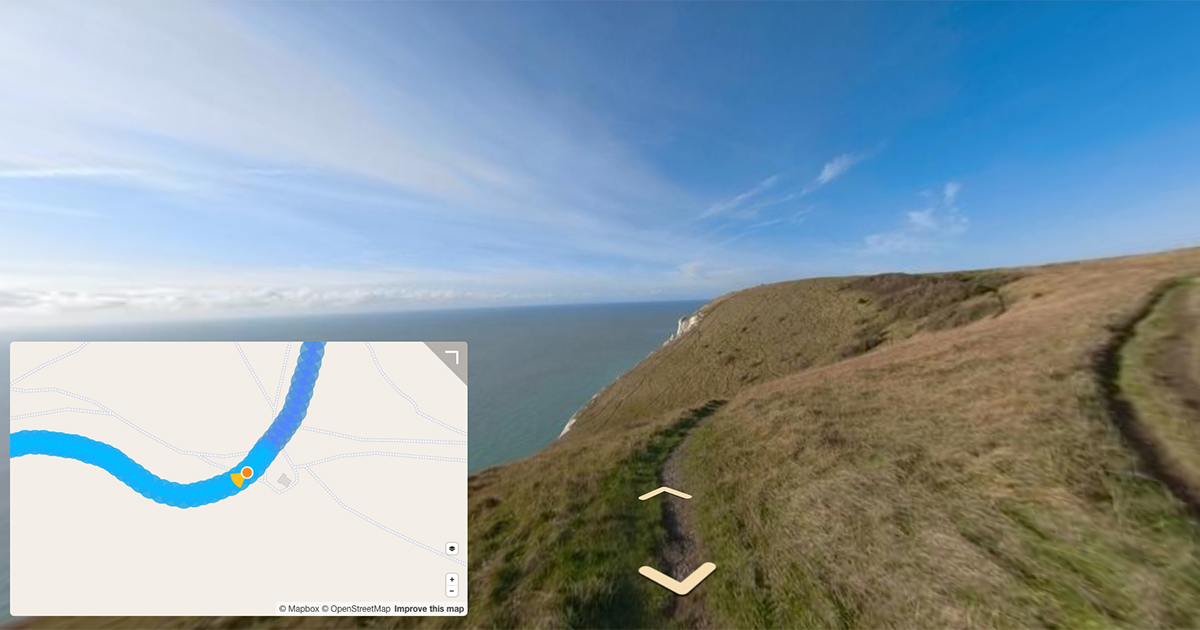
Here’s how to use the GPS points inside your 360 timelapses or videos with tools like Strava and Google Earth.
Two weeks ago I talked about the the metadata found in a 360 video. Before that it was photo files.
Now you know the theory, it’s time to put that knowledge to work.
In the world of 360 outdoor tour photography, telemetry information is usually the most useful metadata, namely – latitude, longitude, and altitude.
I often upload GPS tracks from my tour photography to different tools for deeper insights. Strava is one of my favourites to analyse the telemetry. How was my speed? How long did it take on this stretch? …
Let me show you how to grab a GPS track from a 360 timelapse or video to use with Strava, Google Earth, and almost any other mapping or location based tool.
360 video GPS metadata examples
I’m going to be using a process known as inverse or reverse geotagging – a process that creates a GPS track file from a series of geotagged images or a video.
Luckily for us, the brilliant EXIFtool supports inverse geotagging.
Note, if your file is encoded in some proprietary format it might not be properly supported by EXIF tool.
In the following examples, I am assuming that the GPSLatitude, GPSLongitude, GPSAltitude and GPSDateTime tags are all available in each processed file. Warnings will be generated for missing tags. The outputted files will be invalid if any GPSLatitude or GPSLongitude tags are missing, but will be OK for missing GPSAltitude or GPSDateTime tags (but could cause problems later with other tools).
There are a significant amount of GPS points in the example files I’ve used. For this post I’ve only included snippets of each output. Where I’ve deleted part of the output you’ll see a [...]. The full output is linked below each snippet should you want to take a deeper look.
GoPro Fusion Video
For this first example I’m going to use an .mp4 video filmed using a GoPro Fusion with GPS enabled shot at 5.2K and the final file encoded using H.264 at 4K at 30 FPS using GoPro Fusion Studio (no Protune). The file size is 86.2MB and runs for 16 seconds.
CLI input:
$ exiftool -ee -p gpx.fmt VIDEO_7152.mp4 > VIDEO_7152.gpx
This command includes the following arguments:
- -ee: Extract embedded data from mp0 files (and others).
- -p FMTFILE: Print output in specified format
Make sure you reference the correct path to the fmt_file. In the example above, the gpx.fmt file is in the same directory I’m running the script from. This tripped me up – thanks, Phil!
CLI output:
<?xml version="1.0" encoding="utf-8"?>
<gpx version="1.0"
 creator="ExifTool 11.99"
 xmlns:xsi="http://www.w3.org/2001/XMLSchema-instance"
 xmlns="http://www.topografix.com/GPX/1/0"
 xsi:schemaLocation="http://www.topografix.com/GPX/1/0 http://www.topografix.com/GPX/1/0/gpx.xsd">
<trk>
<number>1</number>
<trkseg>
<trkpt lat="51.2485" lon="-0.7824">
</trkpt>
<trkpt lat="51.248479" lon="-0.782468">
  <ele>156.968</ele>
  <time>2020-04-13T15:37:22.444Z</time>
</trkpt>
<trkpt lat="51.2484785" lon="-0.7824932">
  <ele>155.943</ele>
  <time>2020-04-13T15:37:23.489Z</time>
</trkpt>
[...]
<trkpt lat="51.2484698" lon="-0.7827668">
  <ele>153.819</ele>
  <time>2020-04-13T15:37:35.534Z</time>
</trkpt>
<trkpt lat="51.2484656" lon="-0.7827818">
  <ele>154.364</ele>
  <time>2020-04-13T15:37:36.524Z</time>
</trkpt>
<trkpt lat="51.2484591" lon="-0.7828009">
  <ele>154.95</ele>
  <time>2020-04-13T15:37:37.514Z</time>
</trkpt>
</trkseg>
</trk>
</gpx>
You can see the output contains lat (latitude), lon (longitude), ele (elevation) and time (the time reported by the camera when the measurement was captured) values.
In total there are 17 GPS points <trkpt>’s. 1 for every second of the video. Note, the first <trkpt> has no time or elevalues.
Interestingly in the eaw metadata output for this video, there are about 18 GPS points recorded per second by the Fusion. I think the output of just one per second in the .gpx file is due to the way exiftool handles the gpmd telemetry standard.
GoPro Fusion Timelapse
Now I’ll use a series of 55 timelapse photos shot using a GoPro Fusion at 5 second intervals and stitched as .jpg files at 5.8K. Grab them here.

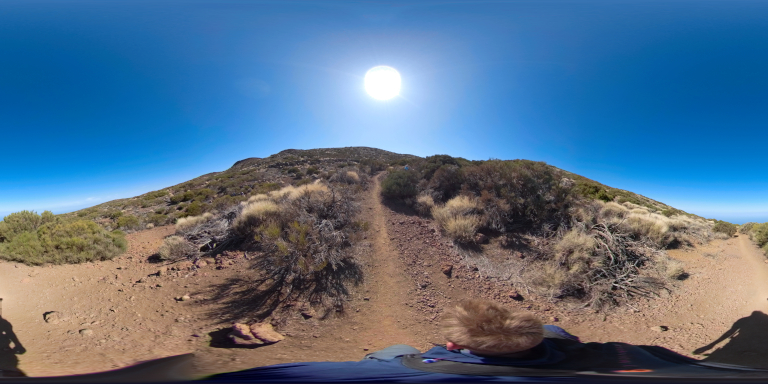
(This timelapse was shot at the Chinyero Volcano in Tenerife)
CLI input:
$ exiftool -fileOrder gpsdatetime -p gpx.fmt TIMELAPSE > MULTISHOT_9698.gpx
This command includes the following arguments:
- -fileOrder: Used to force processing of files in a particular order. For example, the above command processes files in order of increasing
GPSDateTime. The default behaviour for order of track points in the output GPX file will be the same as the order of processing the input files, which may not be chronological depending on how the files are named. - -p FMTFILE: Print output in specified format
CLI output:
<?xml version="1.0" encoding="utf-8"?>
<gpx version="1.0"
 creator="ExifTool 11.99"
 xmlns:xsi="http://www.w3.org/2001/XMLSchema-instance"
 xmlns="http://www.topografix.com/GPX/1/0"
 xsi:schemaLocation="http://www.topografix.com/GPX/1/0 http://www.topografix.com/GPX/1/0/gpx.xsd">
<trk>
<number>1</number>
<trkseg>
<trkpt lat="28.29865" lon="-16.5458055555556">
  <ele>2323.621</ele>
  <time>2019-11-29T13:06:48Z</time>
</trkpt>
<trkpt lat="28.2985972222222" lon="-16.5458027777778">
  <ele>2323.715</ele>
  <time>2019-11-29T13:06:53Z</time>
</trkpt>
[...]
<trkpt lat="28.2961222222222" lon="-16.5480055555556">
  <ele>2346.109</ele>
  <time>2019-11-29T13:11:13Z</time>
</trkpt>
<trkpt lat="28.2960666666667" lon="-16.5480472222222">
  <ele>2346.205</ele>
  <time>2019-11-29T13:11:18Z</time>
</trkpt>
</trkseg>
</trk>
</gpx>
There are 55 <trkpt>’s. This matches the count of timelapse photos (meaning all images are correctly GPS tagged).
Insta360 Pro2 Video
For this next example, I’m going to use an .mp4 video filmed using a Insta360 Pro2 with GPS at FPS in 8K. The file size is 4.02GB and runs for 1 minute 46 seconds.
Using the same exiftool command as before…
CLI input:
$ exiftool -ee -p gpx.fmt VID_20200420.mp4 > VID_20200420.gpx
Note, for larger files you might encounter the error:
Warning: End of processing at large atom (LargeFileSupport not enabled)
I got this error when processing this 4GB video.
In which case you need to enable large file support (largefilesupport) using an exiftool .config file. Read this topic on the exiftool forum for more information.
CLI output:
<?xml version="1.0" encoding="utf-8"?>
<gpx version="1.0"
 creator="ExifTool 11.99"
 xmlns:xsi="http://www.w3.org/2001/XMLSchema-instance"
 xmlns="http://www.topografix.com/GPX/1/0"
 xsi:schemaLocation="http://www.topografix.com/GPX/1/0 http://www.topografix.com/GPX/1/0/gpx.xsd">
<trk>
<number>1</number>
<trkseg>
<trkpt lat="50.4561023333333" lon="30.4798308333333">
  <ele>146.800003051758</ele>
  <time>2020-04-02T09:43:22.2Z</time>
</trkpt>
<trkpt lat="50.4561048333333" lon="30.4798321666667">
  <ele>146.600006103516</ele>
  <time>2020-04-02T09:43:22.3Z</time>
</trkpt>
[...]
<trkpt lat="50.456223" lon="30.4797783333333">
  <ele>147.899993896484</ele>
  <time>2020-04-02T09:45:35Z</time>
</trkpt>
<trkpt lat="50.456223" lon="30.4797783333333">
  <ele>147.800003051758</ele>
  <time>2020-04-02T09:45:35.1Z</time>
</trkpt>
</trkseg>
</trk>
</gpx>
Remember in the GoPro example there was only one <trkpt> per second? The Insta360 Pro2 GPS sampling rate that exiftool is outputting to the .gpx file is much higher, about 12 <trkpt>’s per second (1290 trackpoints / 106 seconds).
Other output .fmt’s
So far I’ve covered gpx files. EXIF tool offers for 4 pre-built output formats including .gpx:
gpx.fmt: generates a GPX track log (supports: timelapse, video)gpx_wpt.fmt: generates GPX waypoints with pictures (supports: timelapse)kml.fmt: generates a Google Earth KML file from a collection of geotagged images (supports: timelapse, video)kml_track.fmt: generates a track in Google Earth KML format from a collection of geotagged images or timed GPS from video files (supports: timelapse, video)
Choose the file format suited to the software you’re planning to use the outputted file with.
A note on 360 camera orientation fields
In this post I’m only considering GPSLatitude, GPSLongitude, GPSAltitude and GPSDateTime values.
Other GPS orientation data tags are:
GPS:GPSSpeedGPS:GPSSpeedRefGPS:GPSTrackRefGPS:GPSImgDirectionGPS:GPSImgDirectionRefGPS:GPSPitch-
GPS:GPSRoll EXIF:CameraElevationAngle
XMP orientation data tags are:
XMP-GPano:PoseHeadingDegreesXMP-GPano:PosePitchDegreesXMP-GPano:PoseRollDegrees
It’s important to note that none of these are valid gpx fields.
If you want to preserve these values kml is the better option (with <tilt>, <heading>, <roll> values defined in the schema). Alternatively you could create your own custom defined schema (described at the end of this post).
gpx_wpt.fmt (supports: timelapse)
Great for when you want to keep the image files referenced against the track. This is paticulalry useful in software like Strava, where there are features to share images from your ride or hike.
Note, this only works with timelapse inputs and will not work with a video file.
CLI input:
$ exiftool -fileOrder gpsdatetime -p gpx_wpt.fmt TIMELAPSE > MULTISHOT_9698_wpt.gpx
CLI output:
<?xml version="1.0" encoding="UTF-8" standalone="no" ?>
<gpx version="1.1"
 creator="ExifTool 11.99"
 xmlns:xsi="http://www.w3.org/2001/XMLSchema-instance"
 xmlns="http://www.topografix.com/GPX/1/1"
 xsi:schemaLocation="http://www.topografix.com/GPX/1/1 http://www.topografix.com/GPX/1/1/gpx.xsd">
<wpt lat="28.29865" lon="-16.5458055555556">
  <ele>2323.621</ele>
  <time>2019-11-29T13:06:48Z</time>
  <name>MULTISHOT_9698_000000.jpg</name>
  <link href="TIMELAPSE/MULTISHOT_9698_000000.jpg"/>
  <sym>Scenic Area</sym>
  <extensions>
    <gpxx:WaypointExtension xmlns:gpxx="http://www.garmin.com/xmlschemas/GpxExtensions/v3">
      <gpxx:DisplayMode>SymbolAndName</gpxx:DisplayMode>
    </gpxx:WaypointExtension>
  </extensions>
</wpt>
<wpt lat="28.2985972222222" lon="-16.5458027777778">
  <ele>2323.715</ele>
  <time>2019-11-29T13:06:53Z</time>
  <name>MULTISHOT_9698_000001.jpg</name>
  <link href="TIMELAPSE/MULTISHOT_9698_000001.jpg"/>
  <sym>Scenic Area</sym>
  <extensions>
    <gpxx:WaypointExtension xmlns:gpxx="http://www.garmin.com/xmlschemas/GpxExtensions/v3">
      <gpxx:DisplayMode>SymbolAndName</gpxx:DisplayMode>
    </gpxx:WaypointExtension>
  </extensions>
</wpt>
[...]
<wpt lat="28.2961222222222" lon="-16.5480055555556">
  <ele>2346.109</ele>
  <time>2019-11-29T13:11:13Z</time>
  <name>MULTISHOT_9698_000053.jpg</name>
  <link href="TIMELAPSE/MULTISHOT_9698_000053.jpg"/>
  <sym>Scenic Area</sym>
  <extensions>
    <gpxx:WaypointExtension xmlns:gpxx="http://www.garmin.com/xmlschemas/GpxExtensions/v3">
      <gpxx:DisplayMode>SymbolAndName</gpxx:DisplayMode>
    </gpxx:WaypointExtension>
  </extensions>
</wpt>
<wpt lat="28.2960666666667" lon="-16.5480472222222">
  <ele>2346.205</ele>
  <time>2019-11-29T13:11:18Z</time>
  <name>MULTISHOT_9698_000054.jpg</name>
  <link href="TIMELAPSE/MULTISHOT_9698_000054.jpg"/>
  <sym>Scenic Area</sym>
  <extensions>
    <gpxx:WaypointExtension xmlns:gpxx="http://www.garmin.com/xmlschemas/GpxExtensions/v3">
      <gpxx:DisplayMode>SymbolAndName</gpxx:DisplayMode>
    </gpxx:WaypointExtension>
  </extensions>
</wpt>
</gpx>
Instead of <trkpt>, <wpt>’s (waypoints are generated). You can see the XML structure is a little different, but the key difference is each <wpt> has a link to the associated 360 photo (e.g. <link href="TIMELAPSE/MULTISHOT_9698_000054.jpg"/>).
kml.fmt (supports: timelapse, video)
If you’re using Google Maps, a .kml file might be a better output for your requirements.
CLI input:
$ exiftool -ee -p kml.fmt VIDEO_7152.mp4 > VIDEO_7152.kml
CLI output:
<?xml version="1.0" encoding="UTF-8"?>
<kml xmlns="http://earth.google.com/kml/2.0">
  <Document>
    <name>My Photos</name>
    <open>1</open>
    <Style id="Photo">
      <IconStyle>
        <Icon>
          <href>http://maps.google.com/mapfiles/kml/pal4/icon38.png</href>
          <scale>1.0</scale>
        </Icon>
      </IconStyle>
    </Style>
    <Folder>
      <name>.</name>
      <open>0</open>
      <Placemark>
        <description><![CDATA[<img src='./VIDEO_7152.mp4'
          style='max-width:500px;max-height:500px;'> ]]>
        </description>
        <Snippet/>
        <name>VIDEO_7152.mp4</name>
        <styleUrl>#Photo</styleUrl>
        <Point>
          <altitudeMode>clampedToGround</altitudeMode>
          <coordinates>-0.7824,51.2485,0</coordinates>
        </Point>
      </Placemark>
      <Placemark>
        <description><![CDATA[<img src='./VIDEO_7152.mp4'
          style='max-width:500px;max-height:500px;'> ]]>
        </description>
        <Snippet/>
        <styleUrl>#Photo</styleUrl>
        <Point>
          <altitudeMode>clampedToGround</altitudeMode>
          <coordinates>-0.782468,51.248479,0</coordinates>
        </Point>
      </Placemark>
[...]
      <Placemark>
        <description><![CDATA[<img src='./VIDEO_7152.mp4'
          style='max-width:500px;max-height:500px;'> ]]>
        </description>
        <Snippet/>
        <styleUrl>#Photo</styleUrl>
        <Point>
          <altitudeMode>clampedToGround</altitudeMode>
          <coordinates>-0.7827818,51.2484656,0</coordinates>
        </Point>
      </Placemark>
      <Placemark>
        <description><![CDATA[<img src='./VIDEO_7152.mp4'
          style='max-width:500px;max-height:500px;'> ]]>
        </description>
        <Snippet/>
        <styleUrl>#Photo</styleUrl>
        <Point>
          <altitudeMode>clampedToGround</altitudeMode>
          <coordinates>-0.7828009,51.2484591,0</coordinates>
        </Point>
      </Placemark>
    </Folder>
  </Document>
</kml>
This time the GPS track is split into <Placemark>’s.
Notice how altitude recorded by the GPS sensor is omitted and <altitudeMode>clampedToGround</altitudeMode> is used. Given Google’s large understanding of the earths surface, this can often be more accurate than GPS measurements reported by your camera. See: Modifying .fmt files, if this does not suit your use-case.
kml_track.fmt (supports: timplapse, video)
CLI input:
$ exiftool -ee -p kml_track.fmt VIDEO_7152.mp4 > VIDEO_7152_track.kml
CLI output:
<?xml version="1.0" encoding="UTF-8"?>
<kml xmlns="http://earth.google.com/kml/2.0">
  <Document>
    <name>My Track</name>
    <open>1</open>
    <Placemark>
    <name>VIDEO_7152.mp4</name>
      <Style>
        <LineStyle>
          <color>#ff4499ff</color>
          <width>3</width>
        </LineStyle>
      </Style>
      <LineString>
        <altitudeMode>clampToGround</altitudeMode>
        <coordinates>
-0.7824,51.2485,0
-0.782468,51.248479,0
-0.7824932,51.2484785,0
-0.7825177,51.2484808,0
-0.7825345,51.2484798,0
-0.7825598,51.2484826,0
-0.7825869,51.2484887,0
-0.7826164,51.2484869,0
-0.7826472,51.2484864,0
-0.7826711,51.2484899,0
-0.7826974,51.2484872,0
-0.7827155,51.2484882,0
-0.782733,51.2484899,0
-0.7827508,51.2484781,0
-0.7827668,51.2484698,0
-0.7827818,51.2484656,0
-0.7828009,51.2484591,0
        </coordinates>
      </LineString>
    </Placemark>
  </Document>
</kml>
In the kml_track.fmt output you’ll get a <LineString> of the <coordinates>.
Modifying .fmt files
Sometimes the output generated by the .fmt files might need some slight modifications if you’re attempting some more advanced usage for the output.
In some cases you might want to add a new <tag> to the output, or change the field reported inside a <tag>. Let’s look at an example…
Here’s the default kml.fmt logic used to generate .kml files:
#[HEAD]<?xml version="1.0" encoding="UTF-8"?>
#[HEAD]<kml xmlns="http://earth.google.com/kml/2.0">
#[HEAD]  <Document>
#[HEAD]    <name>My Photos</name>
#[HEAD]    <open>1</open>
#[HEAD]    <Style id="Photo">
#[HEAD]      <IconStyle>
#[HEAD]        <Icon>
#[HEAD]          <href>http://maps.google.com/mapfiles/kml/pal4/icon38.png</href>
#[HEAD]          <scale>1.0</scale>
#[HEAD]        </Icon>
#[HEAD]      </IconStyle>
#[HEAD]    </Style>
#[SECT]    <Folder>
#[SECT]      <name>$main:directory</name>
#[SECT]      <open>0</open>
#[IF]  $gpslatitude $gpslongitude
#[BODY]      <Placemark>
#[BODY]        <description><![CDATA[<img src='$main:directory/$main:filename'
#[BODY]          style='max-width:500px;max-height:500px;'> ]]>
#[BODY]        </description>
#[BODY]        <Snippet/>
#[BODY]        <name>$filename</name>
#[BODY]        <styleUrl>#Photo</styleUrl>
#[BODY]        <Point>
#[BODY]          <altitudeMode>clampedToGround</altitudeMode>
#[BODY]          <coordinates>$gpslongitude#,$gpslatitude#,0</coordinates>
#[BODY]        </Point>
#[BODY]      </Placemark>
#[ENDS]    </Folder>
#[TAIL]  </Document>
#[TAIL]</kml>
Let’s imagine I wanted to change each <Point> to use the GPS altitude recorded by the camera (instead of Google’s value).
In this case I can replace the line:
#[BODY] <altitudeMode>clampedToGround</altitudeMode>
To reference the absolute altitude measurement:
#[BODY]          <altitude>$gpsaltitude#</altitude>
#[BODY]          <altitudeMode>absolute</altitudeMode>
Testing this out with this modification made to the kml.fmt file and saved as a new file kml_custom.fmt:
CLI input:
$ exiftool -ee -p kml_custom.fmt VIDEO_7152.mp4 > VIDEO_7152_custom.kml
CLI output:
<?xml version="1.0" encoding="UTF-8"?>
<kml xmlns="http://earth.google.com/kml/2.0">
  <Document>
    <name>My Photos</name>
    <open>1</open>
    <Style id="Photo">
      <IconStyle>
        <Icon>
          <href>http://maps.google.com/mapfiles/kml/pal4/icon38.png</href>
          <scale>1.0</scale>
        </Icon>
      </IconStyle>
    </Style>
    <Folder>
      <name>.</name>
      <open>0</open>
      <Placemark>
        <description><![CDATA[<img src='./VIDEO_7152.mp4'
          style='max-width:500px;max-height:500px;'> ]]>
        </description>
        <Snippet/>
        <name>VIDEO_7152.mp4</name>
        <styleUrl>#Photo</styleUrl>
        <Point>
          <altitudeMode>absolute</altitudeMode>
          <coordinates>-0.7824,51.2485,0</coordinates>
        </Point>
      </Placemark>
      <Placemark>
        <description><![CDATA[<img src='./VIDEO_7152.mp4'
          style='max-width:500px;max-height:500px;'> ]]>
        </description>
        <Snippet/>
        <styleUrl>#Photo</styleUrl>
        <Point>
          <altitude>156.968</altitude>
          <altitudeMode>absolute</altitudeMode>
          <coordinates>-0.782468,51.248479,0</coordinates>
        </Point>
      </Placemark>
[...]
      <Placemark>
        <description><![CDATA[<img src='./VIDEO_7152.mp4'
          style='max-width:500px;max-height:500px;'> ]]>
        </description>
        <Snippet/>
        <styleUrl>#Photo</styleUrl>
        <Point>
          <altitude>154.364</altitude>
          <altitudeMode>absolute</altitudeMode>
          <coordinates>-0.7827818,51.2484656,0</coordinates>
        </Point>
      </Placemark>
      <Placemark>
        <description><![CDATA[<img src='./VIDEO_7152.mp4'
          style='max-width:500px;max-height:500px;'> ]]>
        </description>
        <Snippet/>
        <styleUrl>#Photo</styleUrl>
        <Point>
          <altitude>154.95</altitude>
          <altitudeMode>absolute</altitudeMode>
          <coordinates>-0.7828009,51.2484591,0</coordinates>
        </Point>
      </Placemark>
    </Folder>
  </Document>
</kml>
As you can see, <altitude> values from the camera are now being reported in each <Point>:
        <Point>
          <altitude>156.968</altitude>
          <altitudeMode>absolute</altitudeMode>
          <coordinates>-0.782468,51.248479,0</coordinates>
        </Point>
Be careful when adding new tags. If they do not conform to the gpx or kml standards, errors are likely to be generated by other tools you attempt use the file with.
We're building a Street View alternative for explorers
If you'd like to be the first to receive monthly updates about the project, subscribe to our newsletter...


