A guide that shows some of the commands we use most for processing 360 virtual tour videos.
FFmpeg is one of the most powerful tools for video transcoding and manipulation, but it’s fairly complex and confusing to use.
This blog post, or cheat sheet as I’m calling it, will help you get to grips with some of the commands that we often use to process videos to make virtual tours.
For this example I will be using the following equirectangular video (GS018421.mp4).
It is 170mb video (20 seconds long) and was shot at 30 FPS on a GoPro MAX Camera and stitched using GoPro Player at 4k (4096x2048).
The basics
Before jumping into some examples, let’s start with some of the most widely used commands:
-i: is follwed by the path to the input video-c:v: sets the video codec you want to use- Options include
libx264for H.264,libx265for H.265/HEVC, and copy if you want to preserve the video codec of the input video
- Options include
-vf: sets so called video filters, which allow you to apply transformations on a video like scale for changing the resolution and setdar for setting an aspect ratio-r: sets the frame rate of the output video-pix_fmt: sets the pixel format of the output video, required for some input files and so recommended to always use and set to yuv420p for playback-map: allows you to specify streams inside a file-ss: seeks to the given timestamp in the format HH:MM:SS
Extracting frames
For most of our requirements, we extract a certain number of frames from a video to ensure a nice spacing between images in a virtual tour.
Choosing the frame rate
You can extract frames by defining the amount of frames (per second) you want to extract using -r.
-r is used here for output (can also be used for input). As an output option, it will duplicate or drop frames to achieve the given rate (note that it won’t duplicate frames if output format accepts variable frame rate). Output r is the ‘encoding rate’ as well. If it is not specified, it is inherited from the input rate, whether that’s manually set or altered or an inherent property of the stream (e.g. 24 FPS in the example video).
To extract one frame every second:
ffmpeg -i GS018421.mp4 -r 1 fps1/GS018421_%d.png
To extract five frames every second:
ffmpeg -i IN_VIDEO.mp4 -r 5 fps5/GS018421_%d.png
To extract one frame every five seconds:
ffmpeg -i IN_VIDEO.mp4 -r 0.2 fps0_2/GS018421_%d.png
As .png’s
To extract one frame per second only (with lossless quality using the .png file format):
ffmpeg -i GS018421.mp4 -r 1 fps1/GS018421_%d.png
Whilst .png will give you lossless image quality, it will result in fairly large file sizes, especially for 360 frames.
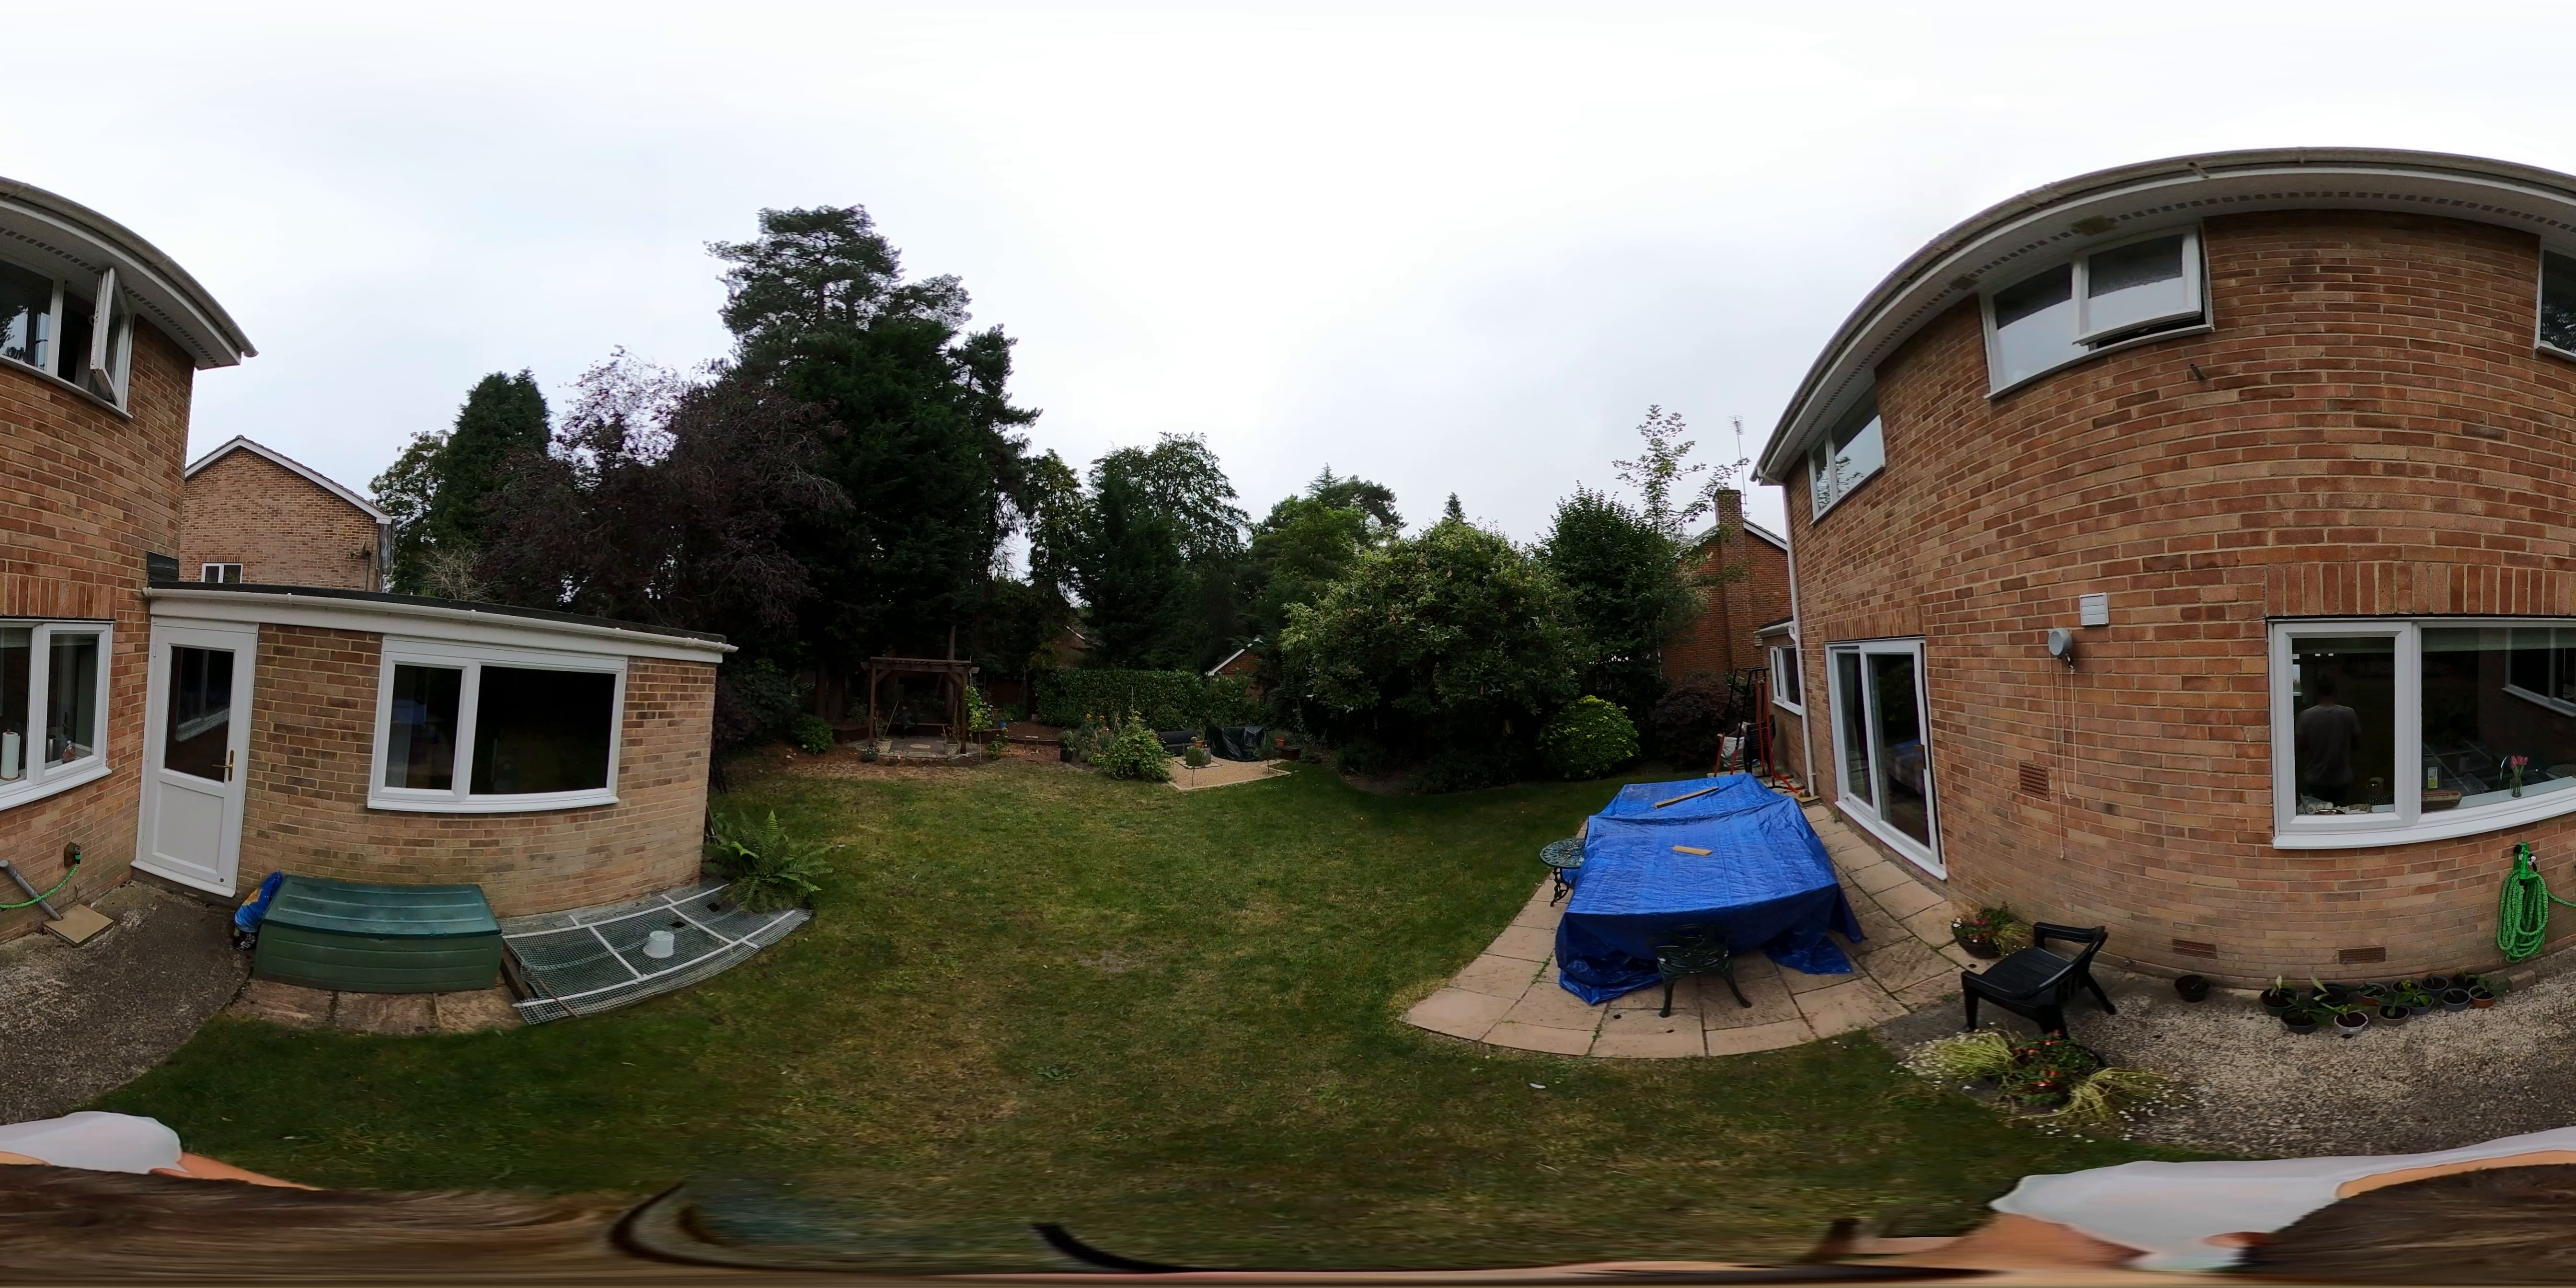
In the sample video, you can see the first raw file above (measuring 16.6mb). The outputted files for the whole video measure between 16-20mb.
As .jps’s
Extracting frames to .jpg’s can help reduce file size.
When extracting to .jpg you can use the -q:v (aka -qscale:v) option to control quality (and thus, resulting file size)”
-qscale:v can be defined from a range between 2-31 (lower value is higher quality).
Setting -q:v 2 (highest quality):
ffmpeg -i GS018421.mp4 -r 1 -q:v 2 jpg2/GS018421_%d.jpg
Produces:
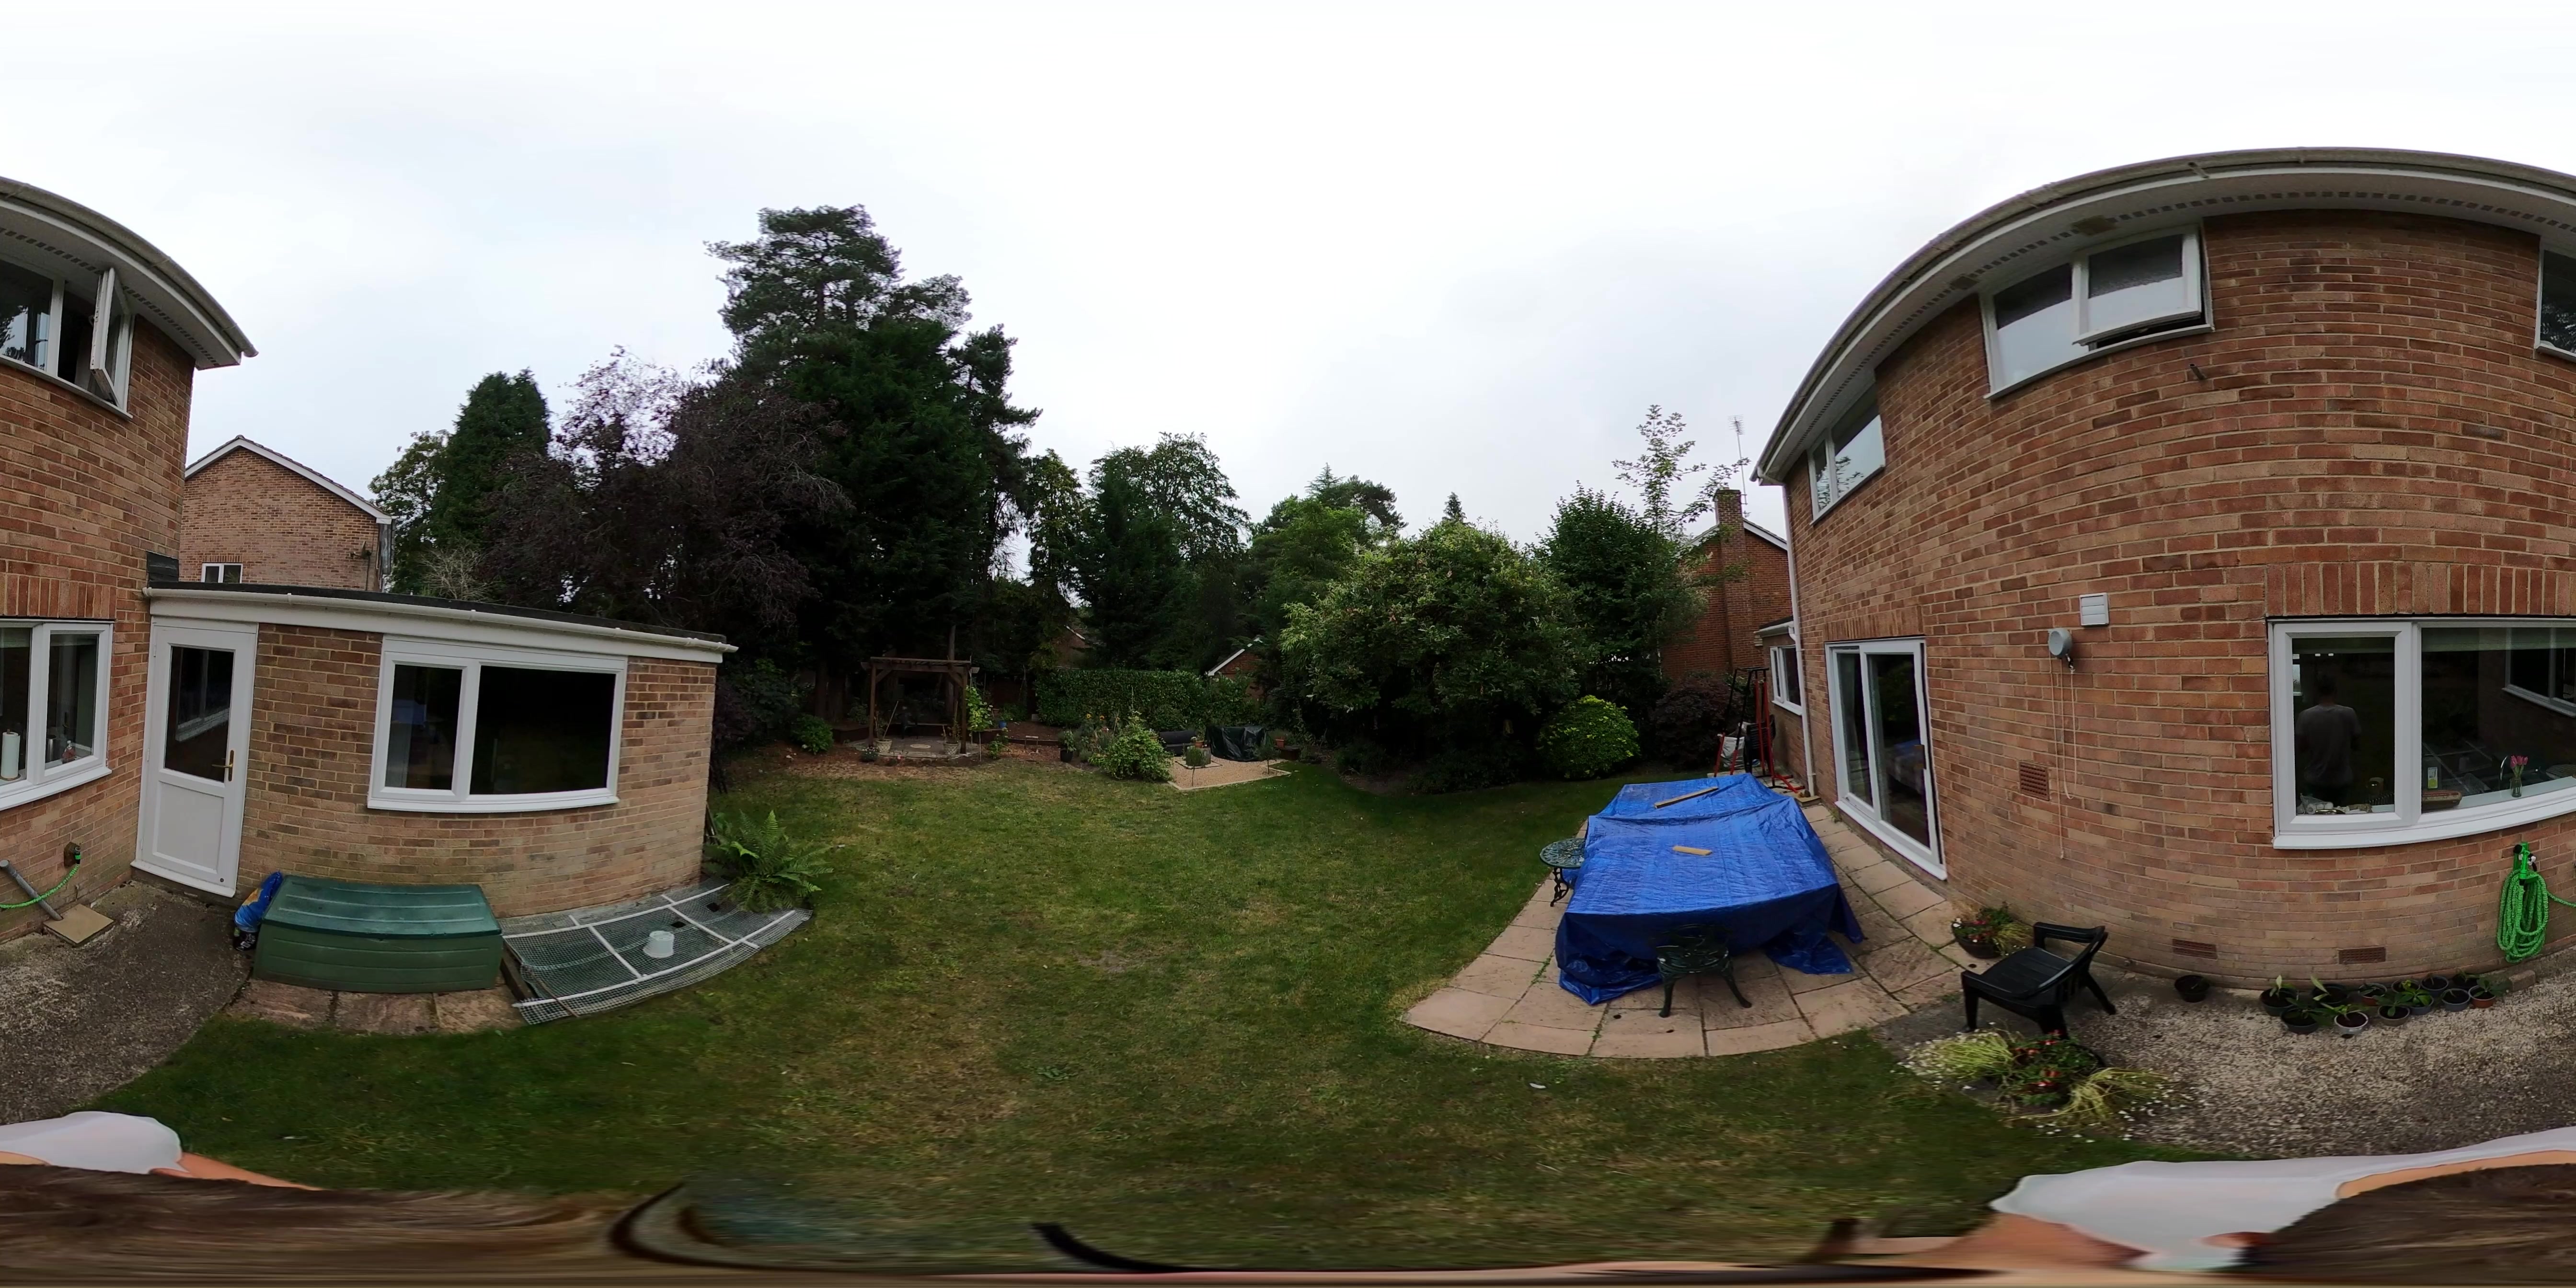
Which has a filesize of 1.9mb. The outputted frames for the whole video range between 1.6mb and 1.9mb.
Setting -q:v 31 (lowest quality):
ffmpeg -i GS018421.mp4 -r 1 -q:v 31 jpg31/GS018421_%d.jpg
Produces:
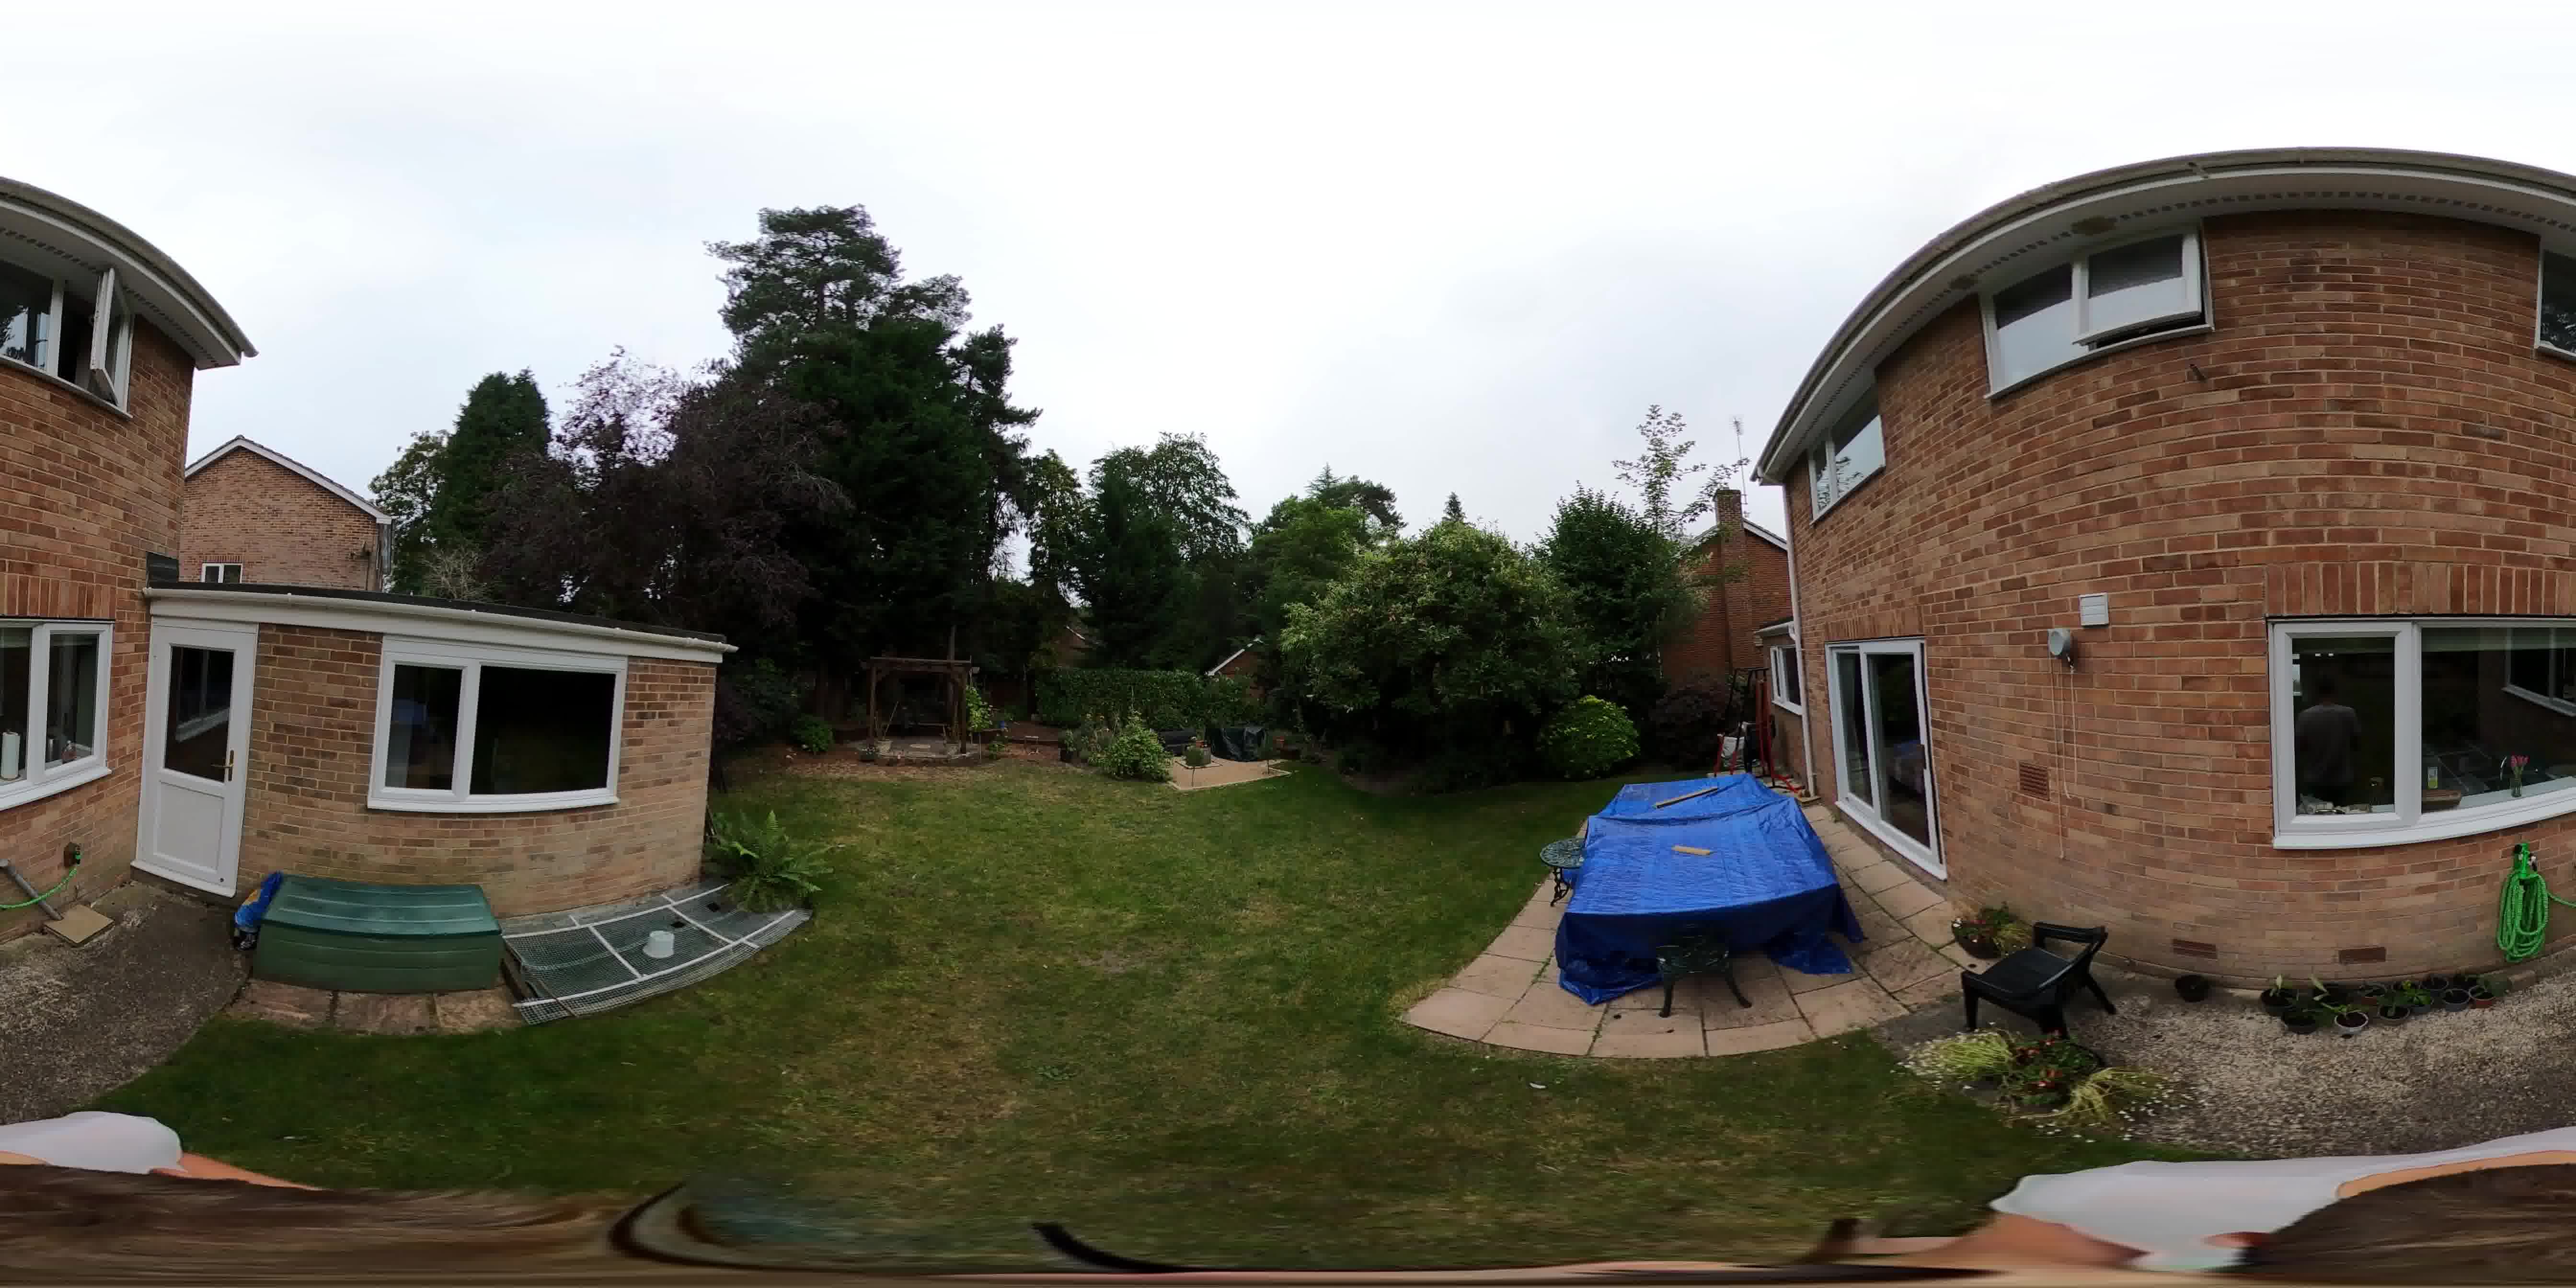
Which has a filesize of 331kb. The outputted frames for the whole video range between 278kb and 335kb.
.png vs .jpg
The file size reduction between .png and .jpg is significant. Even using the highest quality -q:v value (2) for .jpg output, the frames are about 1/10 the size of .png
If you download the files you can see there is a quality difference. However, for blog posts (or other low quality uses), the lowest quality .jpg) image is more than sufficient given a high enough input video resolution (in our case 5.6k).
Choosing certain frames
In our videos, we often want to ignore the first few seconds and last few seconds (usually when setting up the camera).
If you need to extract only a specific part of your input, you’ll need to use the seeking option to get to that specific part in the input first](https://trac.ffmpeg.org/wiki/Seeking.
To extract frames at a certain time (time is passed as either HH:MM:SS or HH:MM:SS.SSS when subseconds are needed):
ffmpeg -ss 00:23:45.000 -i GS018421.mp4 -r 1 -q:v 2 GS018421_002345.jpg
To extract all frames between 5 and 14 seconds:
ffmpeg -ss 00:00:05 -to 00:00:14 -i GS018421.mp4 -r 1 -q:v 2 time5_14/GS018421_%d.jpg
For more complex uses, the -vf select filter is better for this.
To use this like before to extract all frames from between 5 and 14 seconds:
ffmpeg -i GS018421.mp4 -vf select="between(t\,5\,14)" -r 1 -q:v 2 time5_8_and_12_15/GS018421_%d.jpg
You can string these commands together (which is where -vf becomes very useful) to capture certain sections too (perhaps when you might have stopped during a capture).
To extract all frames between 5 and 8 seconds, and also between 12 and 15 seconds:
ffmpeg -i GS018421.mp4 -vf select="between(t\,5\,8))+between(t,12,15)" -r 1 -q:v 2 time5_8_and_12_15/GS018421_%d.jpg
Working with streams
Checking what streams exist
First you can use ffmpeg to identify what streams (often referred to as tracks) exist in the video:
ffprobe GS018421.mp4
Will provide an output that looks something like this:
Input #0, mov,mp4,m4a,3gp,3g2,mj2, from 'GS018421.mp4':
  Metadata:
    major_brand     : qt
    minor_version   : 0
    compatible_brands: qt
    creation_time   : 2021-09-04T08:23:32.000000Z
  Duration: 00:00:20.19, start: 0.000000, bitrate: 67466 kb/s
  Stream #0:0[0x1](eng): Video: hevc (Main) (hvc1 / 0x31637668), yuv420p(tv, bt709), 4096x2048, 67225 kb/s, 29.97 fps, 29.97 tbr, 600 tbn (default)
    Metadata:
      creation_time   : 2021-09-04T08:23:32.000000Z
      handler_name    : Core Media Video
      vendor_id       : [0][0][0][0]
      encoder         : HEVC
    Side data:
      spherical: equirectangular (0.000000/0.000000/0.000000)
  Stream #0:1[0x2](eng): Audio: aac (LC) (mp4a / 0x6134706D), 48000 Hz, stereo, fltp, 188 kb/s (default)
    Metadata:
      creation_time   : 2021-09-04T08:23:32.000000Z
      vendor_id       : [0][0][0][0]
  Stream #0:2[0x3](eng): Data: bin_data (gpmd / 0x646D7067), 91 kb/s (default)
    Metadata:
      creation_time   : 2021-09-04T08:23:32.000000Z
      handler_name    : GoPro MET
Unsupported codec with id 98314 for input stream 2
You can see here that the video contains general Metadata (not inside a stream), Stream #0:0[0x1] (stream 0) which is a HEVC video, Stream #0:1[0x2] (stream 1) which is AAC audio, and Stream #0:2[0x3] (stream 2) which is GPMD telemetry.
ffmpeg refers to input files and streams with index numbers (ID’s). The format is input_file_id:input_stream_id (ffmpeg counts from 0, hence the first input_file_id:input_stream_id = #0:0).
You will also see on the last line, ffmpeg complains about the GPMD telemetry, don’t worry about that, it is only because ffmpeg does not natively understand its purpose.
Copying streams between videos
When creating a video, you might want to copy streams between them.
A good example of this is to retain camera telemetry streams when rebuilding a video.
In this post I added some global metadata: How to Create a 360 Video from a Timelapse of 360 Images (using ffmpeg)), but I did not copy over the telemetry stream. Let me show you how to do this.
In the example video, we know the telemetry is in stream 2 (Stream #0:2[0x3](eng)).
To rebuild a video from frames created earlier into a video (with 1 FPS):
ffmpeg -r 1 -i jpg2/GS018421_%d.jpg -c:v libx264 -pix_fmt yuv420p GS018421-no-meta.mp4
Let’s break that down:
-r 1: the output framerate per second. Here I want 1 frame every 1 second. If the-roption is omitted the default will input and output 25 frames per second.-pix_fmt yuv420p: When outputting H.264, adding -vf format=yuv420p or -pix_fmt yuv420p will ensure compatibility so crappy players can decode the video.-c:v libx264is an abbreviated version ofcodec:v. Encodes the video using the libx264 codec (H264). Like mentioned earlier, it could also belibx265(or some other video codec).
But using ffprobe, you will see no other streams, except the newly created video stream (#0:0):
Input #0, mov,mp4,m4a,3gp,3g2,mj2, from 'GS018421-no-meta.mp4':
  Metadata:
    major_brand     : isom
    minor_version   : 512
    compatible_brands: isomiso2avc1mp41
    encoder         : Lavf59.16.100
  Duration: 00:00:22.00, start: 0.000000, bitrate: 8003 kb/s
  Stream #0:0[0x1](und): Video: h264 (High) (avc1 / 0x31637661), yuv420p(tv, bt470bg/unknown/unknown, progressive), 4096x2048, 8003 kb/s, 1 fps, 1 tbr, 16384 tbn (default)
    Metadata:
      handler_name    : VideoHandler
      vendor_id       : [0][0][0][0]
Therefore now we need to copy over the streams from the original video (that the frames were extracted from) to the newly created one.
For this it is important to know how multiple inputs work to create an output:
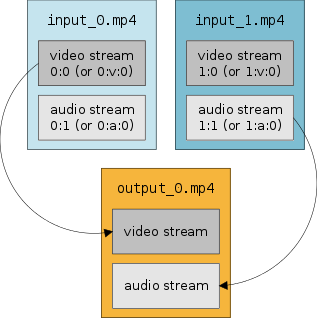
Here is a more detailed explanation of this.
So for our example we will pass two inputs:
- the original video (
GS018421.mp4)- here we will copy to GPMD telemetry file only (
Stream #0:2)
- here we will copy to GPMD telemetry file only (
- the newly created video (
GS018421-no-meta.mp4)- here we will only copy the video stream (
Stream #1:0(you can find this using ffprobe)). Note we use input id #1, as this is the second input video.
- here we will only copy the video stream (
The -map option can be used to instruct ffmpeg what streams you want to copy from each input video.
To create an new video file output GS018421-streams-only.mp4 copying the streams noted above, like so:
ffmpeg -i GS018421.mp4 -i GS018421-no-meta.mp4 -c copy -map 0:2 -map 1:0 GS018421-streams-only.mp4
With -c (copy) the streams will be stream copied, not re-encoded, so there will be no quality loss. If you want to re-encode, see FFmpeg Wiki: H.264 Encoding Guide.
Note, you can also use -map 0:v, -map 1:v, etc. to copy all video (v) streams and -map 0:a, -map 1:a, etc. to copy all audio (a) streams. Be careful with this, as some videos have multiple audio and video streams, e.g. GoPro .360’s, so you might copy more streams than you want with this method.
IMPORTANT: Be very careful when rebuilding videos from frames if you have removed any frames as this will cause issues. For example, if you remove the first 5 seconds you must modify the other streams (e.g. audio and telemetry) to account for this reduction, else the streams will run out of sync.
Examining the streams in the newly created video (GS018421-streams-only.mp4) using ffprobe
Input #0, mov,mp4,m4a,3gp,3g2,mj2, from 'GS018421-streams-only.mp4':
  Metadata:
    major_brand     : isom
    minor_version   : 512
    compatible_brands: isomiso2avc1mp41
    encoder         : Lavf59.16.100
  Duration: 00:00:22.00, start: 0.000000, bitrate: 8087 kb/s
  Stream #0:0[0x1](eng): Data: bin_data (gpmd / 0x646D7067), 91 kb/s (default)
    Metadata:
      handler_name    : GoPro MET
  Stream #0:1[0x2](und): Video: h264 (High) (avc1 / 0x31637661), yuv420p(tv, bt470bg/unknown/unknown, progressive), 4096x2048, 8003 kb/s, 1 fps, 1 tbr, 16384 tbn (default)
    Metadata:
      handler_name    : VideoHandler
      vendor_id       : [0][0][0][0]
Unsupported codec with id 98314 for input stream 0
You can see both the telemetry stream (#0:0) from the original video GS018421.mp4 and the video stream (#0:1) from the video created from the frames GS018421-no-meta.mp4.
ffmpeg will write the streams into the video in the order they are passed. In the command I used -map 0:2 telemetry, came before -map 1:0 video. Thus, telemetry is in the first stream (#0:0) and video in the second (#0:1). Generally, it does not matter what order the streams are in, though you can change by switching around the order the -map arguments are passed.
Copying metadata between videos
For those familiar with ffmpeg, you might notice that the new video file has no global metadata.
Streams are not the same as metadata.
Metadata is defined at video level, and contains information in a standard format (e.g. EXIF).
If we look at the global metadata in the new video (GS018421-streams-only.mp4) we can see only basic information:
exiftool -X GS018421-streams-only.mp4 > GS018421-streams-only.xml
A lot less than found in the original video:
exiftool -X GS018421.mp4 > GS018421.xml
Some of which is vital. For example, to define the video as an equirectangular projection so that it is rendered in viewers correctly
 <XMP-GSpherical:StitchingSoftware>Spherical Metadata Tool</XMP-GSpherical:StitchingSoftware>
 <XMP-GSpherical:ProjectionType>equirectangular</XMP-GSpherical:ProjectionType>
To copy over global metadata you can use two options;
1. Using ffmpeg (do not use for equirectangular videos)
Add the -map_metadata 0 flag will map all known metadata ffmpeg understands.
This will not copy custom metadata tags not understood by ffmpeg. If you are using custom tags you should also pass the flag -movflags use_metadata_tags.
Here is an example;
ffmpeg -i GS018421.mp4 -i GS018421-no-meta.mp4 -map_metadata 0 -movflags use_metadata_tags -c copy -map 0:2 -map 1:0 GS018421-streams-and-meta-ffmpeg.mp4
Though I have found this method to be temperamental, and often leads to loss of some metadata (namely for our use-case XMP-GSpherical tags). Therefore I usually default to using exiftool to copy over global metadata between video files.
2. Using exiftool (recommended)
exiftool is preferred because it is better suited for this purpose. Whilst designed for images, it works very well for copying video metadata too. You can see the wide variety of tags it supports here.
Using exiftool to copy the global metadata (not inside a stream) found in the original video can be carried out like so;
First create the video, as before (I am creating a new one just to demonstrate the difference);
ffmpeg -i GS018421.mp4 -i GS018421-no-meta.mp4 -c copy -map 0:2 -map 1:0 GS018421-exiftool.mp4
Then use exiftool to copy over the global metadata;
exiftool -TagsFromFile GS018421.mp4 "-all:all>all:all" GS018421-exiftool.mp4
Which will copy all original metadata tags from GS018421.mp4 to GS018421-exiftool.mp4.
That is enough for today. I have a few more ffmpeg commands up my sleeve, but I’ll share in a future post.
Never miss an update
Sign up to receive new articles in your inbox as they published.
Discuss this post


