A deeper look into GoPro Fusion fish-eye images (with the aim of reducing our reliance on GoPro’s software).
In the summer of 2019 I bought a GoPro Fusion, and Trek View was born.
2.5 years later the cameras we used have changed (our Trek Pack now uses the GoPro Max), but the mission to create 360-degree imagery of the natural world remains the same.
I receive many emails from people capturing 360 imagery of their adventures each week, many of whom still use the Fusion.
Many of these emails also ask for recommended alternatives to GoPro Fusion Studio, the GoPro software required to stitch the images and videos created by the Fusion camera.
The Fusion was officially discontinued in 2019, with the release of the Max. Since then new operating systems versions have been released, causing breaking changes in the GoPro Fusion Studio software.
As a result, I decided to take a look at how easy it would be to bypass GoPro Fusion Studio software to stitch the images.
Pre-reading
GoPro themselves have written a nice article on the subject: The Art of Stitching Spherical Content.
It notes, some interesting points:
The lenses are offset on each side to ensure that, together, all 360 degrees are captured in any given scene.
(we’ll need this later)
each lens on Fusion captures >180 degrees in field of view
This will be essential to work out later.
Our proprietary D.WARP algorithm transforms these fish-eye images into the spherical space
No help from GoPro here.
Once the image warping has been corrected with D.WARP, the Blending Algorithm is applied to merge several source pixels together creating a more equalized image.
This is an important consideration because not only do we need to stitch the images, we will also need to blend the images together (and probably have to account for different exposures in each lens too).
Fusion camera modes
The Fusion shoots in three modes; images, timelapse, and video.

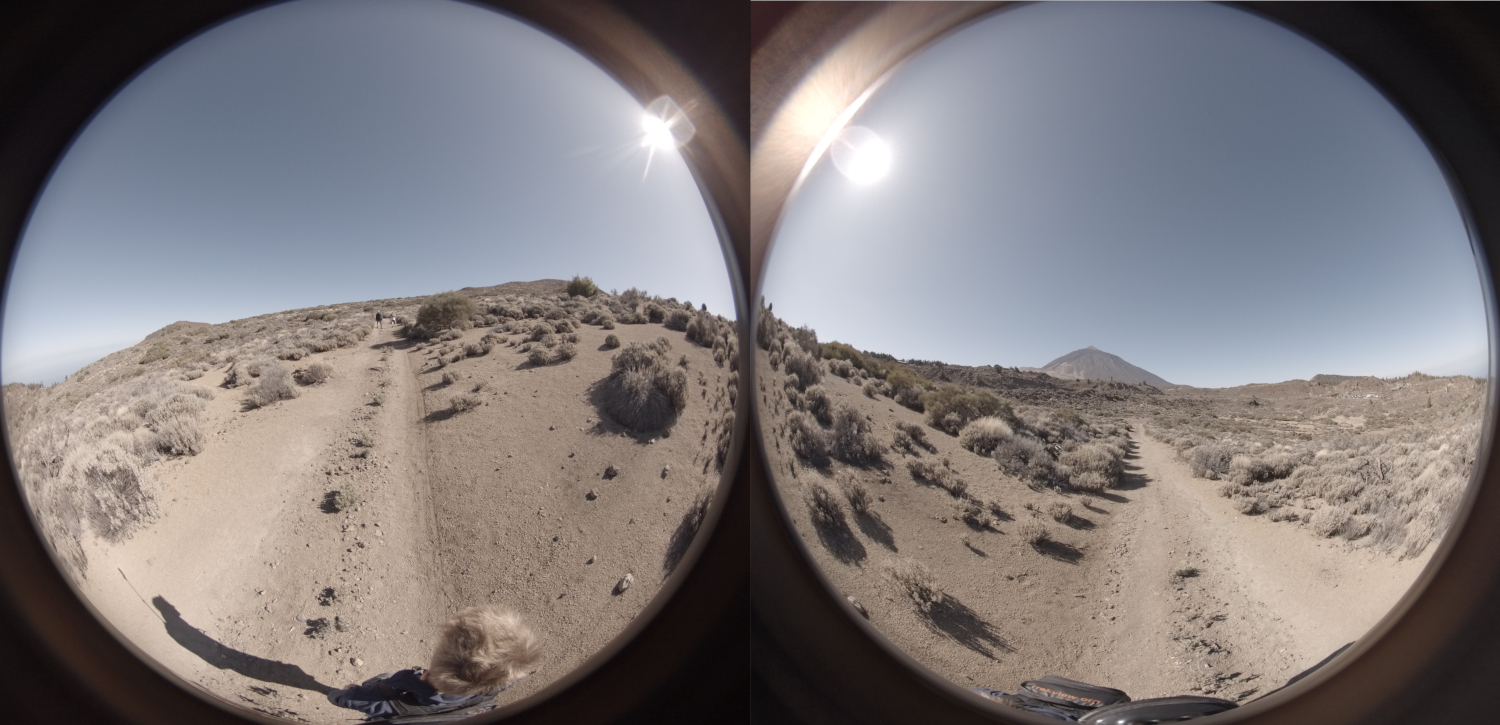
Depending on the setting, the camera outputs two files for each capture (front and back). Either two .mp4’s, or two .jpg’s. I’ve merged the files into one, above, to demonstrate what the images actually look like.
Unlike the MAX, all modes use the front and back camera. It is not possible to shoot from a single camera (like HERO mode on the Max). You need to use GoPro Fusion Studio (when it works) to create an “Overcapture” which will allow you to export a flat projection, but for our needs, this is unnecessary.
Fusion fish-eye projections
As you can see, the two lenses produce fish-eye images.
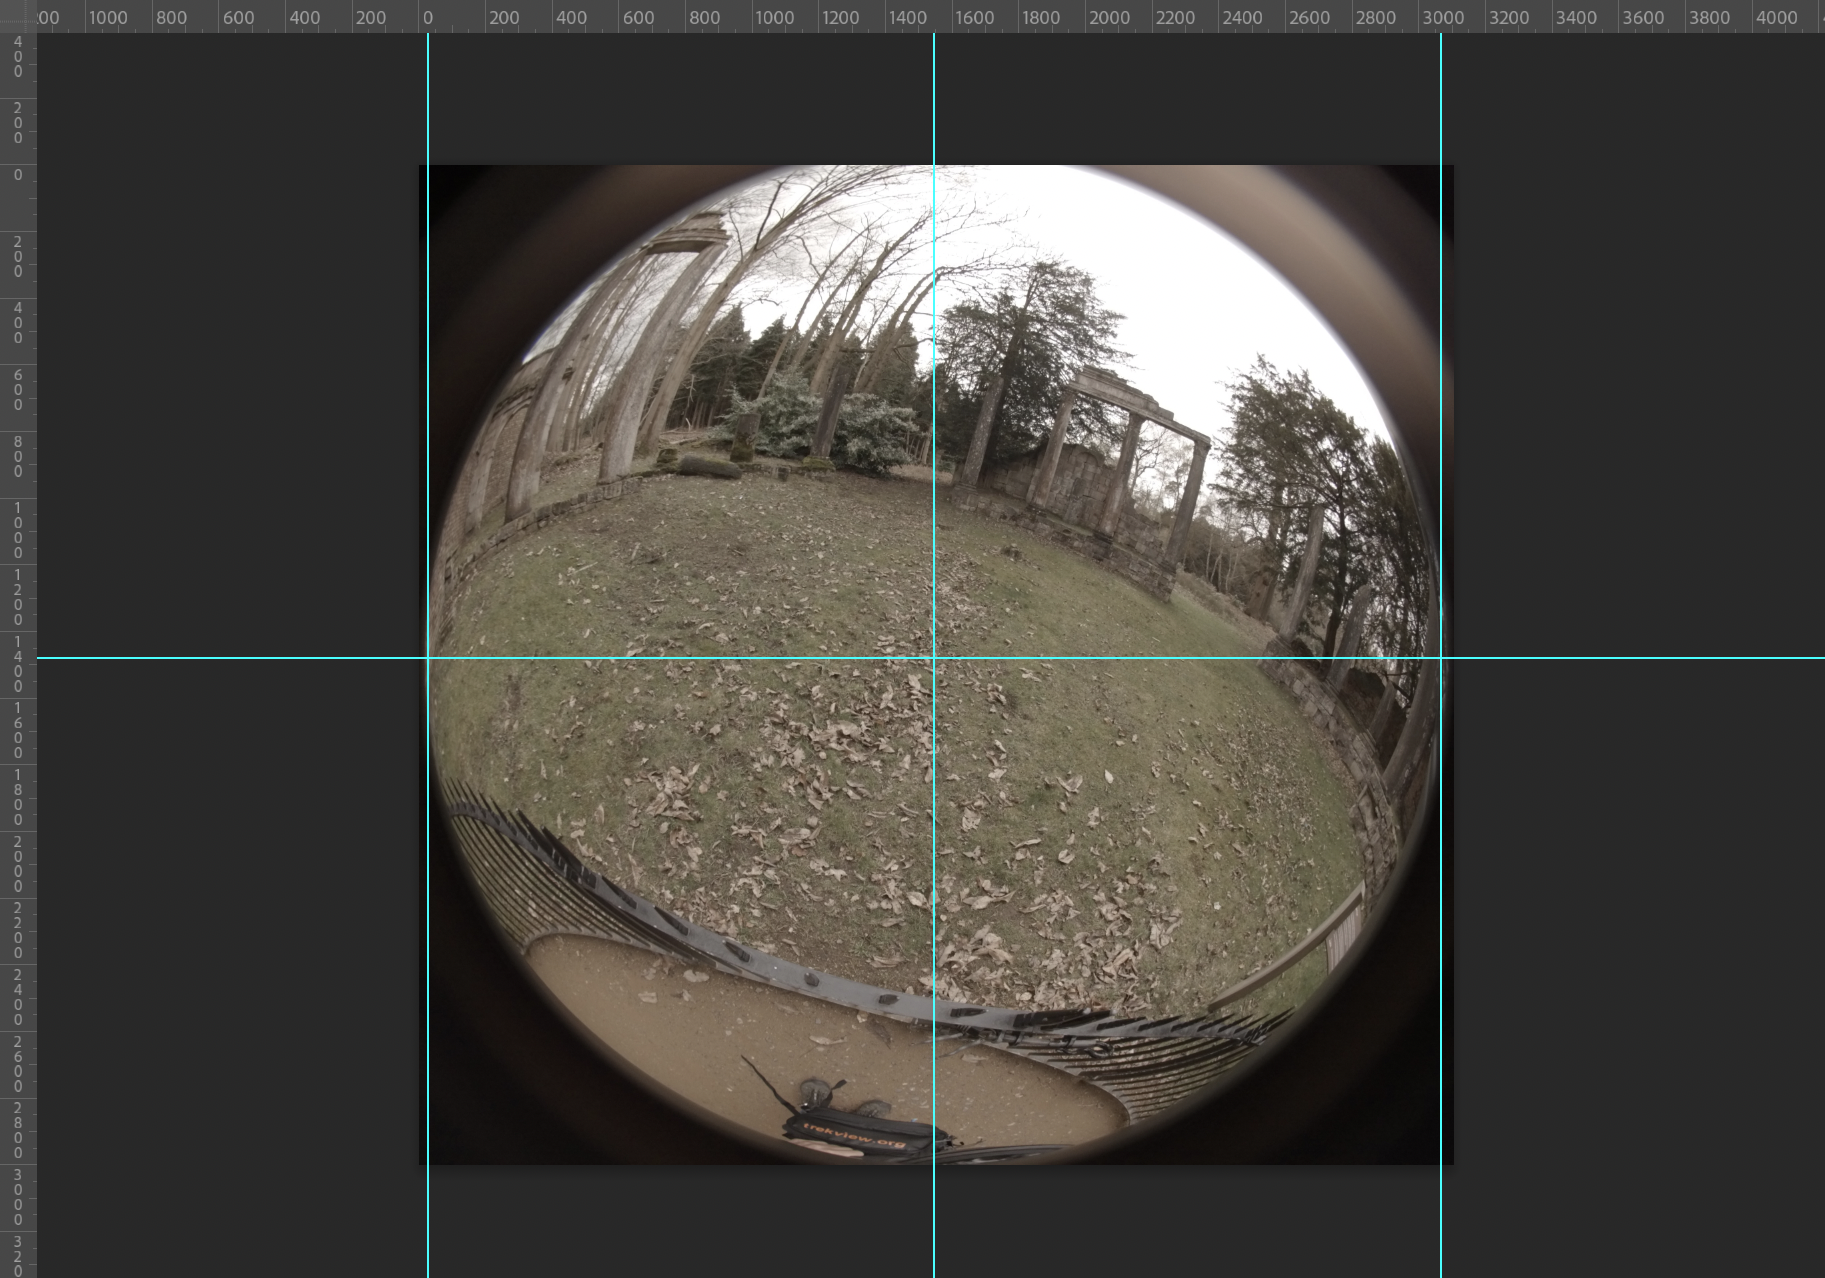
It is the dimensions of these circles that are important for stitching the fish-eye images.
These dimensions will be written into the GoPro Fusion Studio software to process the imagery (the D.WARP algorithm). Unfortunately we can’t see the software code of Fusion Studio so we’ll have to calculate them manually.

The above is from a photo taken on the Fusion (dimensions=3104x3000).
Fusion image frames
The camera outputs two .jpg frames, always both with a resolution of 3104x3000.
Fusion video frames
In video mode, you can select either 3k (at 60 FPS) or 5.2k (at 30 FPS) resolutions.
3k produces two .mp4 videos with a resolution of 1568x1504.
5.2k produces two .jpg videos images with a resolution of 2704x2624.
Frames from these videos can be extracted in the same way I’ve demonstrated previously using ffmpeg.
e.g. extract at 0.5 FPS:
ffmpeg -i GPFR0006.MP4 -r 0.5 -q:v 1 FRimg%d.jpg
ffmpeg -i GPBK0006.MP4 -r 0.5 -q:v 1 BKimg%d.jpg
You might have noticed the images are square. If you’ve extracted video frames at different resolutions, if you look closely you might also notice differences in the image positioning when comparing the front and back images.
I’ll talk more about that of next week…
We're building a Street View alternative for explorers
If you'd like to be the first to receive monthly updates about the project, subscribe to our newsletter...


