Preparing to create an equirectangular projection from two GoPro Fusion fisheye images.
Now we know some of the fundamentals, this week, lets look at how we can merge the two fisheyes together into a single equirectangular projection.
Angle of view and field of view
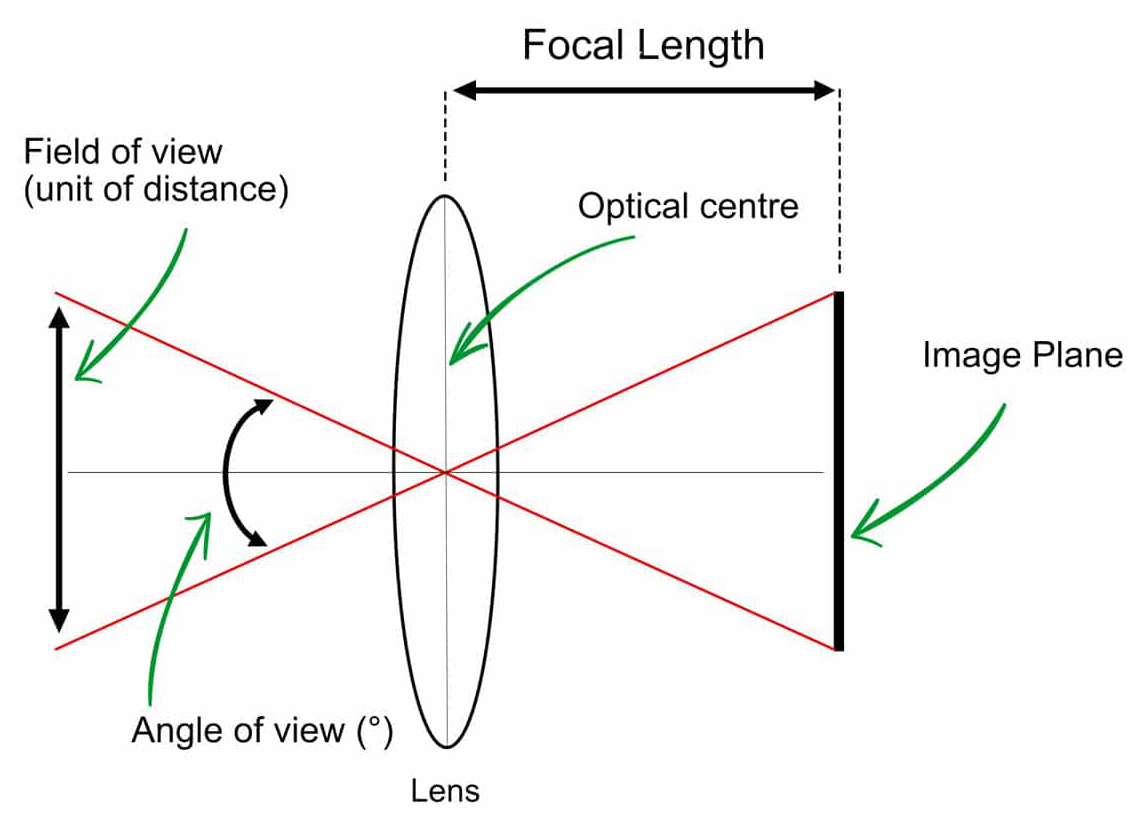
Angle of view (AOV) and field of view (FOV) are very similar.
- AOV: is an angular measurement (the angle of view captured)
- FOV: is a distance measurement (the distance of view captured)
FOV and AOV can be calculated both horizontally (how far the lens can capture left and right) and vertically (up and down).
Below is an example of AOV and FOV:
You’ll often here AOV used interchangeably with FOV.
For the remainder of this post I’ll use FOV, but what I am actually referring to AOV as shown in the above diagram.
Fisheye FOV and stitching
The FOV is vital during stitching of the front and back images as it defines how much of the two images will overlap (duplicate pixels).
180 degree field of view (horizontal and vertical)
Here’s the world mapped in a fisheye with a 180 degree horizontal and vertical FOV.
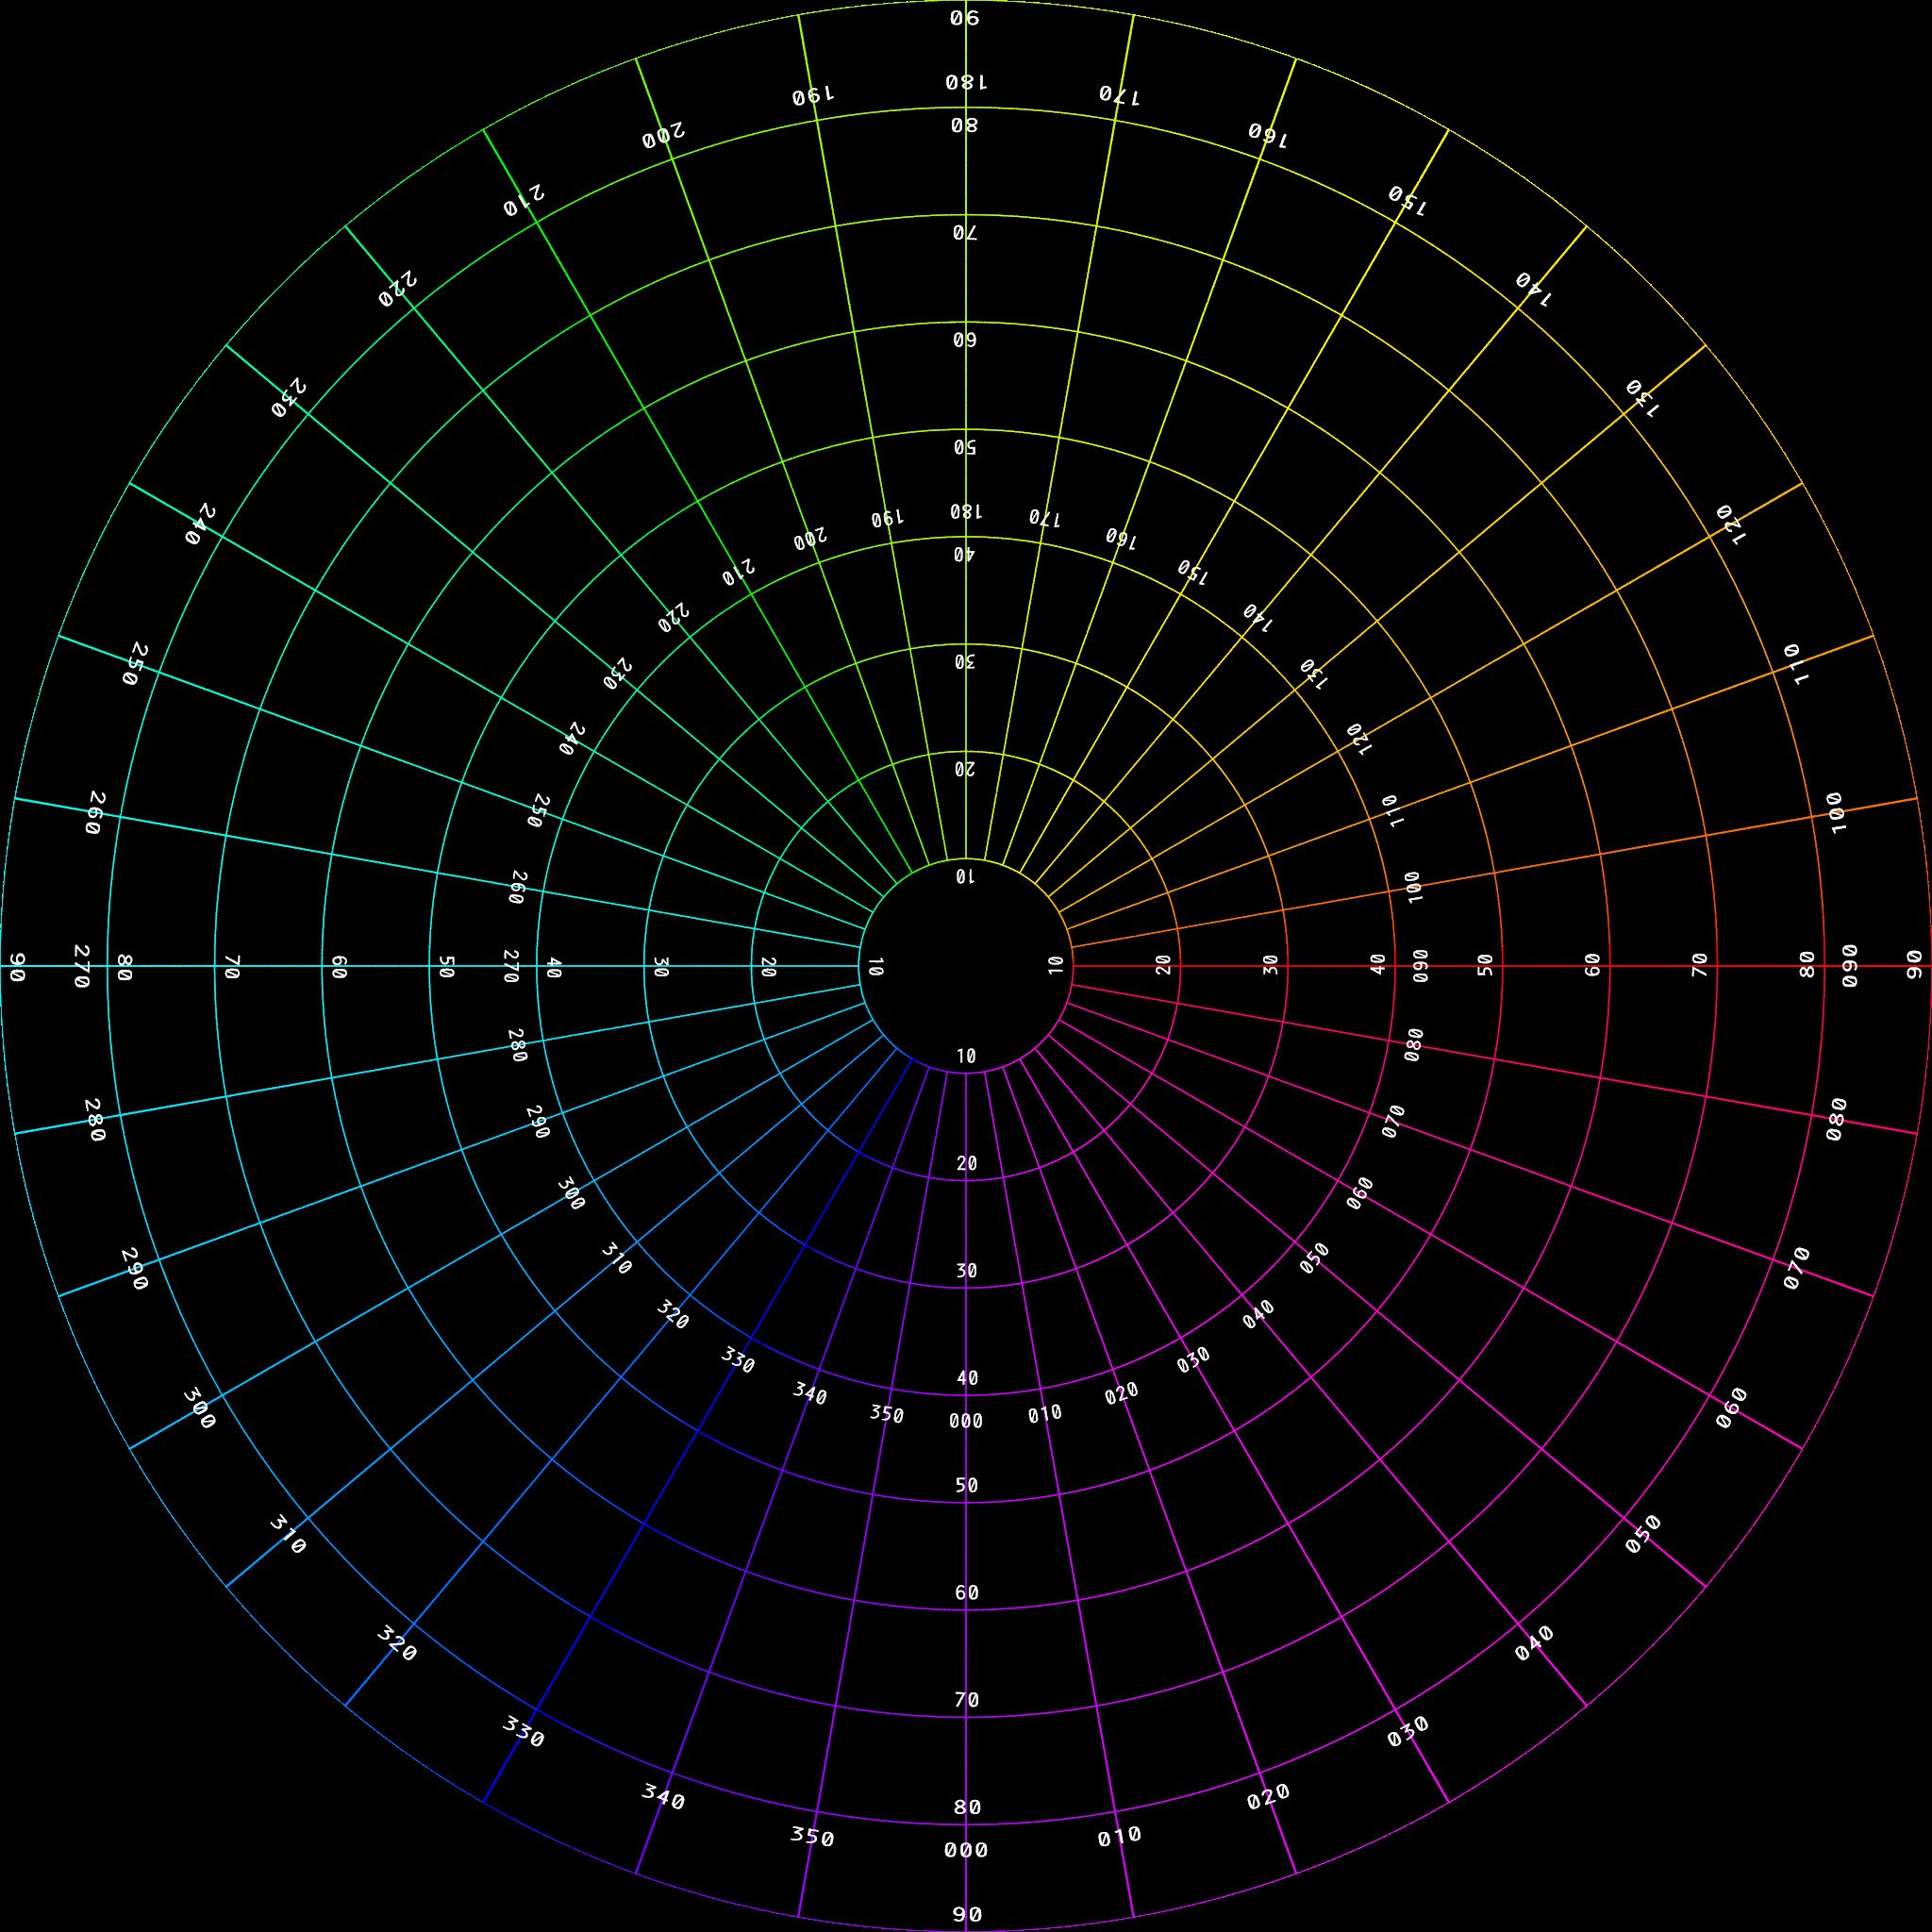
It makes sense that it occupies half of a spherical (equirectangular) projection, which captures the entire visible universe from a single position (2 x 180 degrees = 360 degrees).
Below shows the fisheye grid mapped in the equirectangular space;
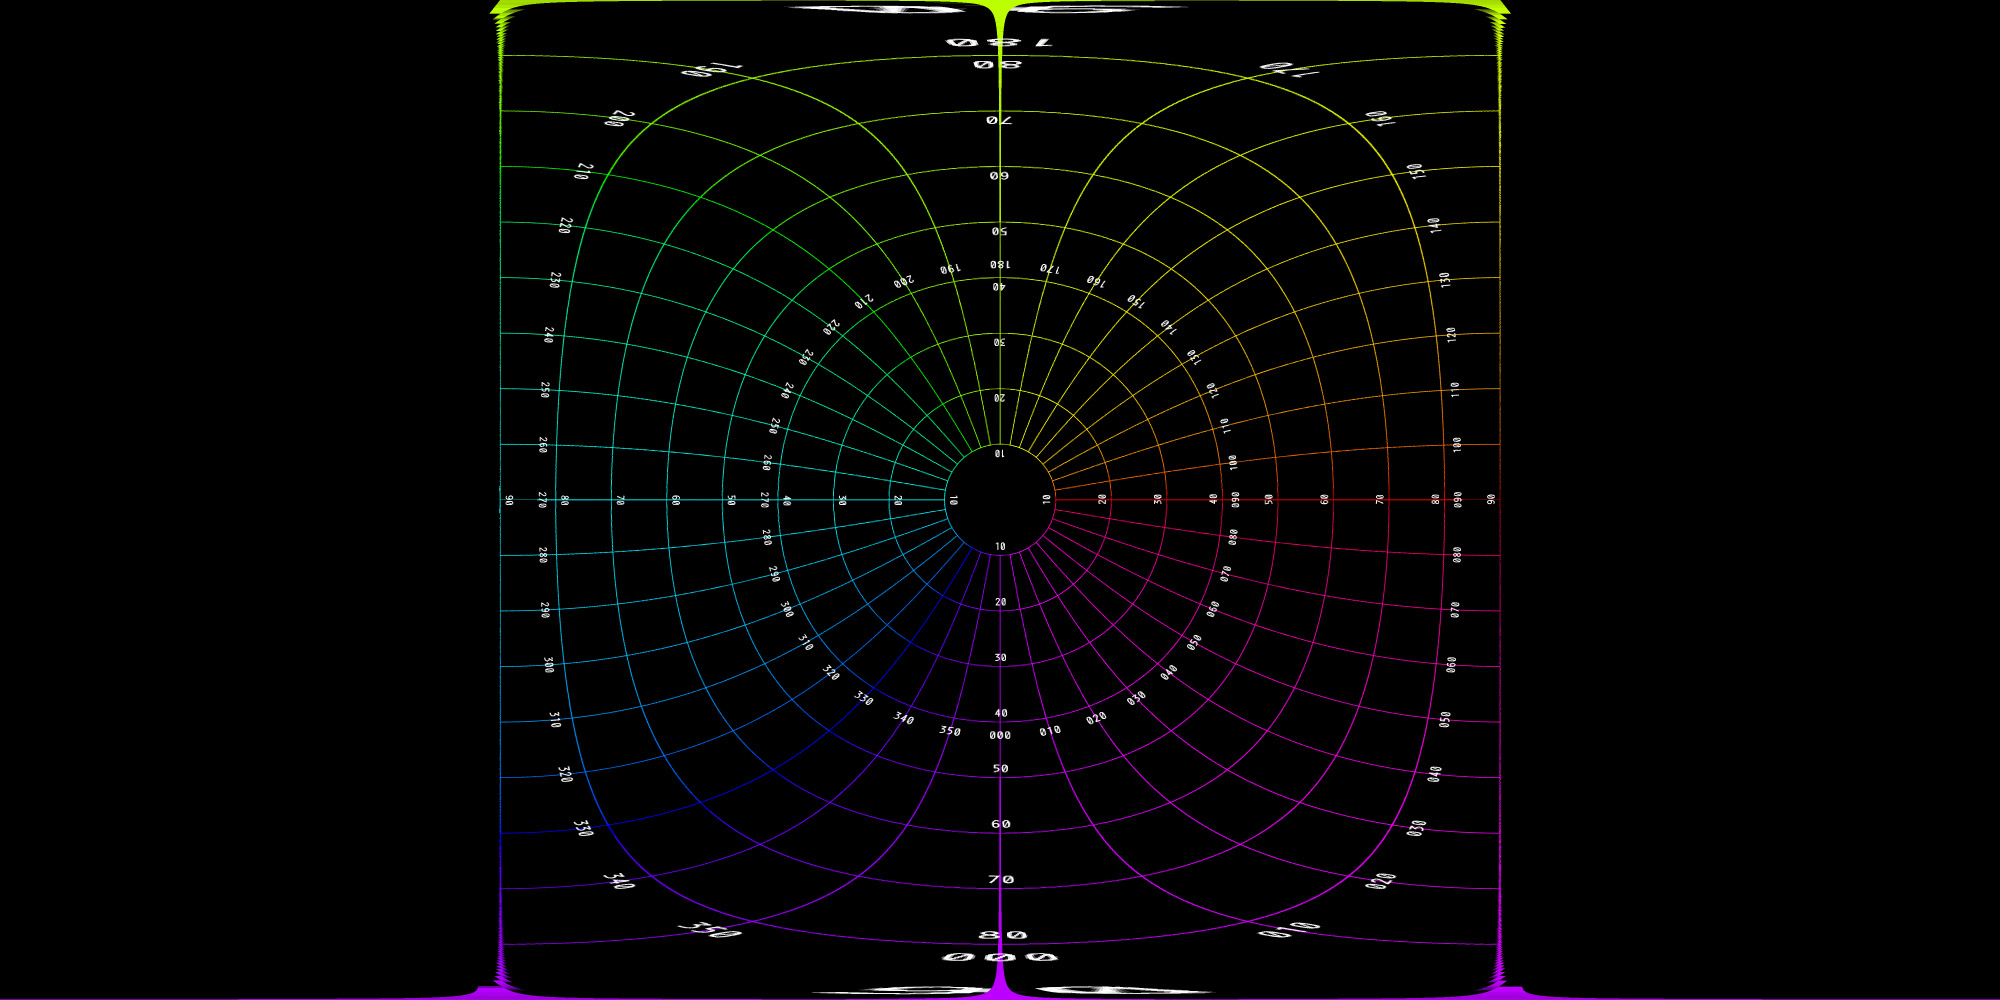
Note how the distortion of the horizontal is almost zero, whilst distortion along the vertical (y) axis increase as you move away from the center. We’ve already covered projection types and why this happens previously (here).
Looking at this transformation in a real photo.
Source fisheye image;
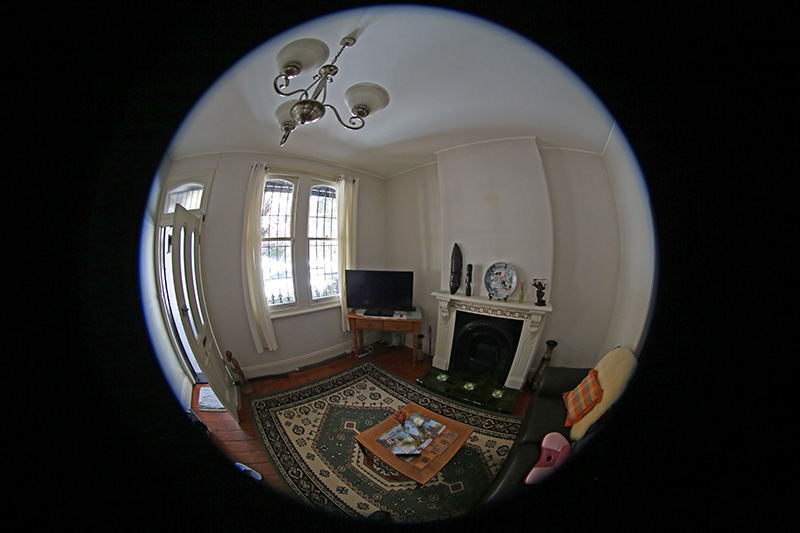
Image credit: Paul Bourke
Transformed to equirectangular;
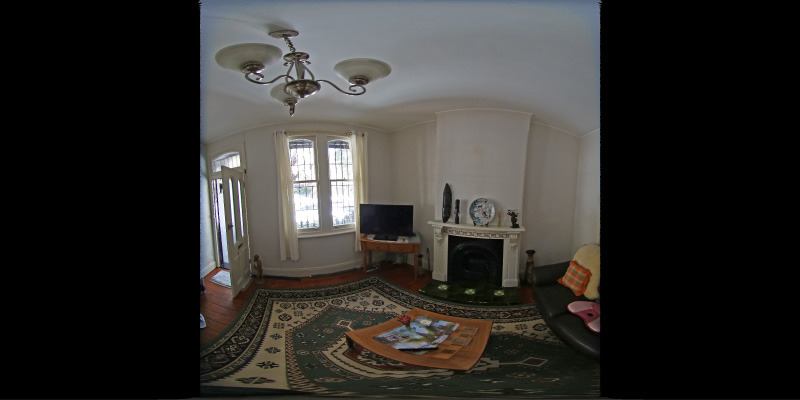
Image credit: Paul Bourke
220 degree field of view
Many 360 cameras use lenses with a field of view greater than 180 degrees. This results in areas of overlap when creating a single image from both photos (assuming both fisheye lenses have the same field of view).
Here’s the world mapped in a fisheye projection with a 220 degree field of view.
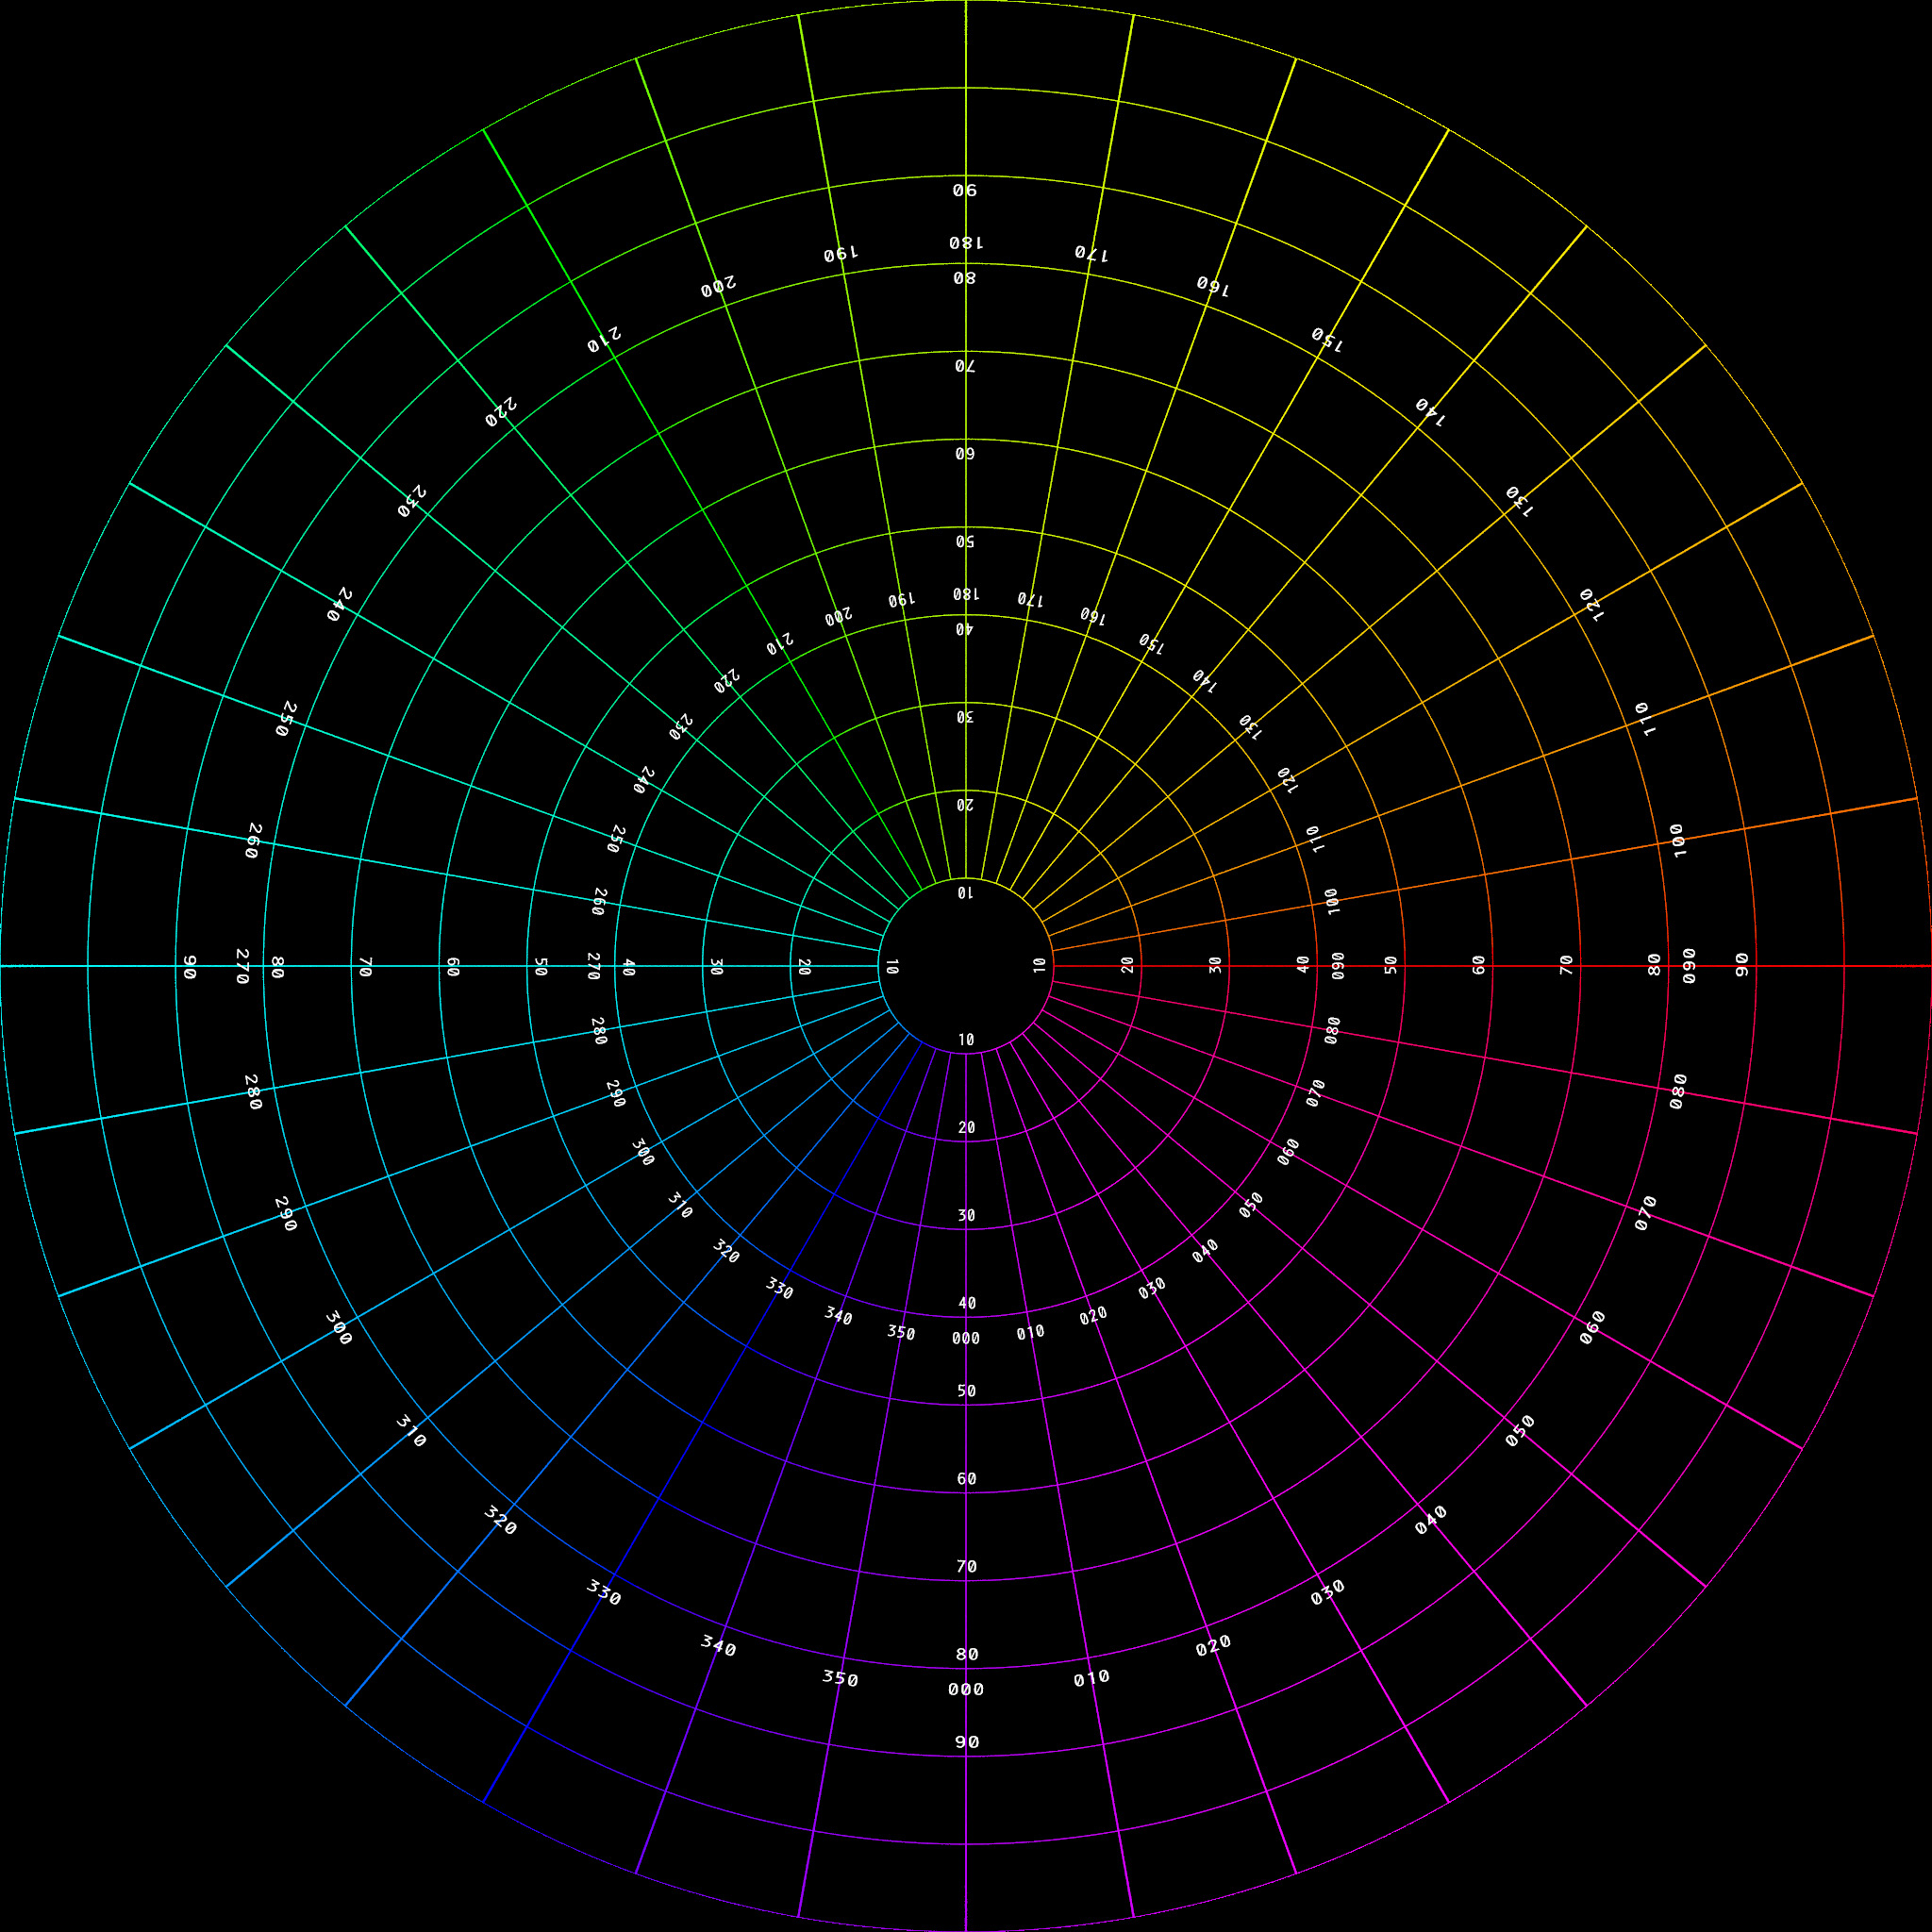
You can see there are more squares along each axis. That’s because the 220 degree field of view captures more of the world.
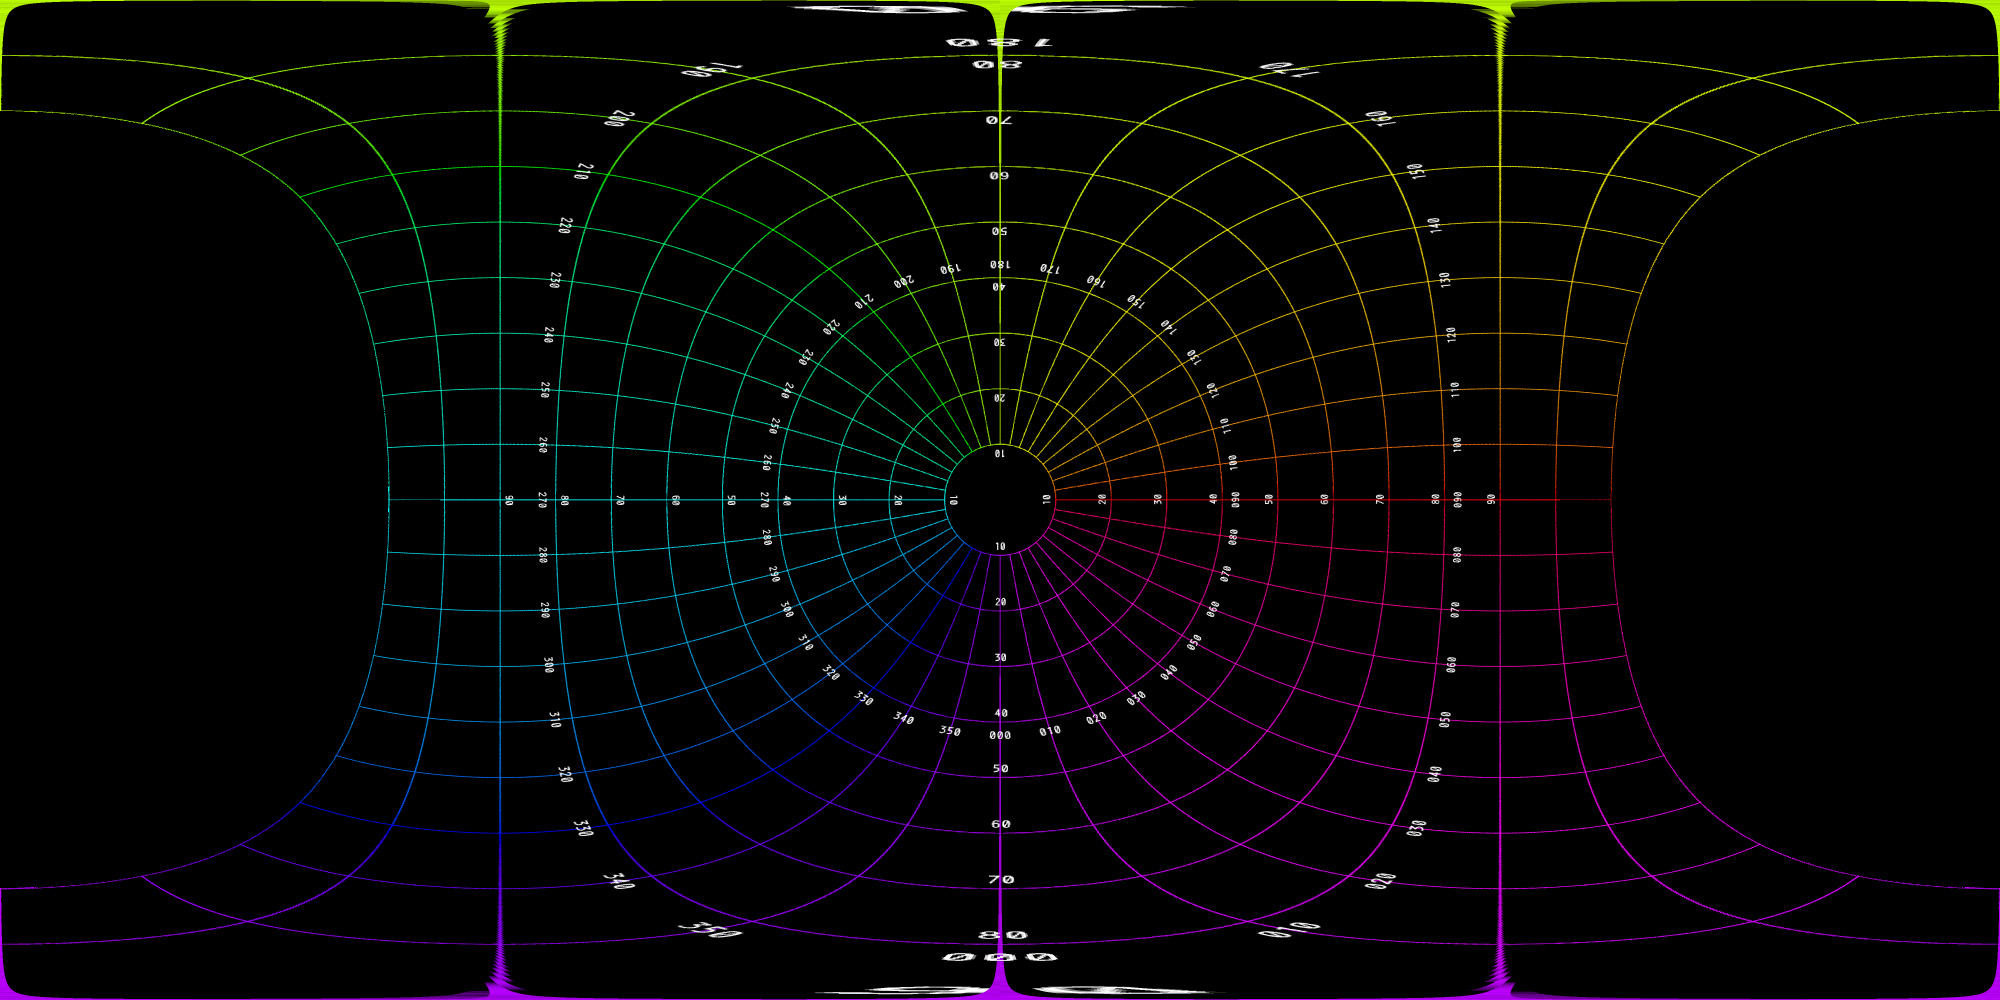
When transformed to an equirectangular projection, you can see the squares of the fisheye go beyond the square edges of the 180 degree example. Again, this is because the 220 degree field of view captures more of the world.
When putting both fisheyes (front and back) into the equirectangular space, these are the areas of duplicate pixels that need to be blended during stitching.
Before getting into stitching, we first need to establish the FOV of the GoPro Fusion.
Determining Field of View
The Fusion captures a lot of data in the metadata of the raw fisheye frames. Here’s an example;
Front image:
 <Composite:Aperture>2.8</Composite:Aperture>
 <Composite:ImageSize>3104x3000</Composite:ImageSize>
 <Composite:Megapixels>9.3</Composite:Megapixels>
 <Composite:ScaleFactor35efl>3.7</Composite:ScaleFactor35efl>
 <Composite:ShutterSpeed>1/1279</Composite:ShutterSpeed>
 <Composite:CircleOfConfusion>0.008 mm</Composite:CircleOfConfusion>
 <Composite:FOV>117.1 deg</Composite:FOV>
 <Composite:FocalLength35efl>3.0 mm (35 mm equivalent: 11.0 mm)</Composite:FocalLength35efl>
 <Composite:HyperfocalDistance>0.39 m</Composite:HyperfocalDistance>
Back image:
 <Composite:Aperture>2.8</Composite:Aperture>
 <Composite:ImageSize>3104x3000</Composite:ImageSize>
 <Composite:Megapixels>9.3</Composite:Megapixels>
 <Composite:ScaleFactor35efl>3.7</Composite:ScaleFactor35efl>
 <Composite:ShutterSpeed>1/2188</Composite:ShutterSpeed>
 <Composite:CircleOfConfusion>0.008 mm</Composite:CircleOfConfusion>
 <Composite:FOV>117.1 deg</Composite:FOV>
 <Composite:FocalLength35efl>3.0 mm (35 mm equivalent: 11.0 mm)</Composite:FocalLength35efl>
 <Composite:HyperfocalDistance>0.39 m</Composite:HyperfocalDistance>
You can see FOV is reported in the metadata above as 117.1 deg – this is obviously incorrect. In my test images I can see part of the mount below the camera, so FOV must be closer to 180.
Even without seeing a test photo, for a true 360 (without guessing missing pixels), the front and back lenses need an FOV of at least 180 degrees, as mentioned above.
GoPro themselves mentions the FOV of each lens is greater than 180 degrees.
In the case of full fisheye circular images (what the Fusion produces), the FOV can be linear (horizontal FOV = vertical FOV) or non linear.
We know the Fusion produces images with a larger width (3104) than height (3000) so the raw FOV is non-linear. I’ll come back to this a little later.
I first decided to conduct a rough (non-scientific) test to try and estimate the Fusion lenses FOV.
Calculating field of view (visually)
Before I continue it is important to note (again) that this test is far from scientific. The aim is to get a rough idea of the angle of view to within a few degrees of the Fusion’s lenses.
Whilst I will need a fairly accurate value for later steps, I can use trial and error to perfect it within a few degrees during stitching.
For the experiment I set up a basic test in my back garden to measure horizontal FOV.
I placed a 10 meter string across the garden, placing the camera at the center (at 5m). At the left end of this string I placed a flowerpot.
I then used another piece of string, also 10m that I could adjust to measure the angles. At the left end of this string I placed a pink football.
Here’s a birds-eye view of the camera / string setup:
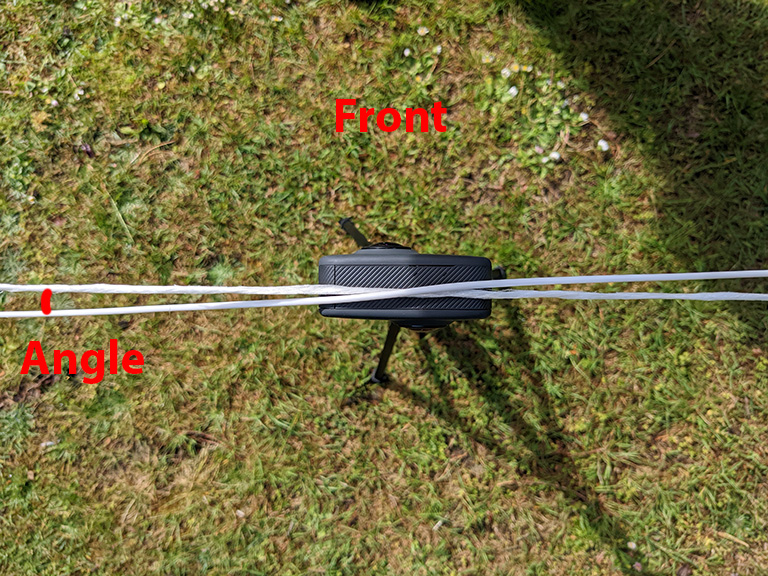
To perform the experiment I kept adjusting the angle (behind the camera) until the pink football was no longer visible (and thus outside the cameras FOV).
190 degrees HFOV (-5 degrees either side)
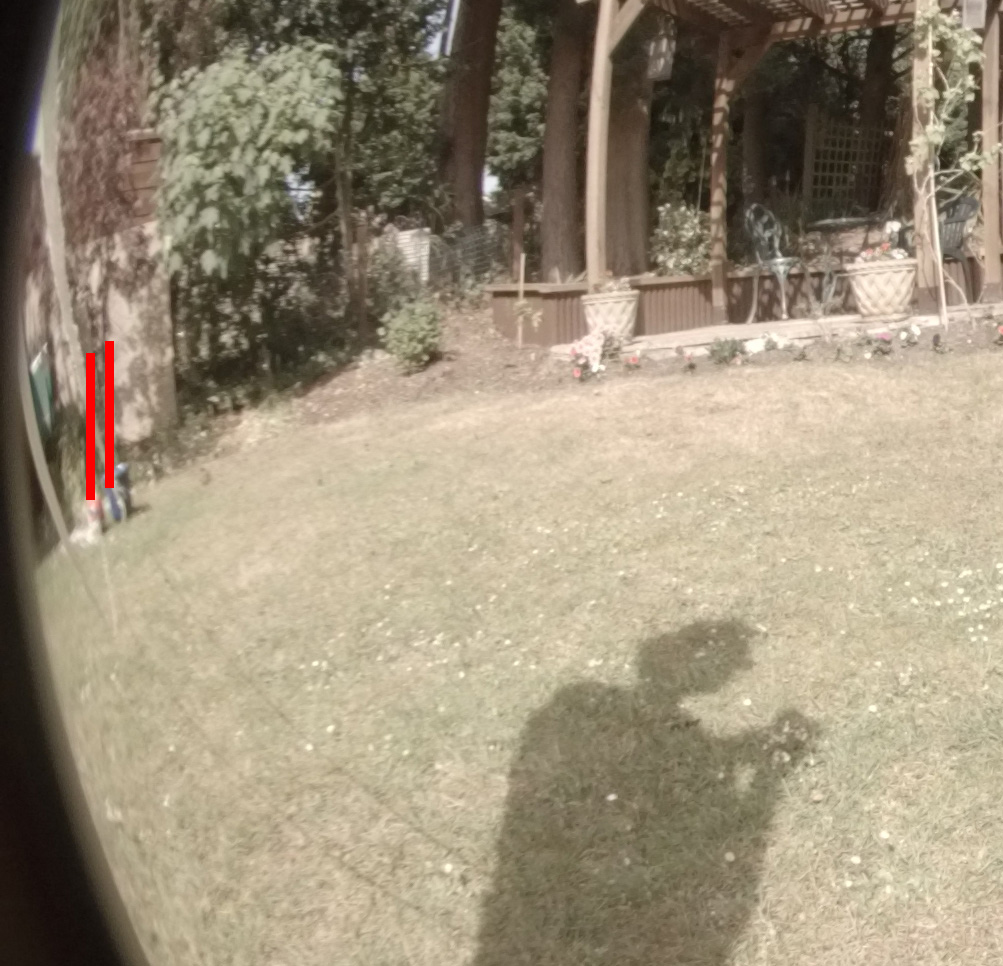
The ball is still visible when around 5 degrees behind the camera.
200 degrees HFOV (-10 degrees either side)
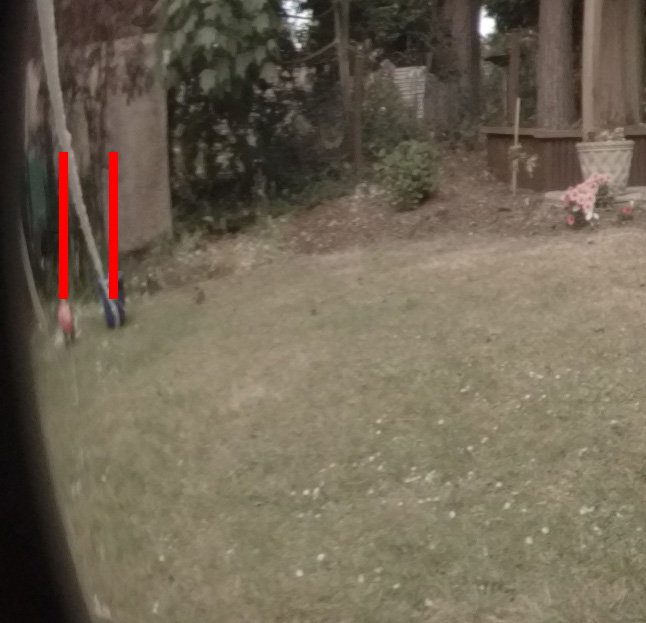
The ball is still visible when around 10 degrees behind the camera.
210 degrees HFOV (-15 degrees either side)
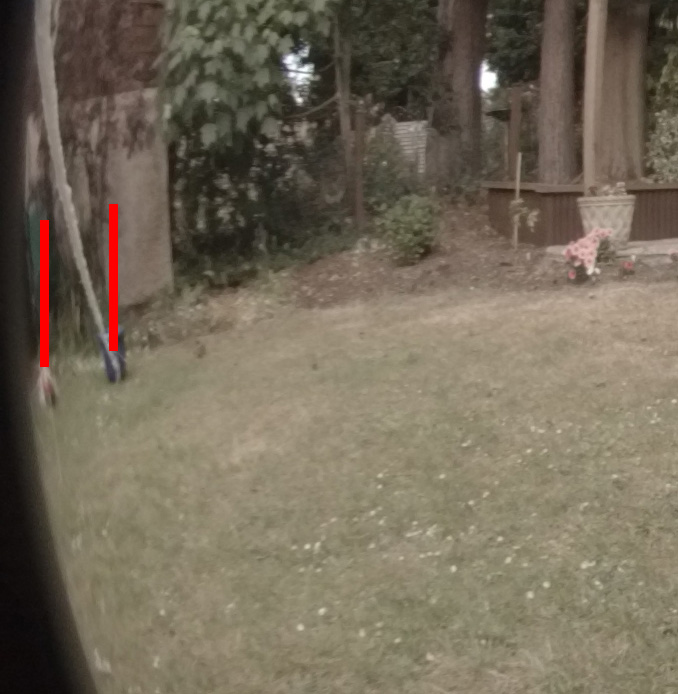
You can see in this final example, the ball is visible, but is much more out of focus than in the previous two examples.
Cropping the FOV
You can see a “blur ring” prominently in some fisheyes from the Fusion reducing the usable part of the frame. This “blur ring” is not linear around the fisheye frame.
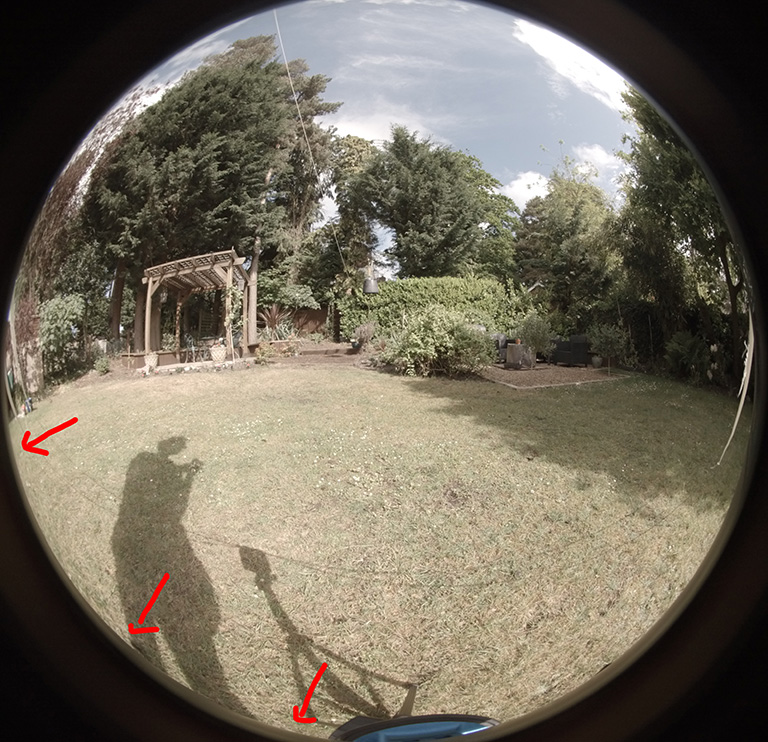
I suspect this “blur ring” is related to the aperture. For example, in low light, the aperture will be wider than compared to very sunny conditions, perhaps leading to a larger fisheye image (and a smaller blur ring).
In the images, you can also see the top and the bottom images are cropped. Therefore the vertical FOV is less than HFOV.
To account for all these factors, my guess is that GoPro software crops the circular fisheye during processing to only include the area of the fisheye that will always be captured and captured without any distortion.
This cropping probably crops a perfect circle (smaller than those shown last week), so that stitching is easier. The example below shows what this cropping could look like:
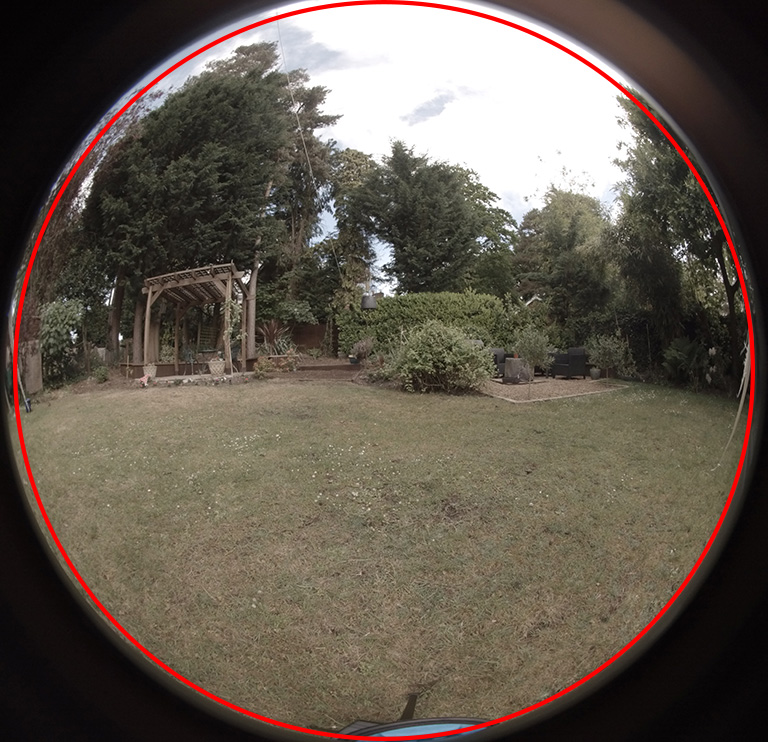
I’d guess the cropped area covers a FOV of about 190 (horizontally and vertically), namely to account for the HFOV cropping in the raw fisheyes.
This is enough to start experimenting with stitching (more on that next week).
Calculating field of view (mathematically)
Reading a few articles online, there are a few ways FOV for a lens can be calculated using focal length and image dimensions.
This post uses the calculation:
fov = 4 * arcsin (image size/(focal length * 4))
We know the Fusion’s focal length from the metadata (3.0).
However, the image size I am not so sure on.
Yes, we know the raw image dimensions, but as I said previously it’s likely GoPro know (but don’t advertise) part of the fisheye frame is redundant, and is ignored during the stitching process through further cropping. Therefore the image dimensions of the raw fisheye will be different to the actual size of the fisheye image considered during stitching.
As such, I’m not sure mathematically calculating FOV would offer any benefit over my estimations – I’d still end up with a inaccurate FOV value (and probably more inaccurate as my experiment slightly accounted for redundant areas of the fisheye) that I’d need to modify and experiment with during stitching.
Update 2021-01-07
Stitching GoPro Fusion Images Without GoPro Fusion Studio (Part 4)
We're building a Street View alternative for explorers
If you'd like to be the first to receive monthly updates about the project, subscribe to our newsletter...
