North, South, East or, West? Calculating bearings between photos.
Me? North (in my home office).
A heading of about 5 degrees, if you want me to be more accurate.
Now look at the 50th photo (roughly) you took on your phone. Any idea of the heading?
What about the pitch?
Probably not.
And it is very unlikely your phone will have the answer either.
Usually you will find it tagged with where the photo was taken using GPS (latitude, longitude and elevation), but I’m not aware of a phone that logs the heading (prove me wrong!).
There’s good reason for this; rarely is it important.
Though in some case it’s life or death. This is no exaggeration.
Take Bellingcat. Their crowdsourced work often involves taking a photograph and determining the location, heading, and even time (using shadows) it was taken to aid their investigations (like the downing of MH17).
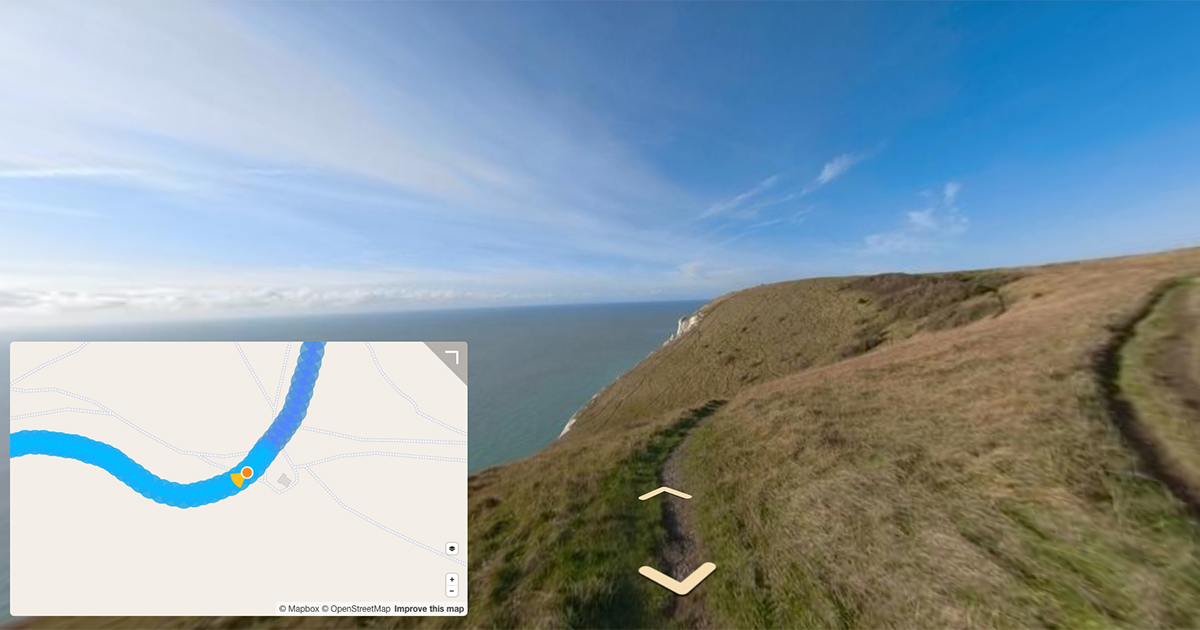
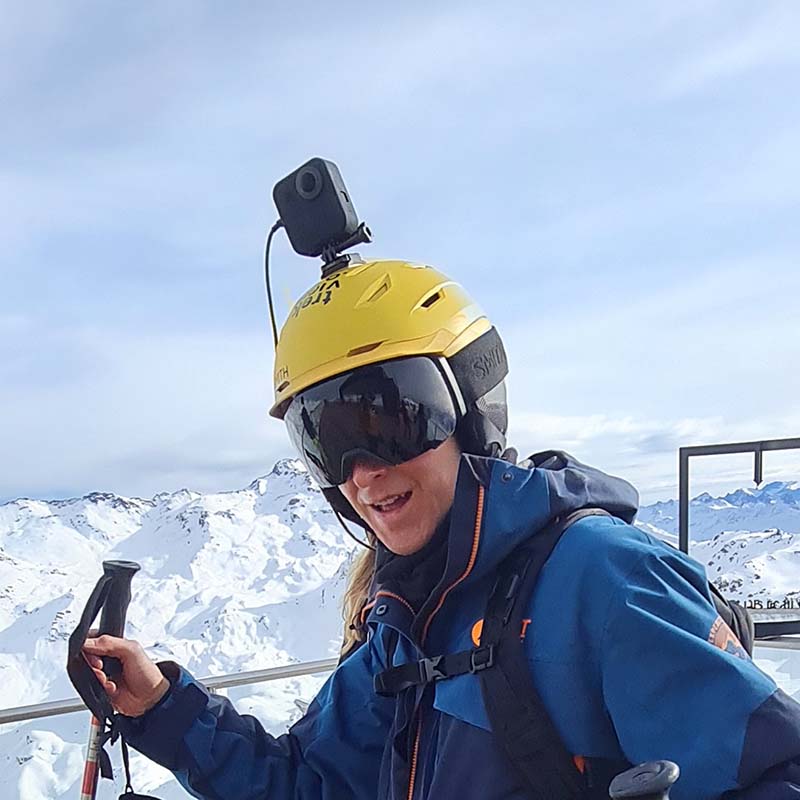
Because the Trek Pack camera (GoPro Fusion) does not support heading or pitch when shooting timelapse tours, we needed to manually calculate this information when building some of our software.
Now you might be wondering why pitch or heading is important. “Surely a user can define where they want to be looking using a 360-degree photo viewer?”, you might be asking. This is true. Though when trying to link 360-degree photos in a tour (e.g what direction is the next photo?), this information is vital.
On many newer cameras, the gyroscope and compass built into the camera alongside the GPS receiver will automatically record the pitch, roll, and heading of each frame.
But we use an older GoPro Fusion for our camera packs and shoot in time lapse mode (because of battery and heat issues). Whilst the Fusion has a an gyroscope and compass, the pitch, roll, and heading data is only included video captures.
Using the latitude, longitude, and altitude values captured by the GoPro Fusion GPS receiver you have all the information needed to make an fairly accurate calculation of these variables when shooting in time lapse mode.
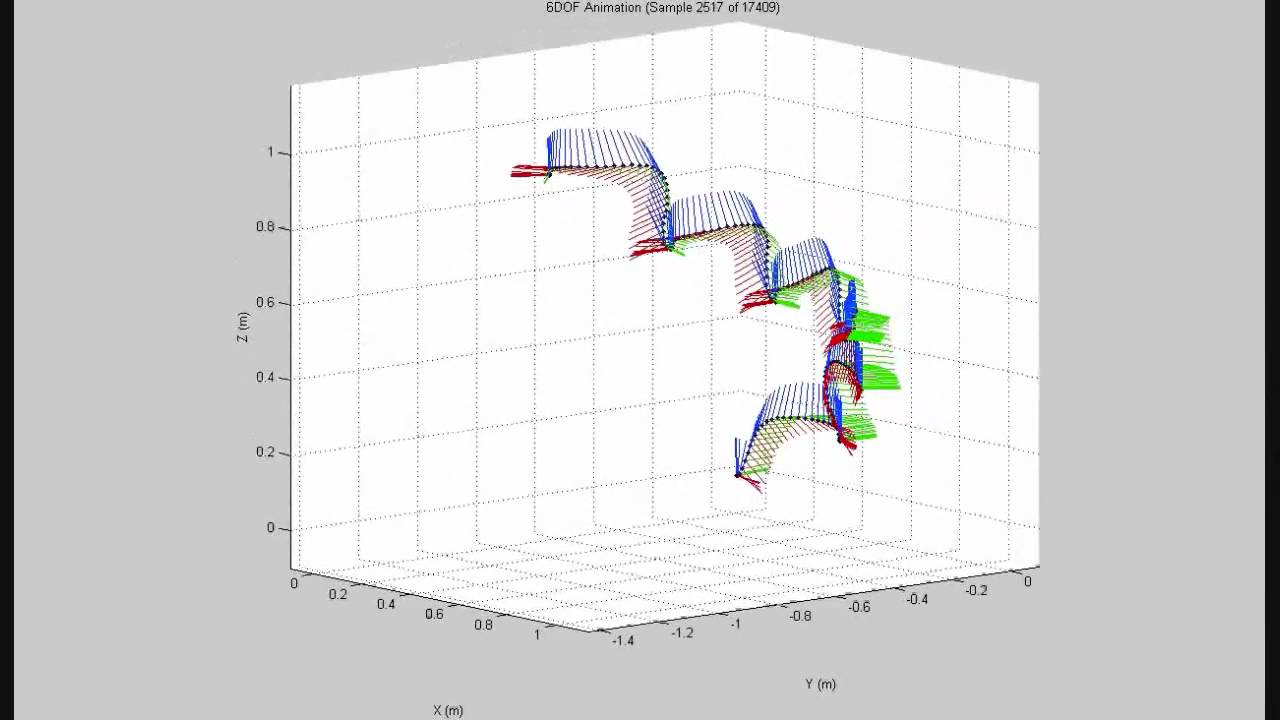
Take a moment to visualise this as a 3D map. The latitude (x) and longitude (y) gives the horizontal position. The elevation (z) gives us the vertical position.
Distance
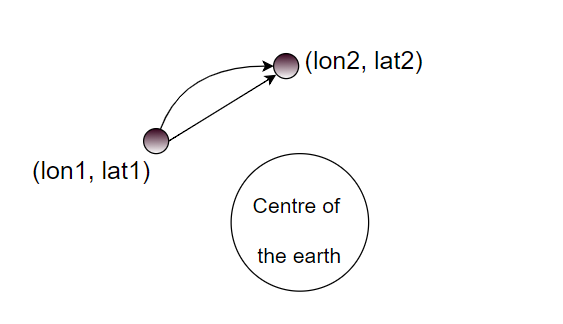
To calculate distance, you can use the Haversine formula to find the distance between two points on a sphere (Earth) given their longitudes and latitudes.
Two things to note: 1) this is probably overkill as the curvature of the earth is minuscule at short distances (e.g. 3 metres) and, 2) it does not account for elevation change between points, although again given distances in question, this will be small.
Pitch
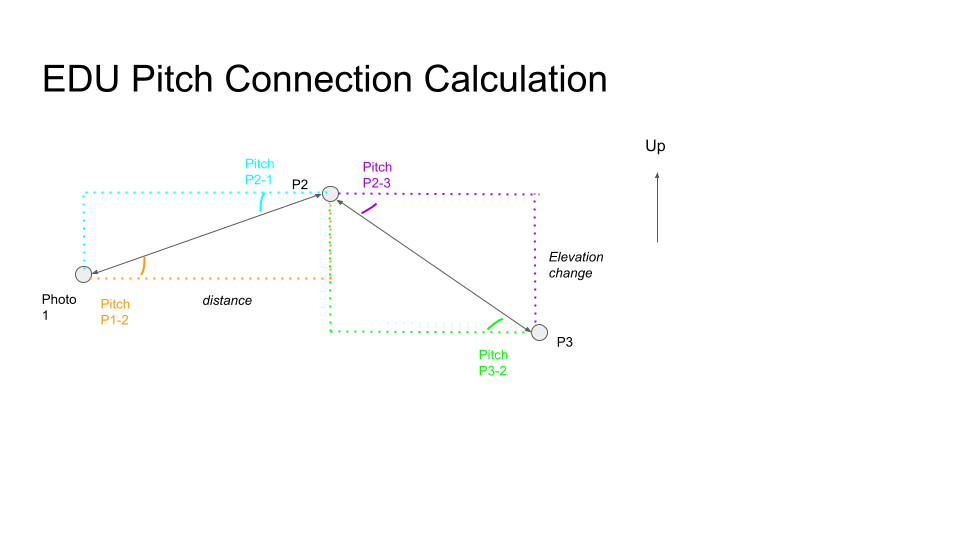
The best way to think about this calculation is to visualise the photos as points in a line from left to right (first photo to last).
Now you can turn to trigonometry (“sohcahtoa”), to calculate the missing values for these right angled triangles we’ve visualised;
Sine = Opposite / HypotenuseCosine = Adjacent / HypotenuseTangent = Opposite / Adjacent
Given this; pitch(θ) = tan(θ) = opposite / adjacent
We have the adjacent measurement (distance between photos), you just need the opposite value (elevation change between photos).
The GPS logs the elevation, so you can work this out; source photo elevation - destination photo elevation = elevation change (note, can be positive or negative).
So now you have; pitch(θ) = tan(θ) = opposite / adjacent = elevation change / distance.
Heading
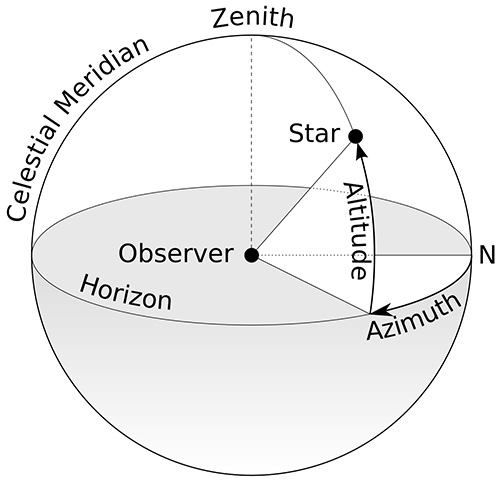
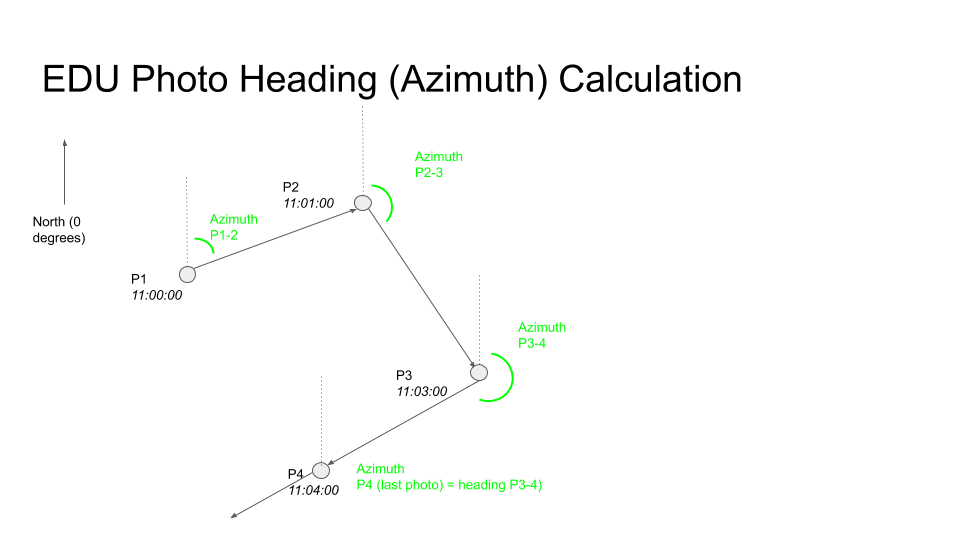
Heading or orientation is generally measured from North (0°), and is often referred to as the azimuth.
If I’m facing magnetic North my heading is 0°. If I’m facing magnetic South my heading is 180°. And so on.
All our tours are currently shot in time order. The start / end of the tour is the first / last photo.
Given photos are generally less than 3m apart and our Trek Pack cameras are always facing forward / backwards in the same direction, you can make an assumption that the camera is facing in the direction of the next photo (by time). Note, this will not always be correct, for example, if Trekker turns 90° between start and destination photo (but this is rare, so we’re overlooking it for now in favour of simplicity).
Now you can calculate the heading of the current photo by measuring the heading (angle) from North to the next photo (by time), as shown in the diagram.
There is a slight problem with this approach, you cannot get the heading of the last photo (because there is not a next photo by time). As a simple approach, you could just copy the heading calculated for the last photo in the sequence.
Multiple Headings
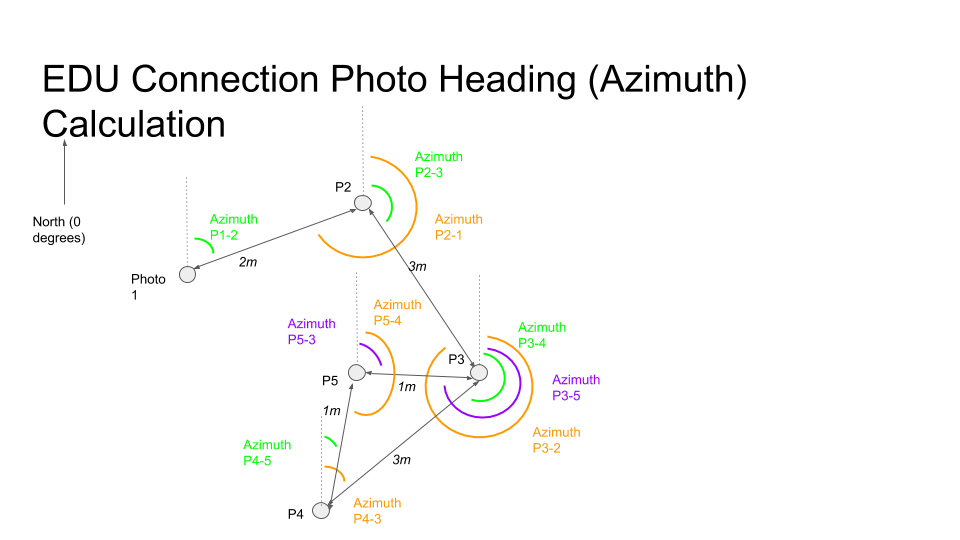
Now you have an estimate for what direction the camera was facing when the photo was taken.
In some cases, you might have multiple connections. For example, at a fork where two paths intersect – one going forward, two others off to each side.
So you not only need to know the heading to the next photo based on time, but also the direction to all connected photos so that a user can move through a tour virtually (think Google Street View).
First you need to consider what photos are connected. In some of our software photos are considered connected if the horizontal distance between photos is <=10 metres of the elevation change is <=+/-5 (both these values calculated earlier).
So you can use the same logic as before to work out heading for all connected photos.
As with pitch, you’ll notice in the diagram there is a forward and backward connection heading (P1 - P2 and P2 - P1) for each connected photo. And like with pitch, it is so you can move forward and backwards between photos.
Adjusted Headings
One final calculation (I promise); adjusted heading.
This is useful for connections, where the software has no concept of true North.
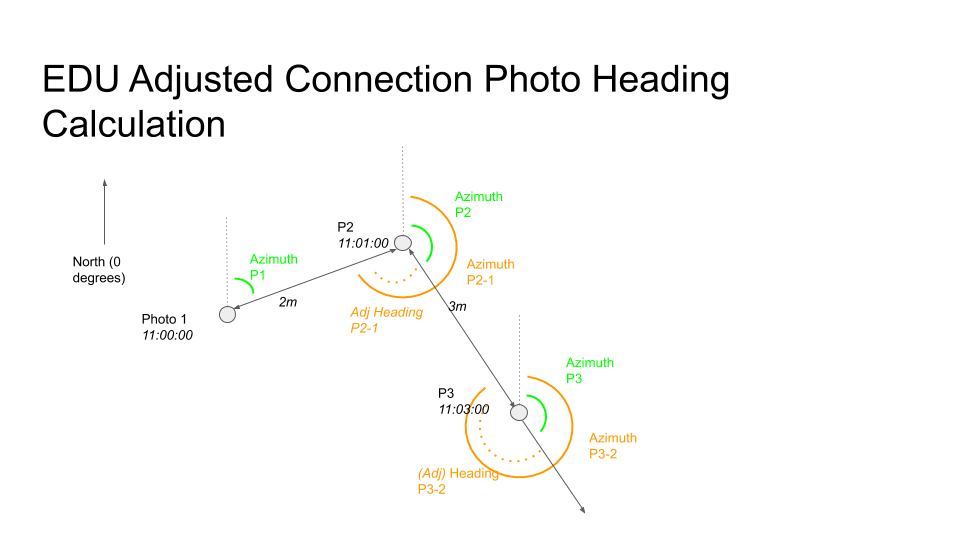
In such case, we must therefore adjust the heading to connected photos to the centre of the source 360-degree photo (it’s heading from North) in these scenarios.
This an easy calculation to estimate using existing heading fields; adjusted heading = heading of source photo - heading of connection photo.
You will see there is no adjusted heading for the next photo by time (e.g P2 to P3). It does exist, but is not shown in the diagram because the adjusted photo heading for the next photo by time (heading) will always be 0. For example, heading from P2 to P3 = x, and adjusted heading for P2 to P3 = x (heading) - x (connection heading) = 0.
We're building a Street View alternative for explorers
If you'd like to be the first to receive monthly updates about the project, subscribe to our newsletter...
