Automate the process of adding a custom branded watermark to all your timelapse photos using Imagemagick
We’ve recently been playing with the new GoPro HERO 10. It’s a neat bit of kit.
Many people use action cameras for mapping. In many cases, the money to buy a 360 camera for mapping can’t be justified. Action cameras are simpler to use and more versatile.
At the end of 2020, Google Street View started accepting non-equirectangular photos:
Before this feature, you would typically need special 360-degree cameras to capture and publish Street View imagery. Some equipment you could even attach to the roof of your car, but at the cost of thousands of dollars; that’s out of the realm for many.
Now that anyone can create their own connected Street View photos, we can bring better maps to more people around the world, capturing places that aren’t on Google Maps or that have seen rapid change. All you need is a smartphone—no fancy equipment required.
Although we tried to keep our Trek Packs as cheap as possible (>$500), it’s still a lot of money.
For many, action cameras, or even-more-so, smartphones, are more versatile and readily accessible.
For these trekkers, we also wanted to allow them to brand their imagery in the same way as we will do with equirectangular photos (by using a logo in the nadir). I’ve documented how to add a nadir to a 360 equirectangular photo here:
This week I’ll show you how to add a watermark to regular photos (2D plane).
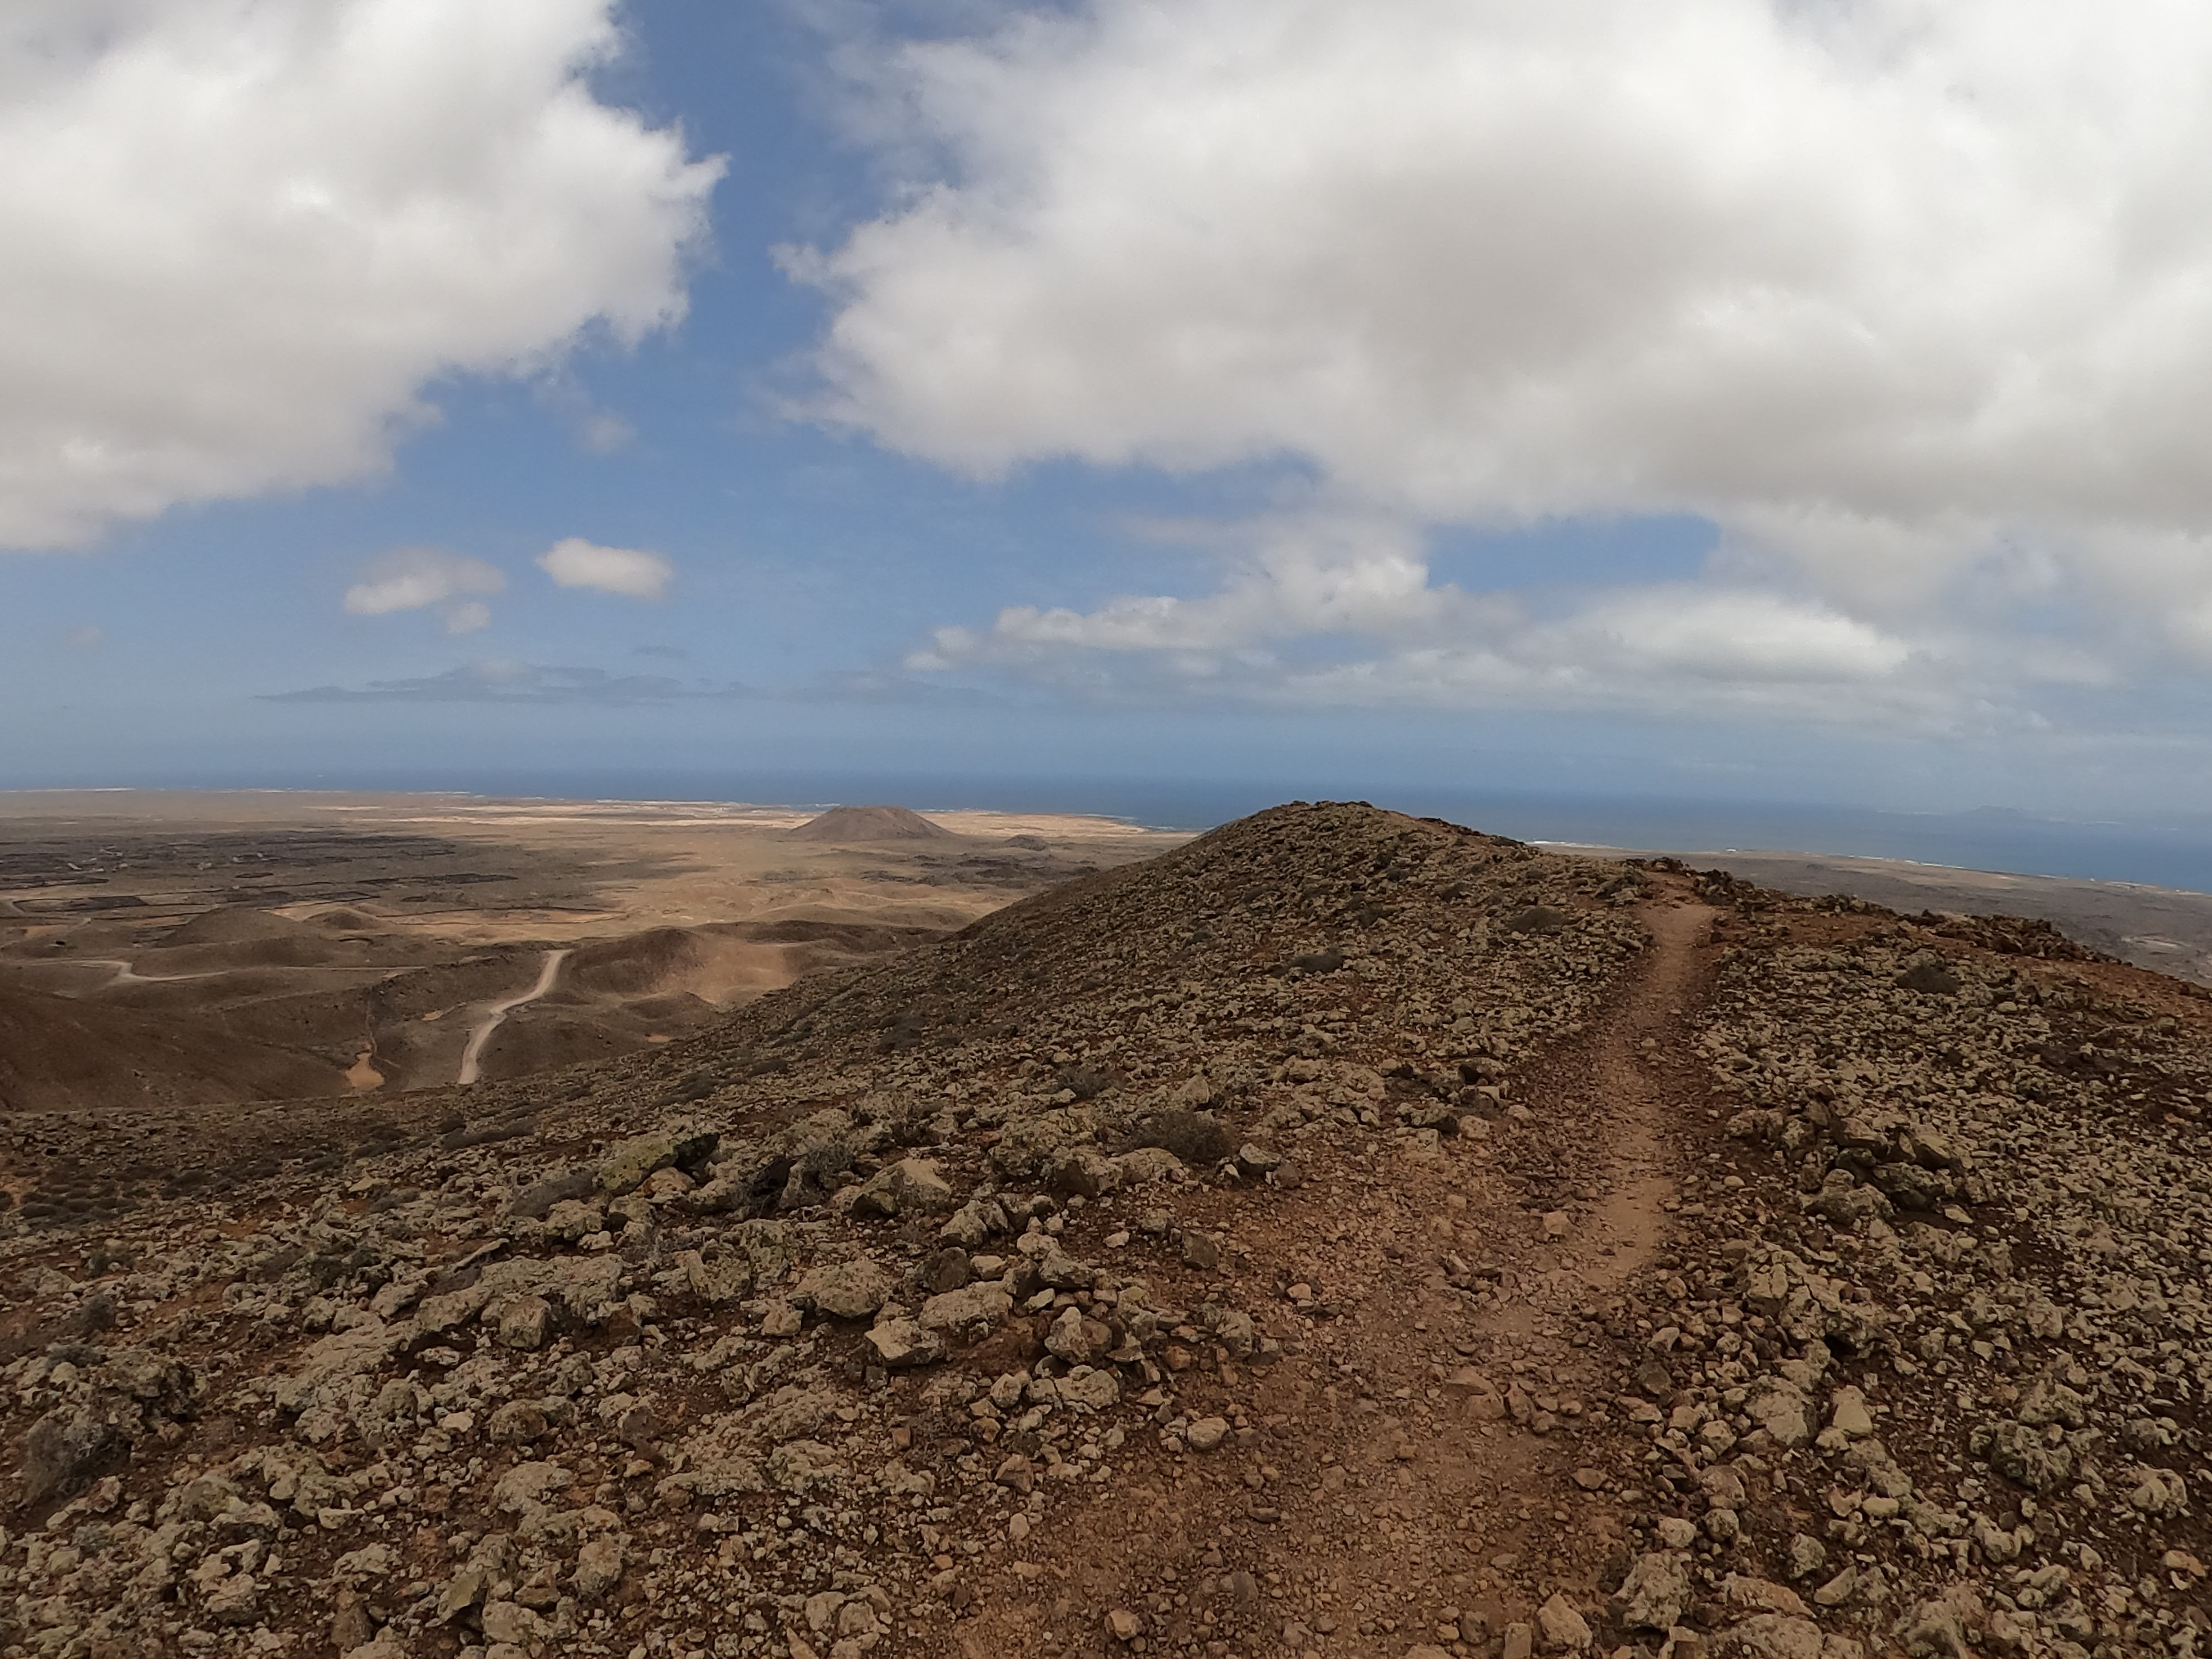
Below is the photo I will use (taken in Fuerteventura in 2020 using the Trek Pack v2), and the Trek View logo I will use for this exercise.

Step 0: Install Imagemagick
Imagemagick provides a huge variety of functions to manipulate image files.
For this demo I’ll be using it to resize and place the logo as a watermark.
Download the Imagemagick command line tools here.
Step 1: Get image size
In order to resize the watermark correctly, we first need to determine the size of the photo we will overlay the logo image onto.
You can use exiftool to grab this information, using the width and height tags like so:
$ exiftool -ImageWidth -ImageHeight GPAA1088.JPG
Which returns for my photo GPAA1088.JPG:
Image Width                     : 2704
Image Height                    : 2028
Step 2: Resize the logo
Let’s assume we want to make the watermark 10% of the image width. In which case, we calculate 10% of the image width to be 270.4 (2704 * 0.1).
Now we need to scale the logo file to measure 270 in width (and 270 height, because our logo is square).
Using Imagemagick:
magick trek-view-square-nadir.png -resize 270x270 trek-view-square-nadir-270.png
Step 3: Getting creative
You can also play around with other settings like the watermarks transparency.
For example, we could make it 65% transparent, so that the photo behind is still slightly visible when it is overlaid, like so:
convert trek-view-square-nadir-270.png -alpha set -channel a -evaluate set 65% +channel trek-view-square-nadir-270-65transp.png
Imagemagick provides a huge variety of functions to manipulate image files so have a read through the docs for more inspiration.
Step 4: Place the logo watermark
We now need to know where to place the logo horizontally and vertically.
I think the best place for the watermark is in the bottom right hand corner of the image.
To calculate this position we need to use the photo width (2704) and height (2028), as well as the logo width (270) and height (270).
So we need to place it horizontally (2704-270) at 2434 pixels across, and vertically (2028-270) at 1758 pixels down, which gives us the following command:
composite trek-view-square-nadir-270-65transp.png GPAA1088.JPG -geometry +2434+1758 GPAA1088-watermark-65transp.JPG
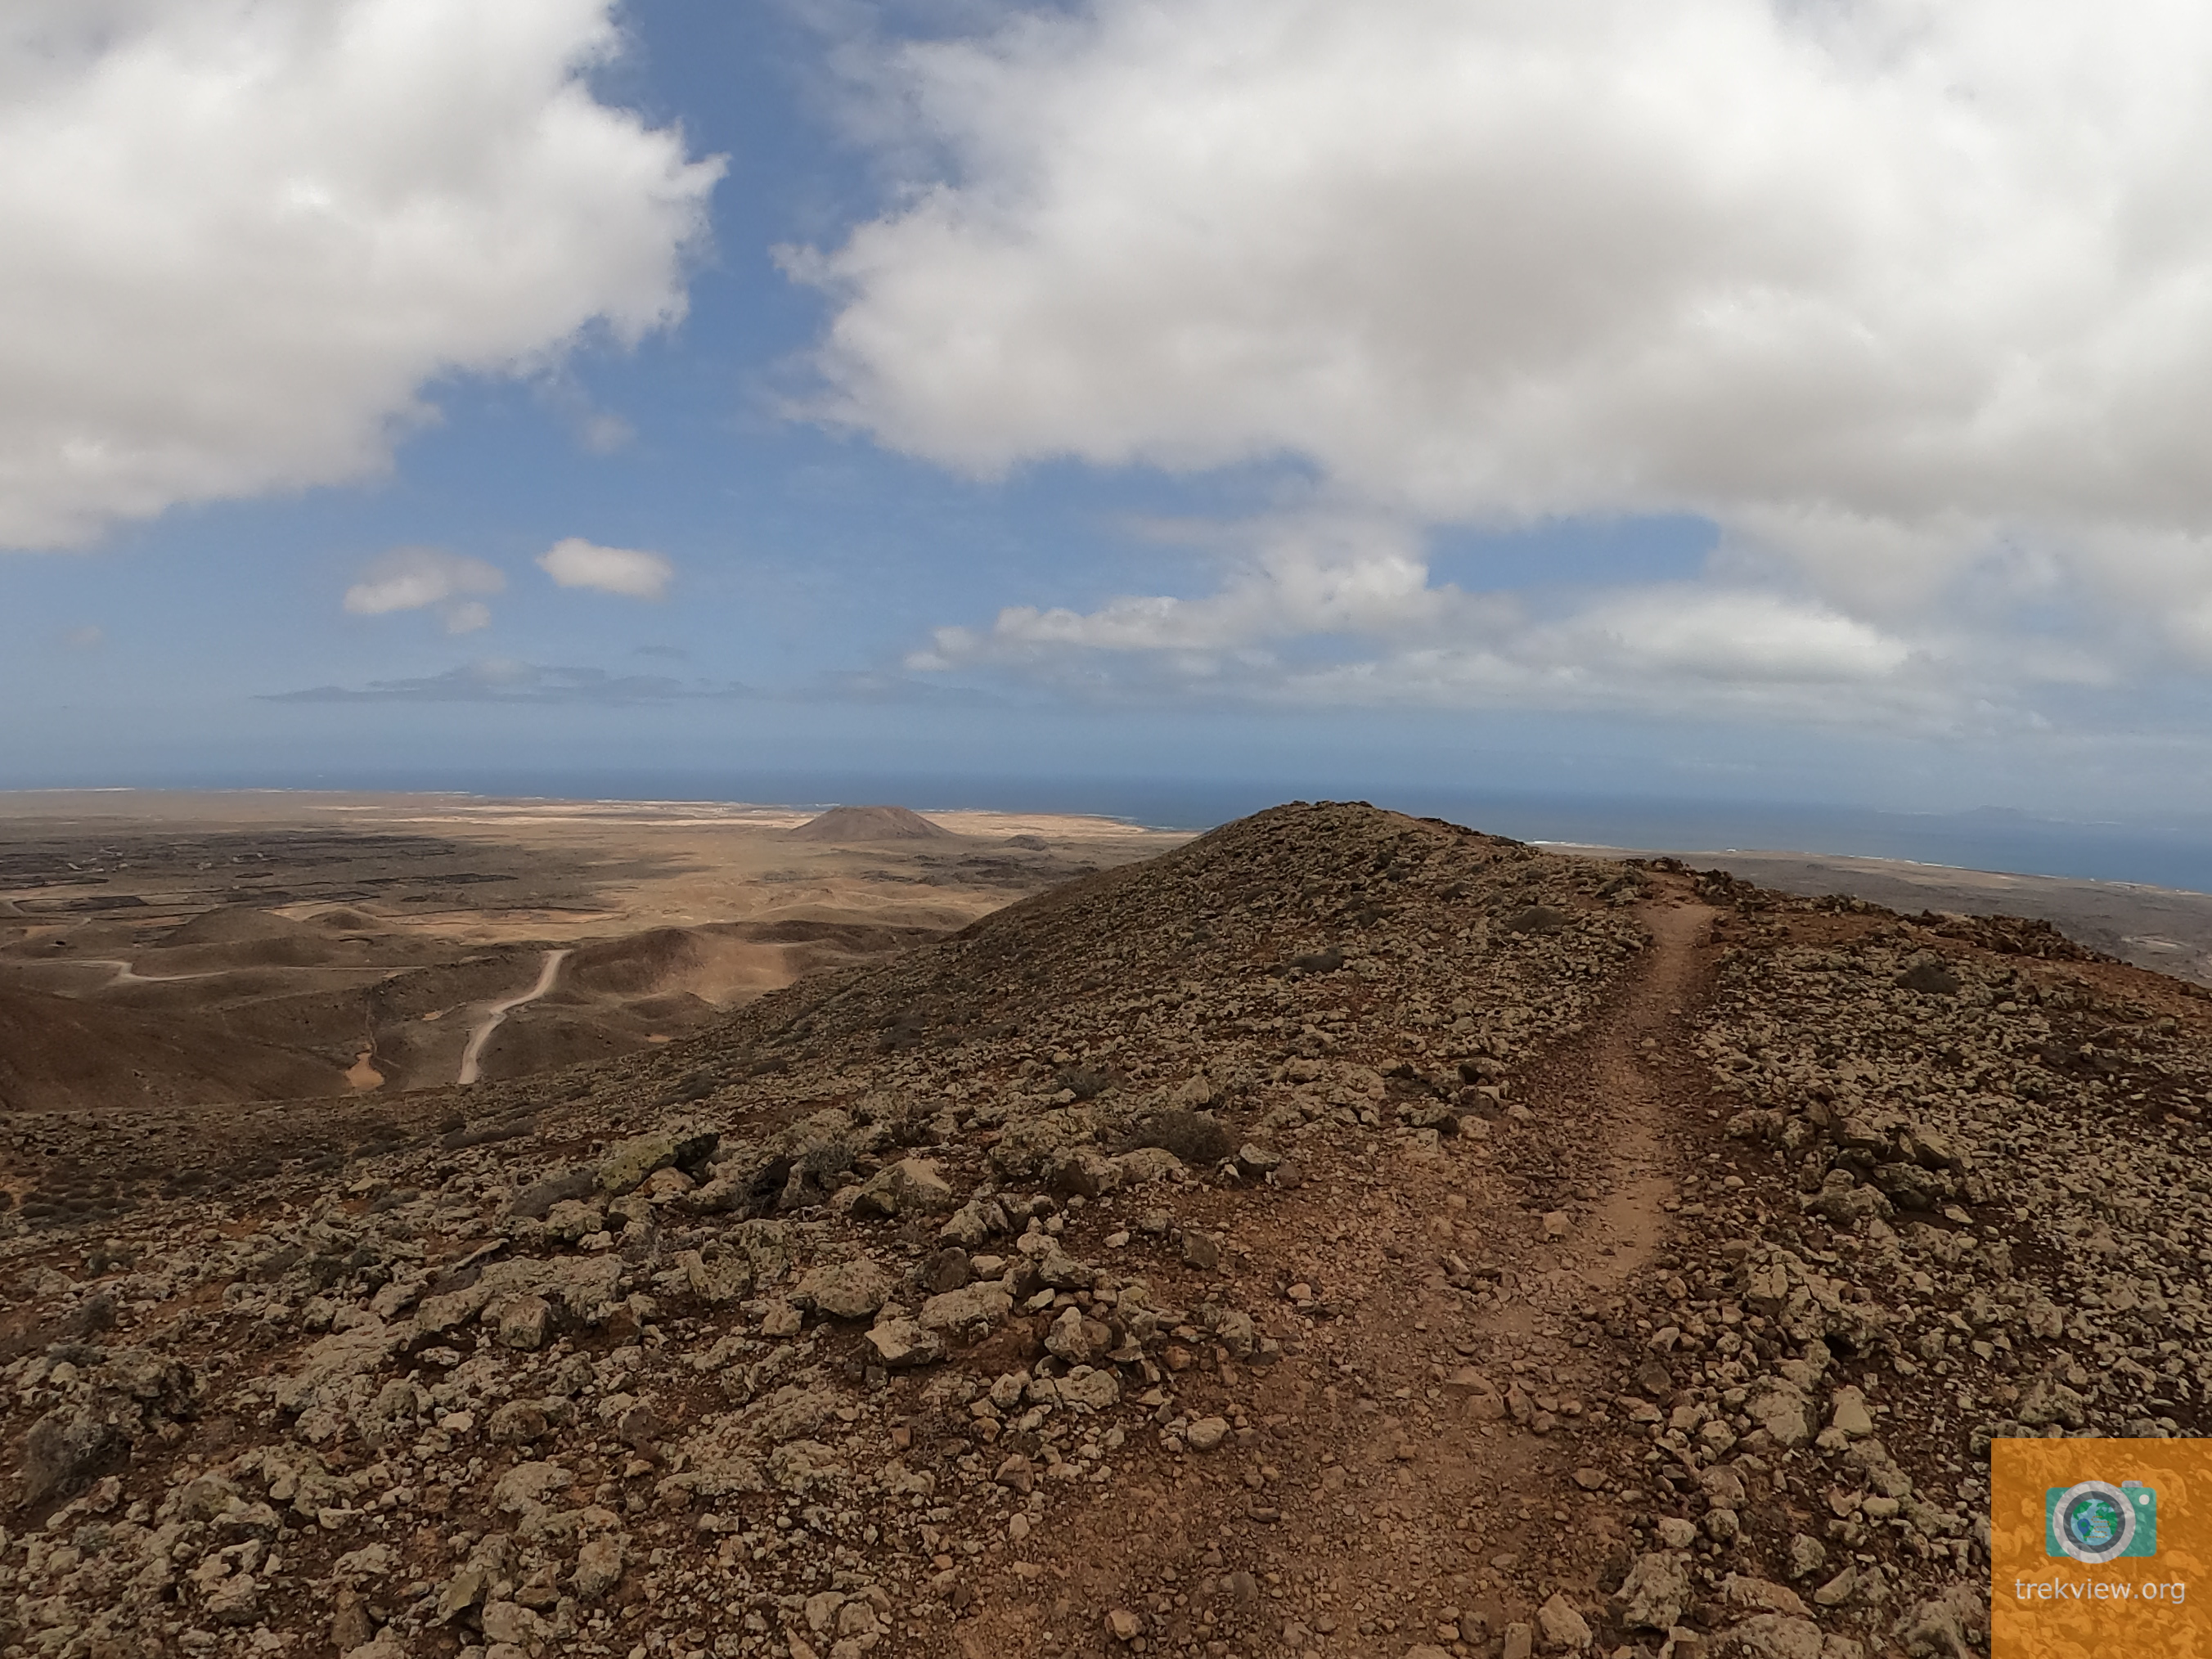
Giving us the final image:
Step 5: Script it
You’ll probably want to run this on multiple images in a timelapse.
Assuming all your photos are the same dimensions and you want the same watermark size overlaid on each, all you need to do is run the final command (step 4) on all your photos.
At its most simplistic, you can chain the commands together:
composite trek-view-square-nadir-270-65transp.png GPAA1088.JPG -geometry +2434+1758 GPAA1088-watermark-65transp.JPG && \
composite trek-view-square-nadir-270-65transp.png GPAA1089.JPG -geometry +2434+1758 GPAA1088-watermark-65transp.JPG && \
composite trek-view-square-nadir-270-65transp.png GPAA1090.JPG -geometry +2434+1758 GPAA1088-watermark-65transp.JPG
Though I’ll leave you to come up with more elegant solutions.
We're building a Street View alternative for explorers
If you'd like to be the first to receive monthly updates about the project, subscribe to our newsletter...
