A less technical way to create timelapse videos with spherical metadata. No command line in sight (but you will need an Adobe Premiere subscription).
Last summer I wrote about how you can use ffmpeg and Google’s Spatial Media Metadata Injector to take a series of timelapse photos to create a single timelapse movie – perfect for sharing on YouTube.
Though many of you emailed in asking if there was an easier way, without having to jump into an unfamiliar command line.
As you have probably already guessed from the title of this post, the answer is yes. Here’s how…
Import images to Premiere
Open Premiere Pro and go to File > Import.
In the File Browser, navigate to the folder with your image sequence.
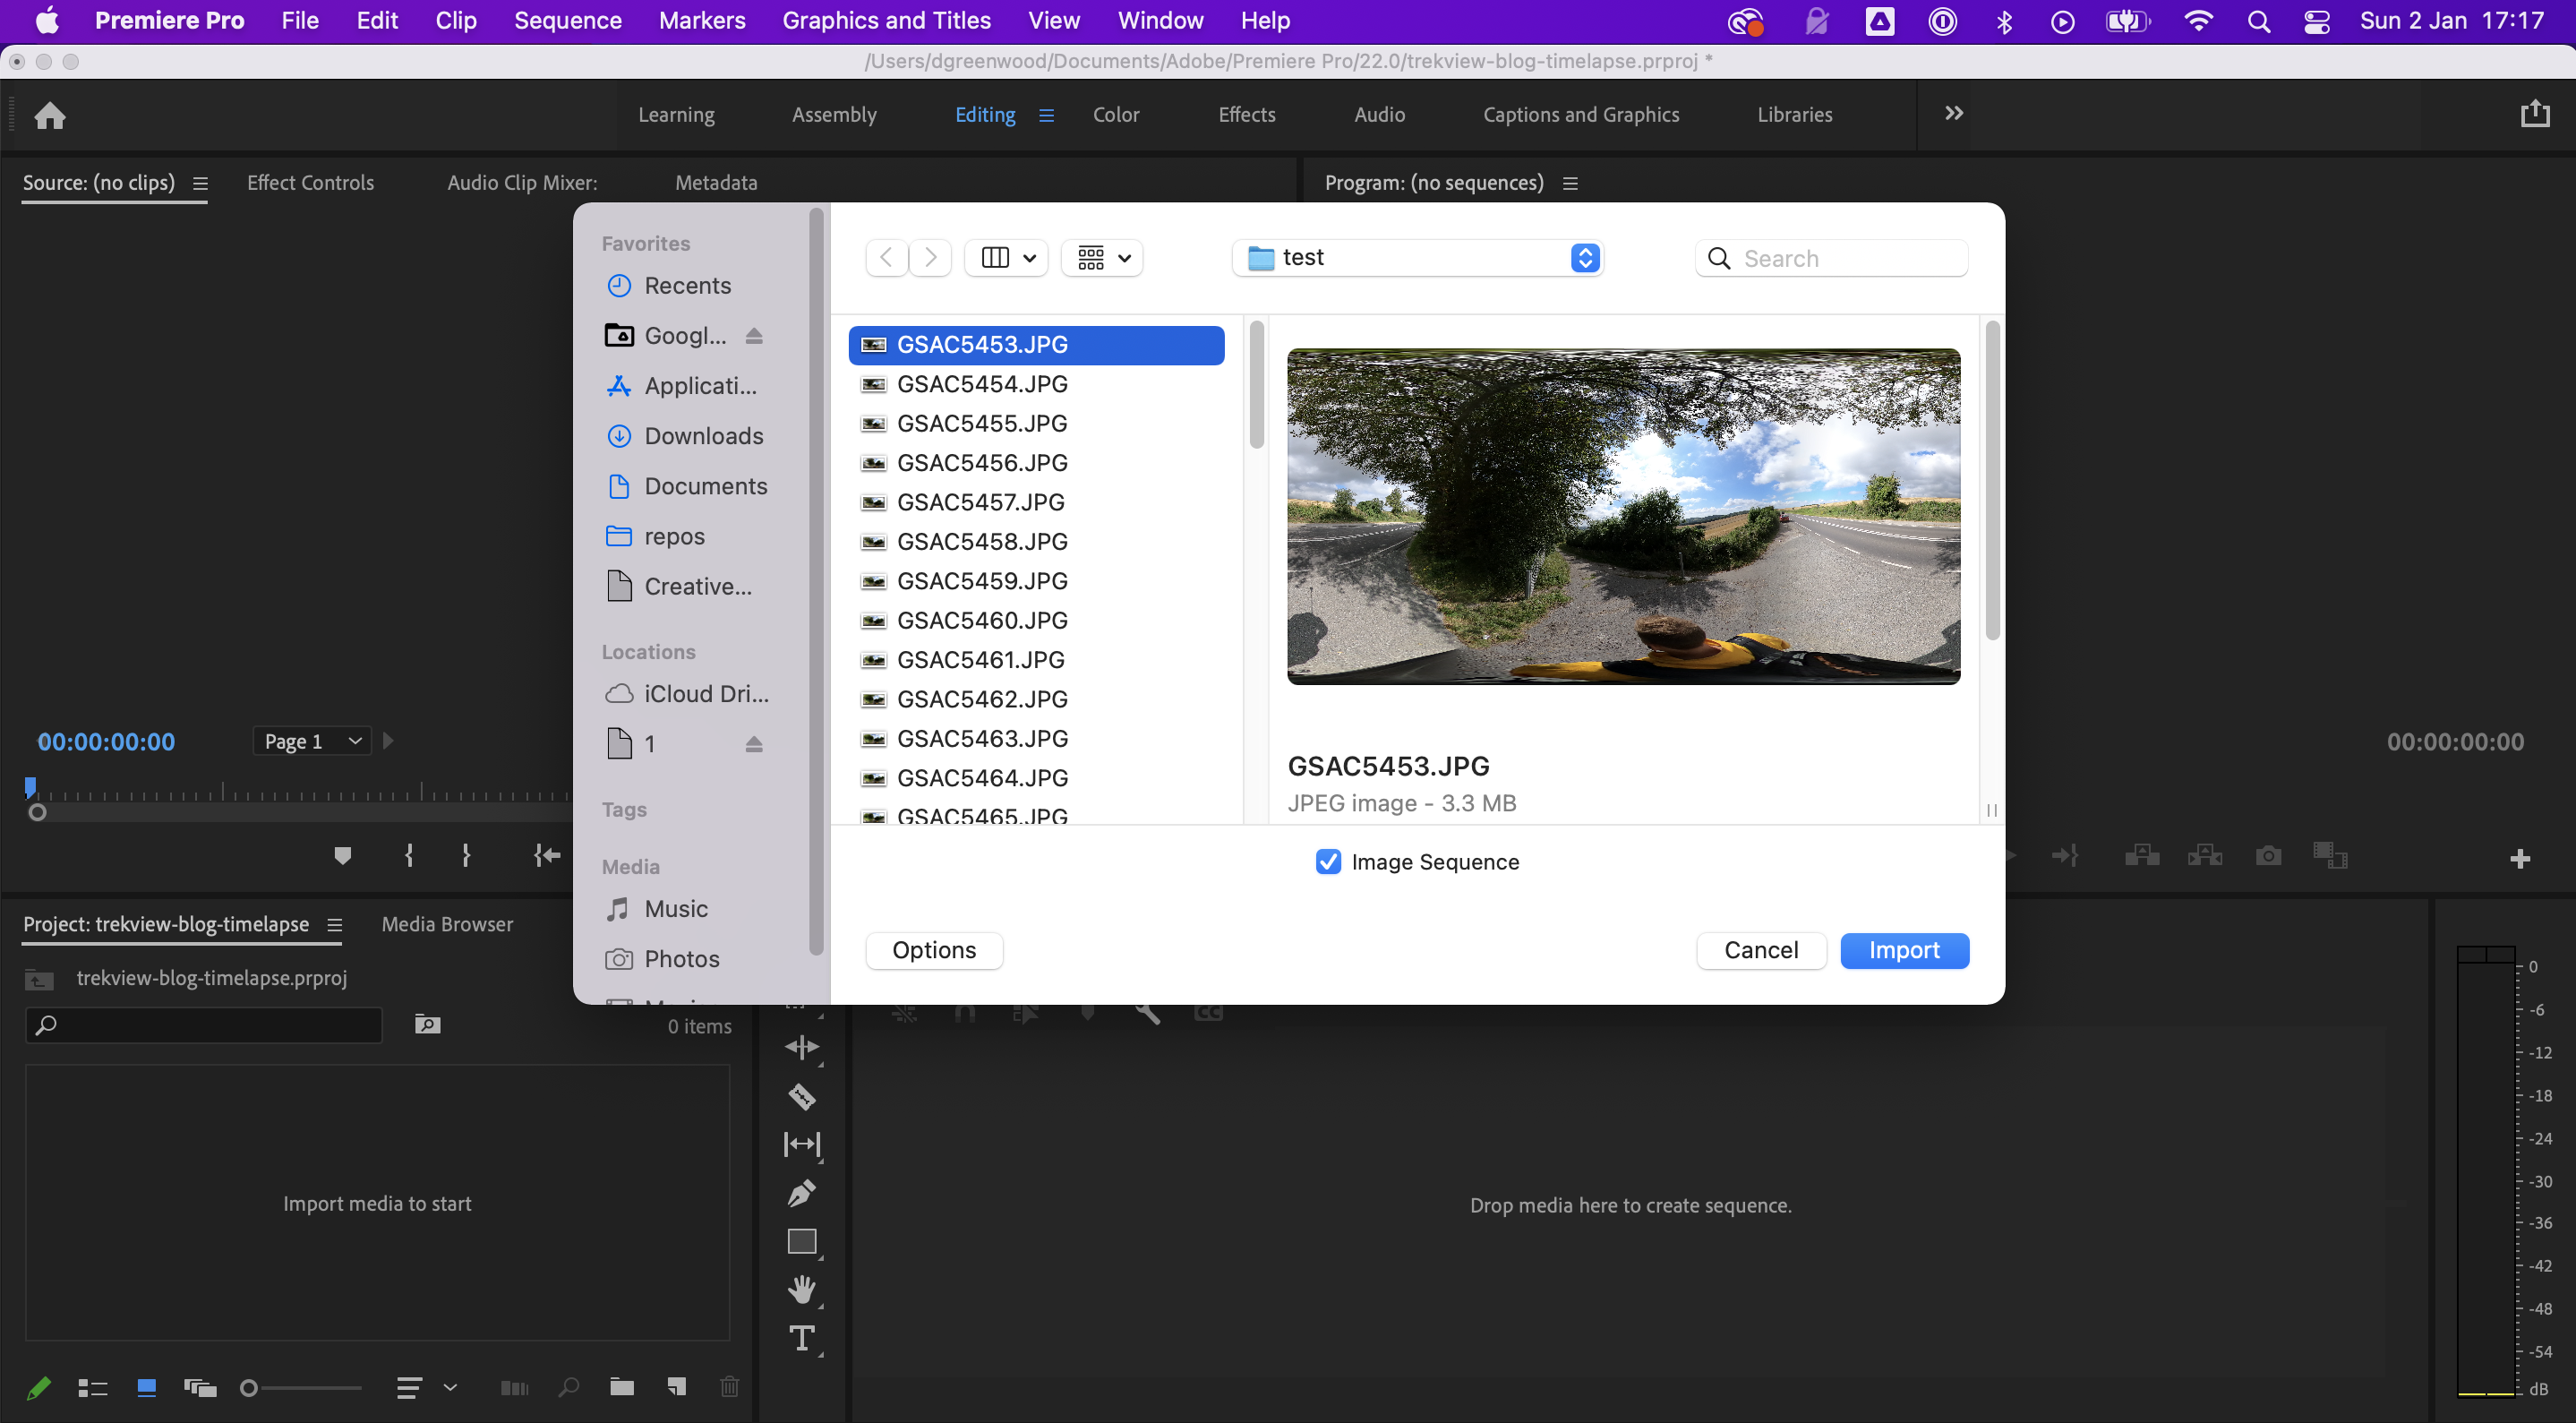
Click on the first image file. Do not select all files. You only want to click on the first image in the sequence.
Now check on the checkbox for “image sequence”. On a Mac, you will need to click “Options” to make this checkbox visible.
Import the file.
Your image sequence has now been imported as a single video file.
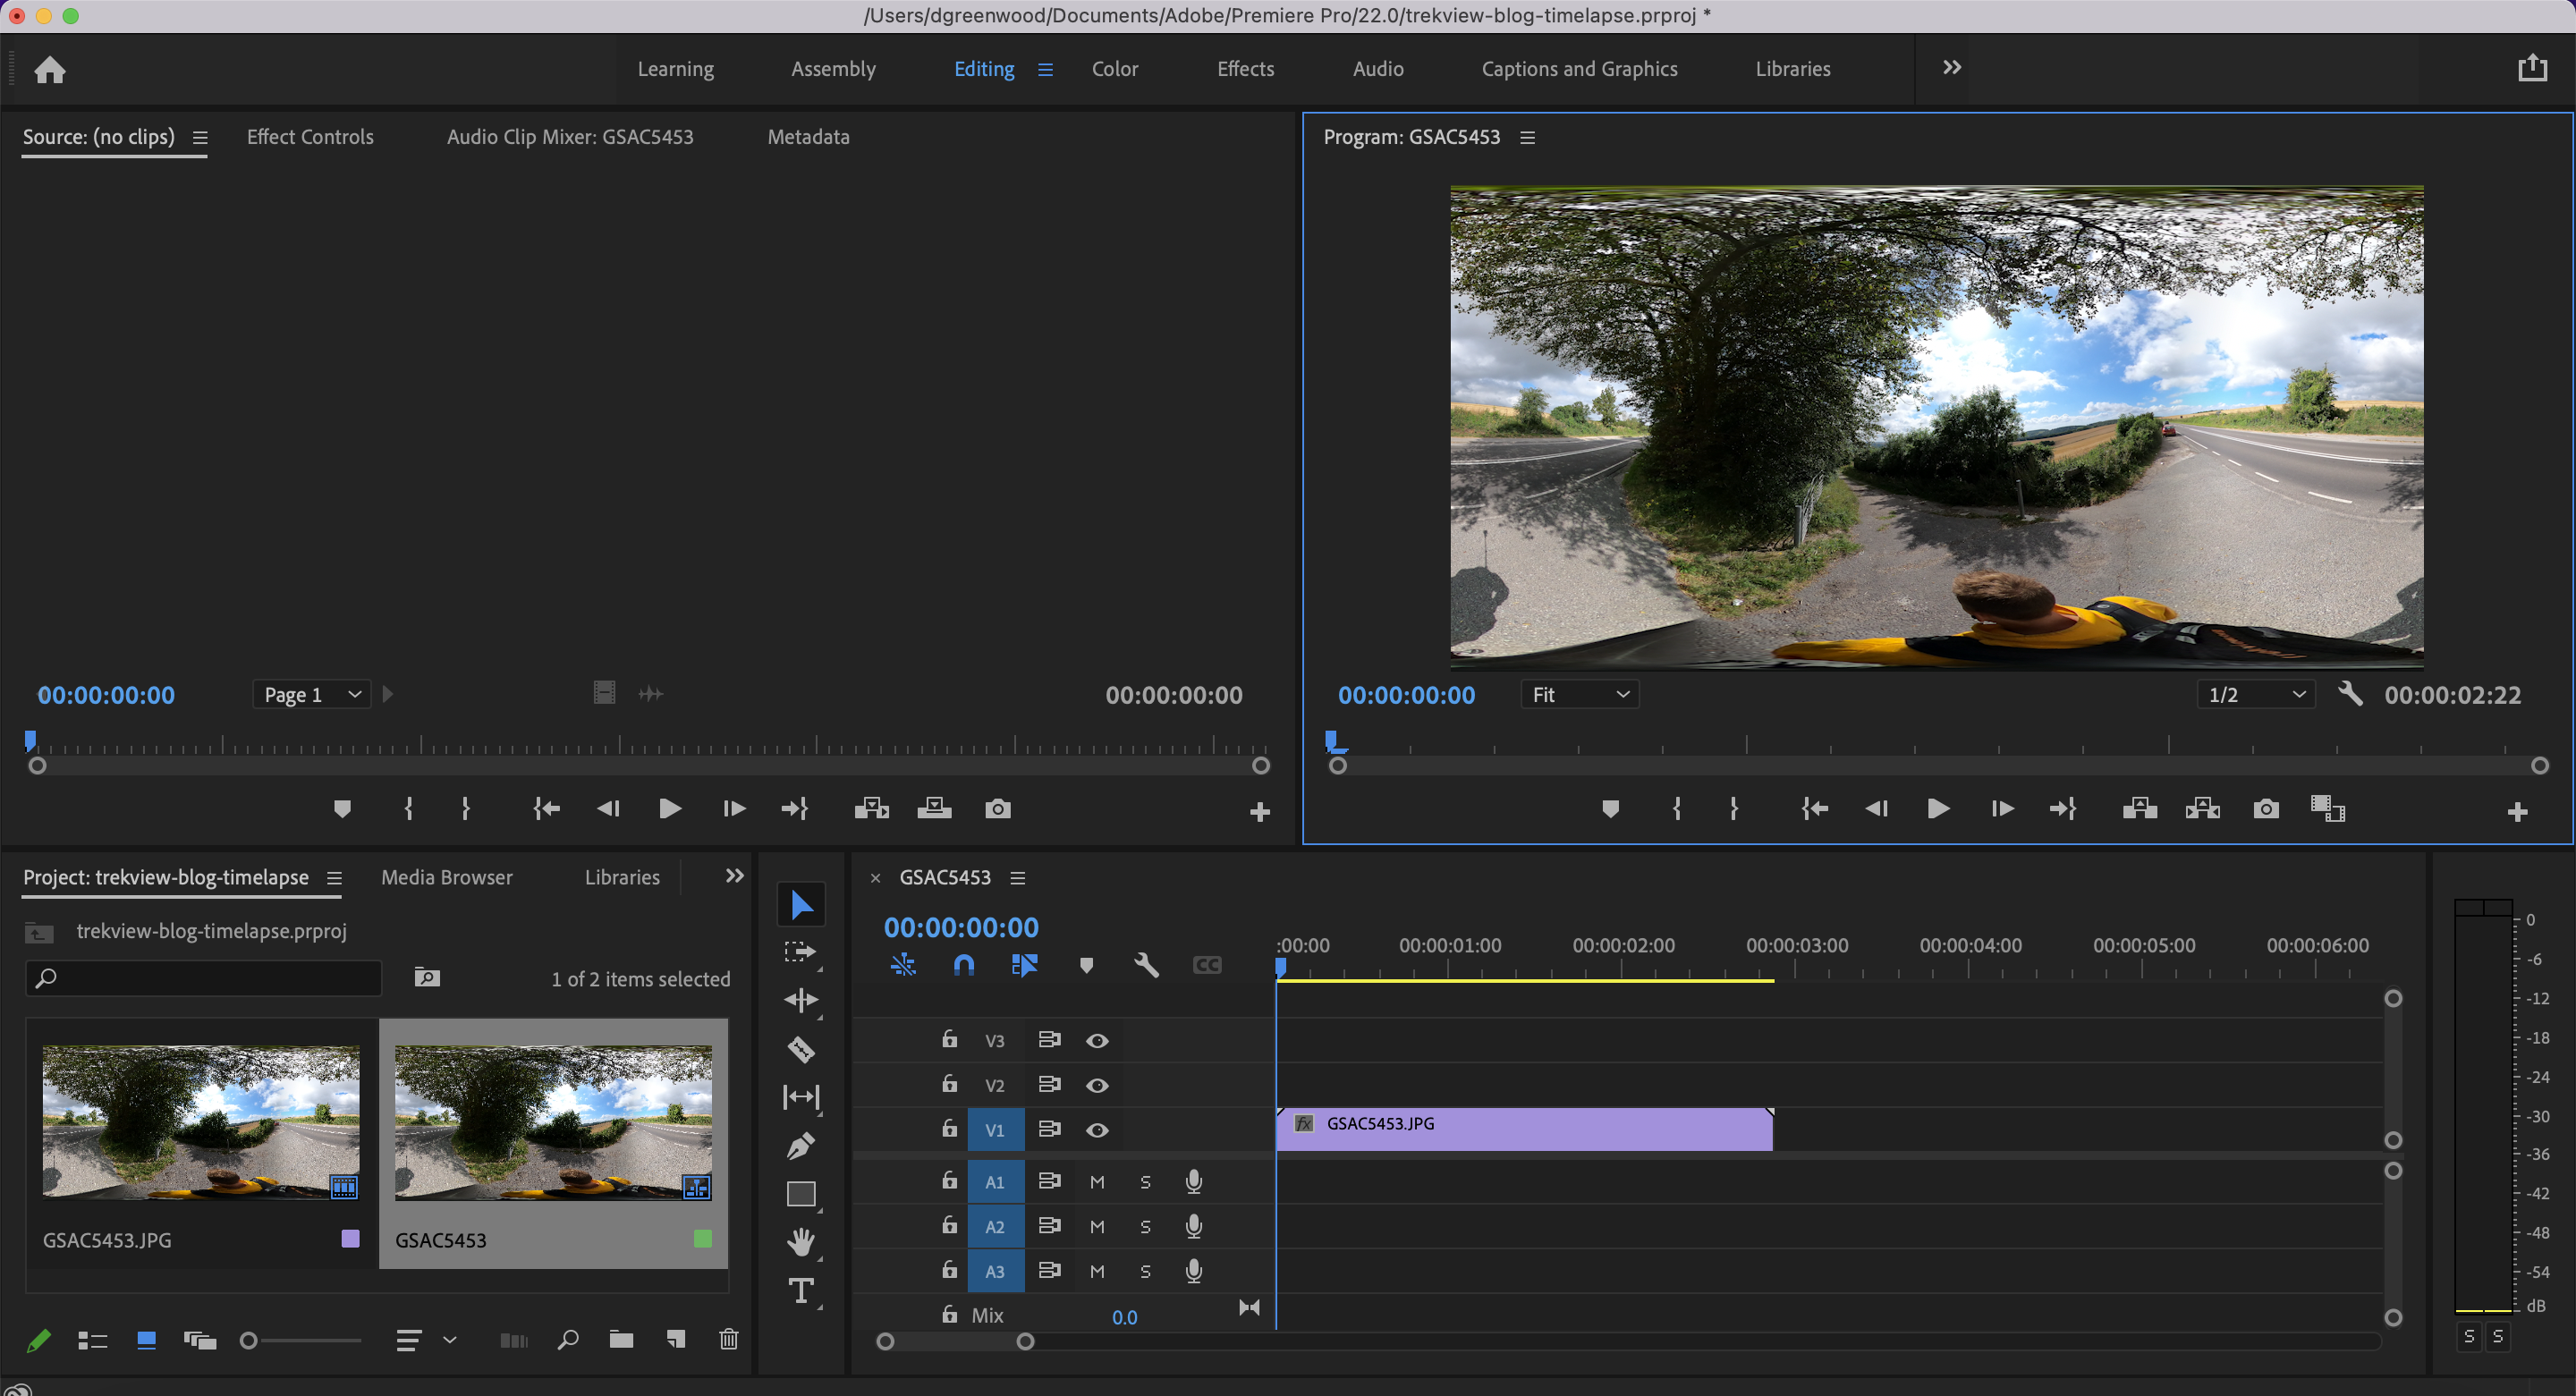
You can now drag this file from the project files onto the sequence timeline.
Create the timelapse
You will likely want to modify the frame rate settings of your timelapse.
This will depend on many factors; time between source images, speed you want the timelapse to replay, and length of the timelapse.
My photos were shot at 1 frame every 2 seconds. There are 72 in total.
At a frame rate of 24 FPS (which is fairly standard in film-making) my video will be 48 time faster than it was shot (original rate was 24 frames every 48 seconds), and be 3 seconds long (72/24).
Increasing the frame rate speeds things up, lowering the framerate slows things down.
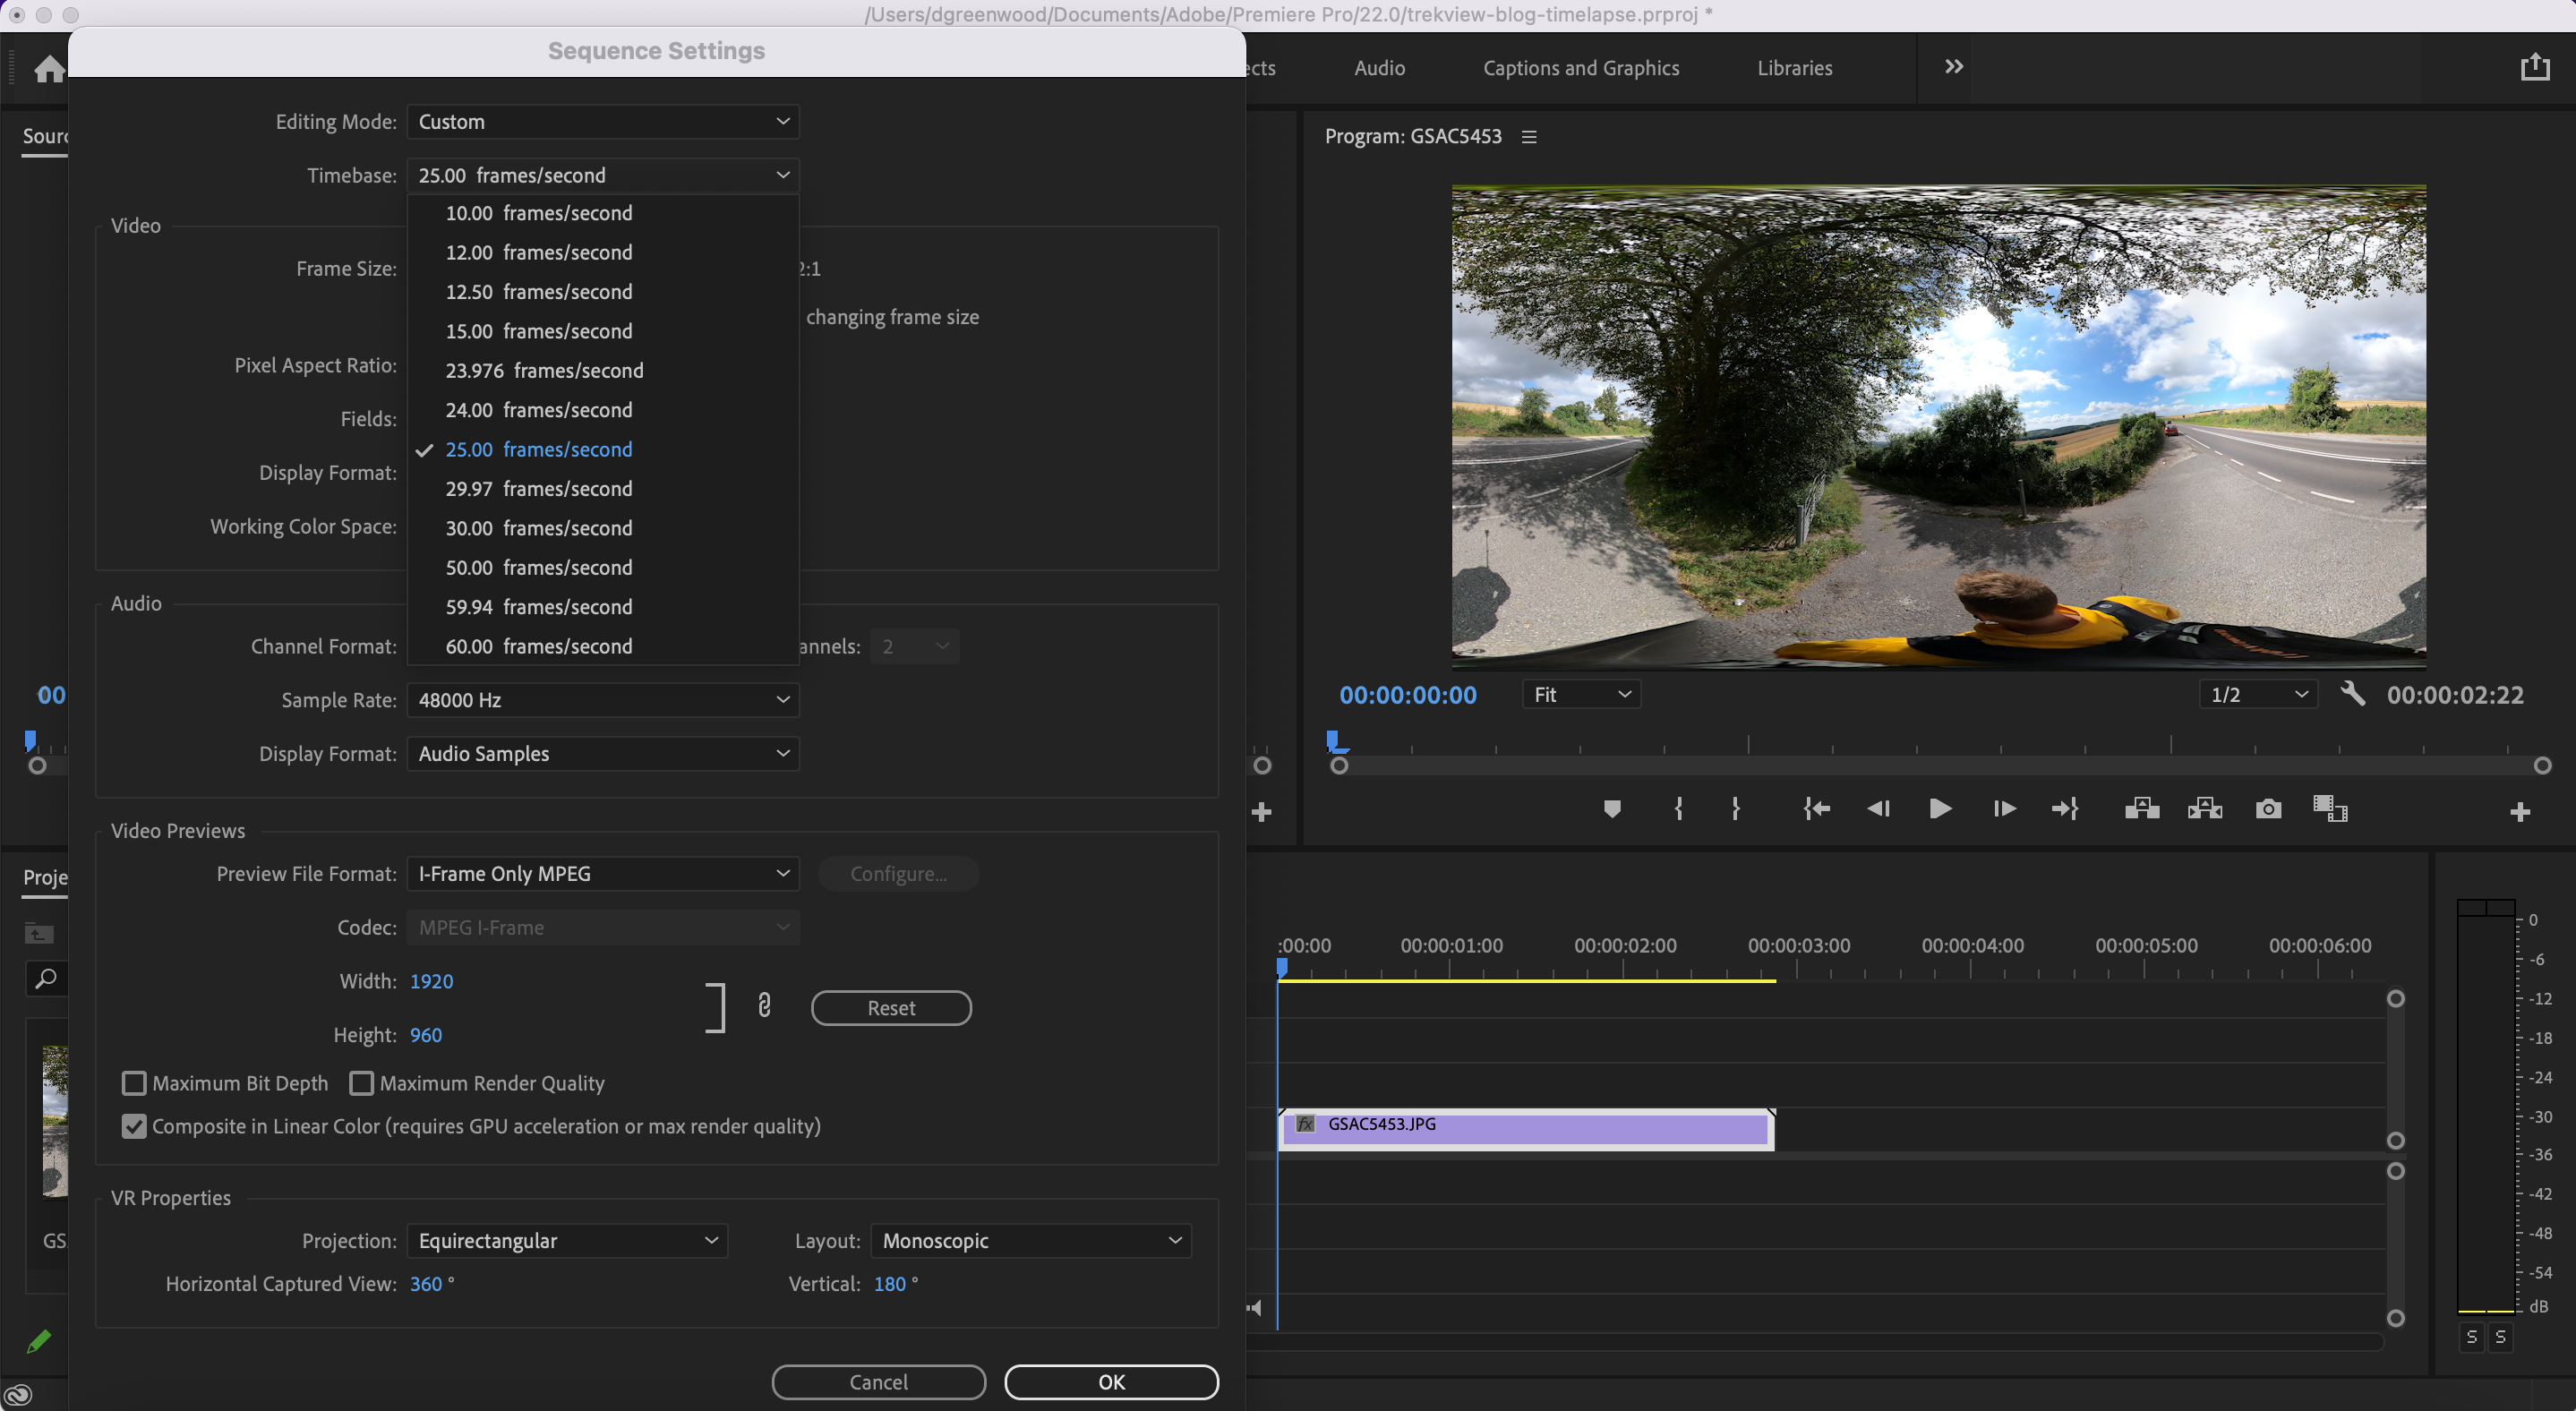
To change the framerate, click the video file on the timeline, then select Sequence > Sequence Settings. The popup has a setting allowing you to modify the framerate.
Export the timelapse
Select File > Export > Media
You can play around with the settings depending on how you intend to use the video. The settings described below are simple, and the ones I use to share content to video sharing platforms.
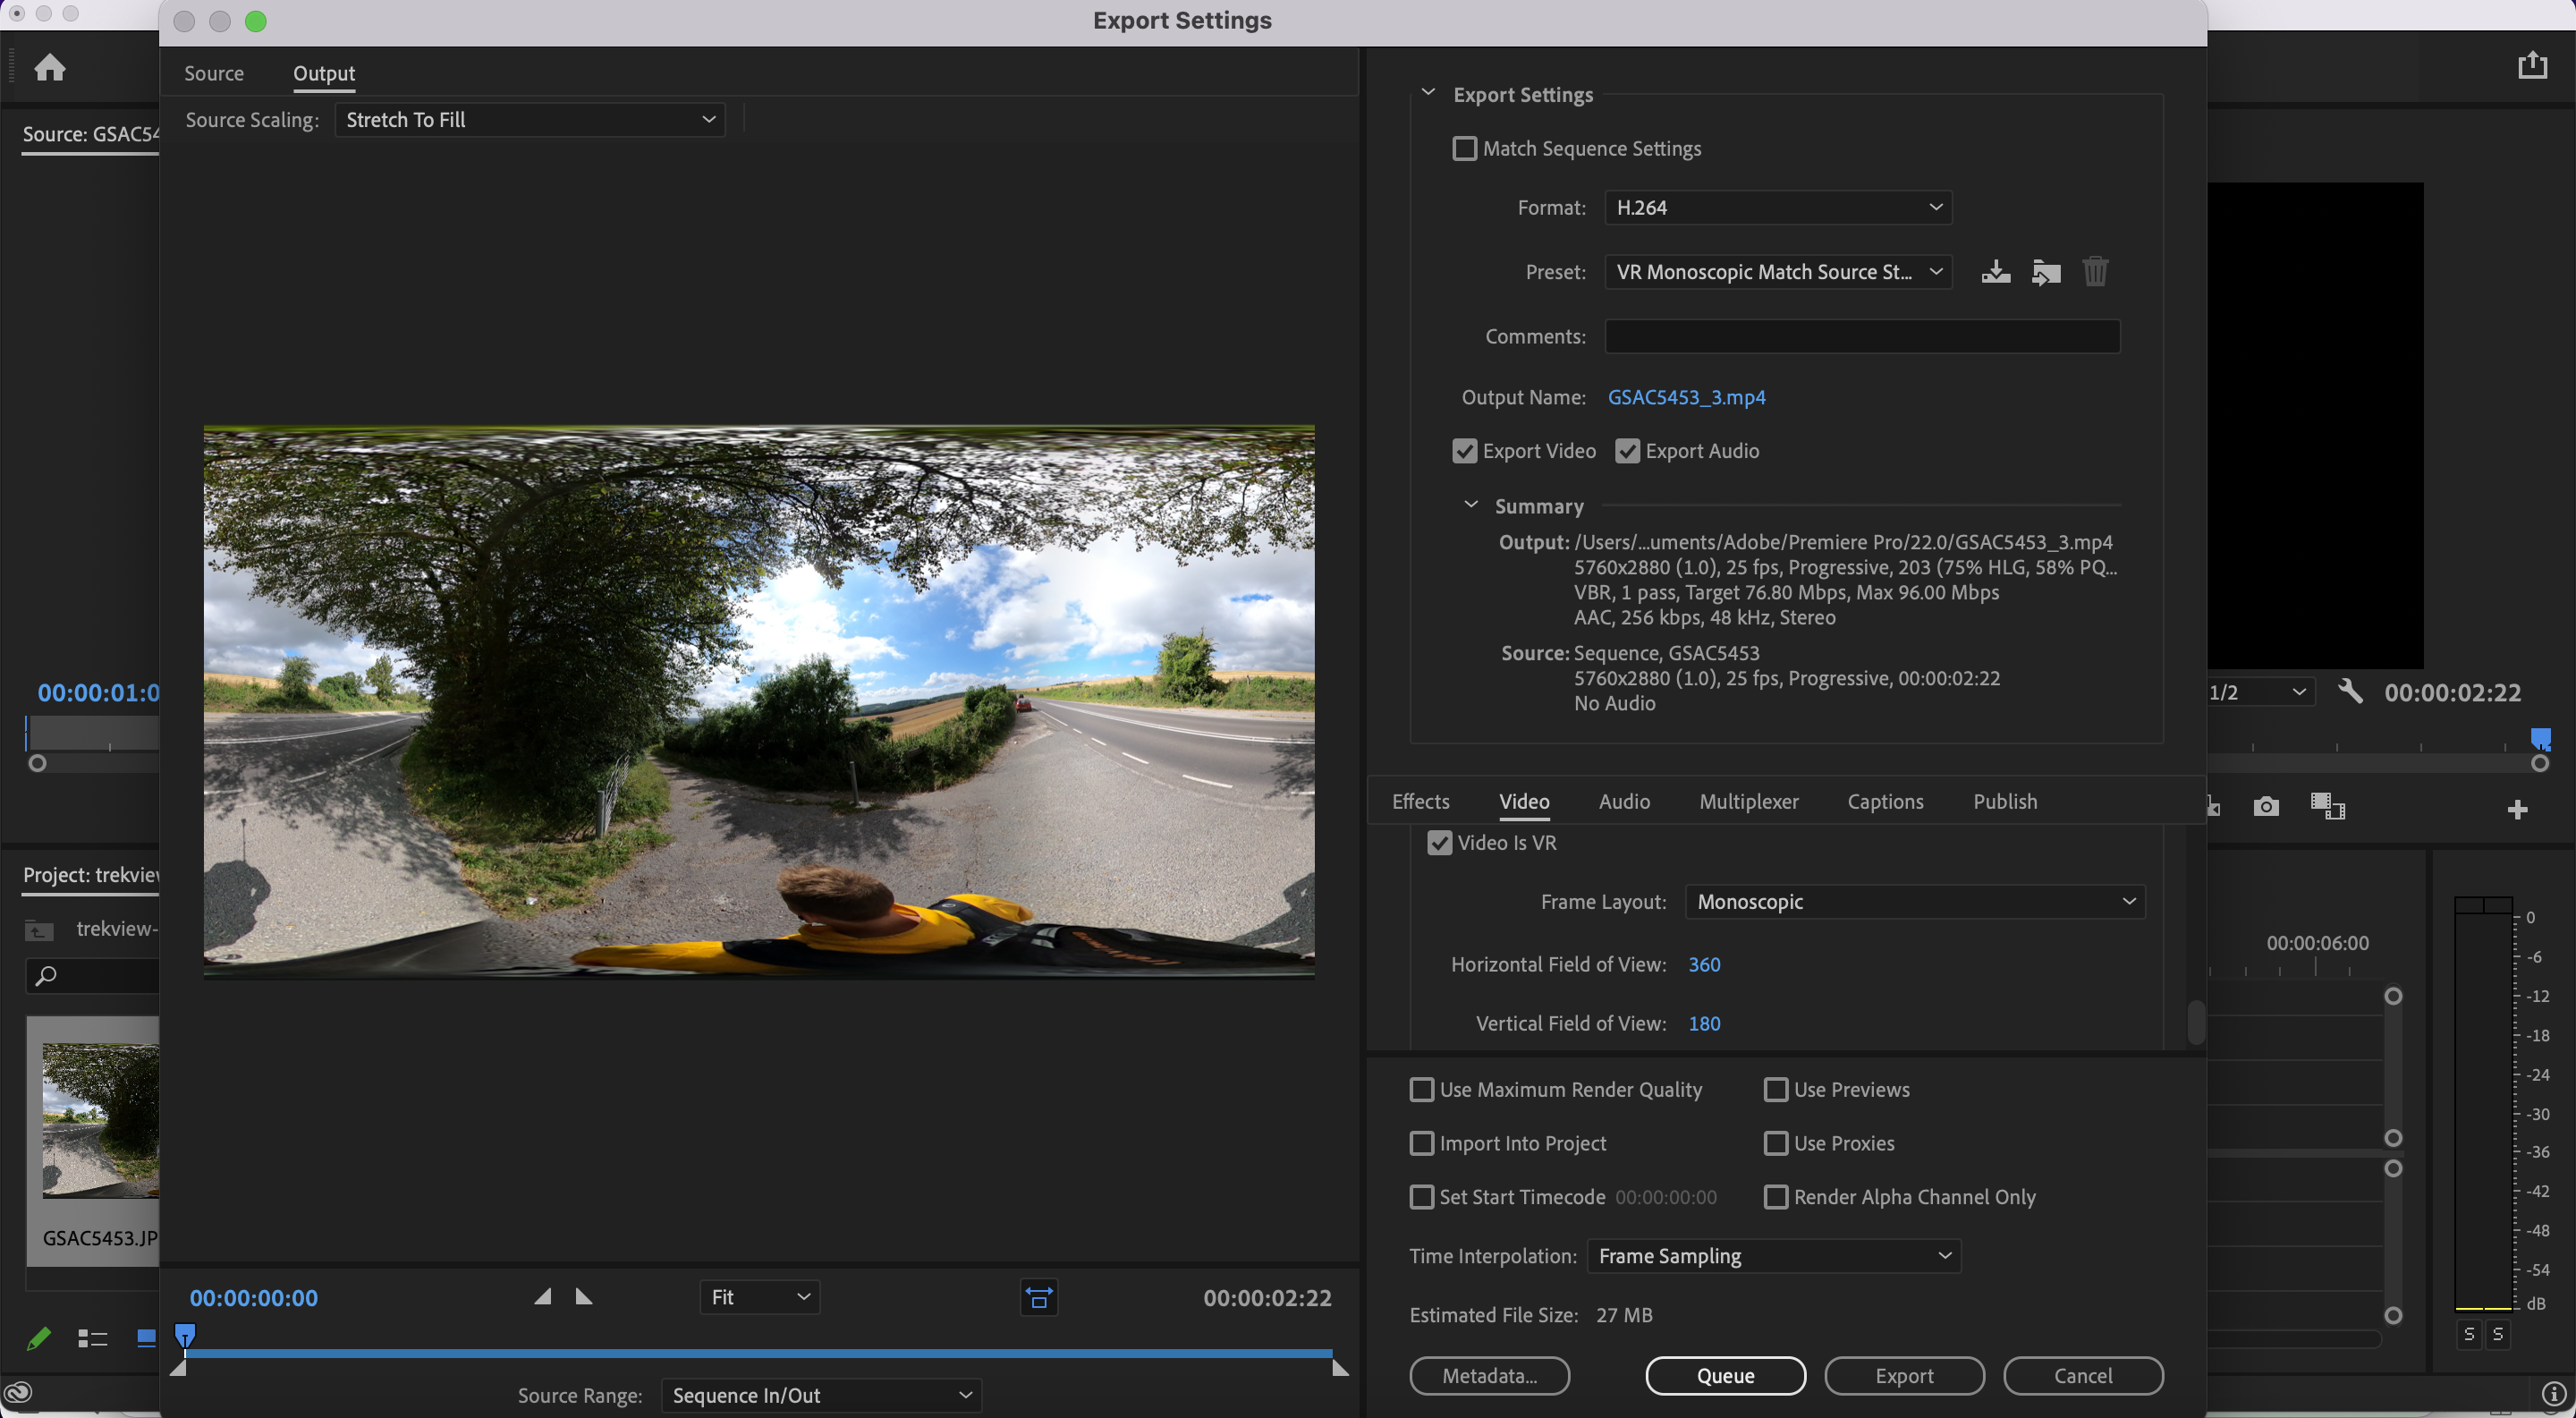
- Format: H.264
- Preset: VR Monoscopic Match Source Stereo
It’s worth playing around with the bitrate on export to suit the quality you want. Higher bitrates offer better quality, but result in larger files.
If the files imported contain correct spherical information in the metadata (GPano tags), then the “Video is VR” should be auto selected (if not, be sure to check it). This is vital to ensure the correct 360 metadata is included in the video.
Clicking Export will start the creation of the .mp4 timelapse.
A note on GPS and telemetry
This process does not create a GPS track in the video, so GPS data from original photos will be lost.
Full telemetry needs to be written into the metadata in a standard structure (e.g CAMM or GPMD). Adobe Premiere cannot do this.
The final timelapse
And voila, the final timelapse on YouTube with full 360 video controls.
A big thank you to Brian Redmond who showed me this functionality in Premiere, and was patient with my question whilst figuring it out – thanks Brian!
Never miss an update
Sign up to receive new articles in your inbox as they published.
Discuss this post


