Power your GoPro Fusion with an external power pack, the equivilant of 10 GoPro Fusion batteries.
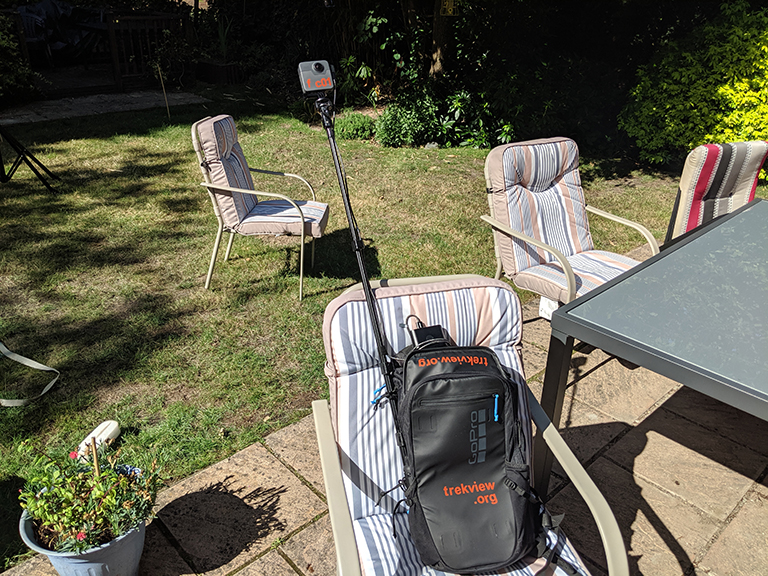
I received lots of comments after previos posts detailing how to build a DIY Trek Pack:
- DIY Google Street View (1/5): How I (Trek View) Started Capturing 360-Degree Tours
- DIY Google Street View (2/5): My Basic Kit for Creating Outdoor Street View Tours
- DIY Google Street View (3/5): Preparing to Shoot 360-Degree Tours
- DIY Google Street View (4/5): Stitching 360-Degree Photos Using GoPro Fusion Studio
Keep them coming in the comments.
One of the most common threads were questions about shooting for longer journeys – weekend hikes, remote locations with no electricity supply to recharge batteries, etc.
Hence, an unplanned part 6…
The problem with the GoPro Fusion Lithium Ion batteries
In part 2, I recommended an additional GoPro Fusion battery for £25. Each Fusion battery will give you around 3 hours of continuous shooting in time lapse mode when set at 5 second intervals.
The more photos you take, the quicker the battery will drain.
For tours where you need to shoot at faster intervals (e.g. in a car) using video mode the battery will drain fairly quickly.
Based on my own experience, I find that I can shoot video for about a total of 60 minutes using one GoPro Fusion battery (in short intervals, see overheating issue).
This can mean potentially having to spend over £50 on spare batteries to get 2 hours of filming time (inc. the battery supplied with the camera). You’ll also have to carry them.
Though the stock GoPro Fusion Lithium Ion batteries present a larger problem, heat. The more photos being taken, the more processing power the camera requires, the hotter the battery becomes.
To prevent damage, the GoPro Fusion will automatically turn off if it begins to overheat. In video mode, even on milder days (20C), the battery has a tendency to overheat after 20 minutes. Put it in direct sunlight, the problem gets worse, almost to the point where the camera becomes unusable.
Increase battery life. Reduce heat.
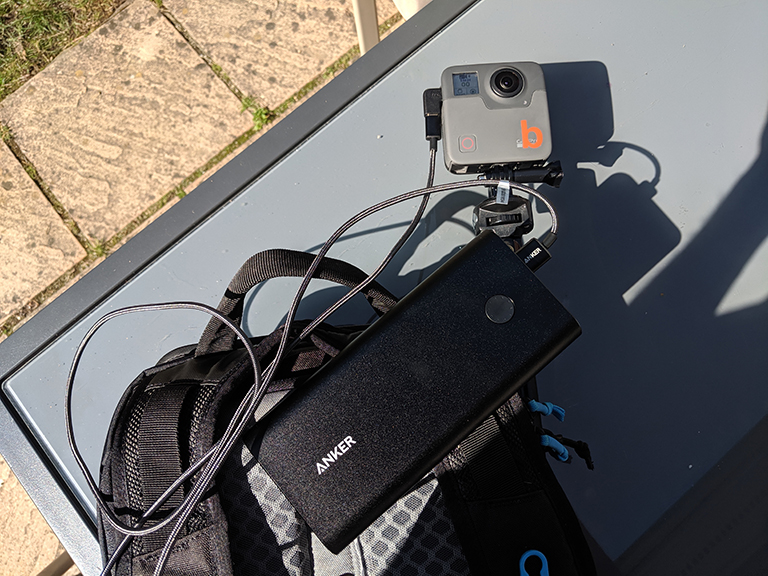
Luckily there is a solution that solves both these problems in one go.
The GoPro Fusion supports an external power source. You can remove the battery and connect the camera to a power source via its USB-C port.
External battery packs are perfect for this.
I use one produced by Anker. I chose the Anker PowerCore+ 26800. It was one of the most powerful batteries on the market at the time of purchase (early-2019) and had receive a number of positive reviews. And, not only does it help when shooting tours, it’s also great at powering my other electronics, including my laptop.
The standard Fusion battery holds 2620Ma. The PowerCore holds 26800Ma – the equivalent of 10 GoPro Fusion batteries.
In 5 second time-lapse mode, the PowerCore battery will give easily give me 24 hours of shooting – usually more than enough even for multi-day hikes.
Note, you don’t a need a battery with charge capacity as high as the Anker PowerCore+ 26800. Think about quality as well as power when buying. Beware of cheap external batteries with a low power output as they might not produce enough charge to keep the camera on.
Dealing with the wires
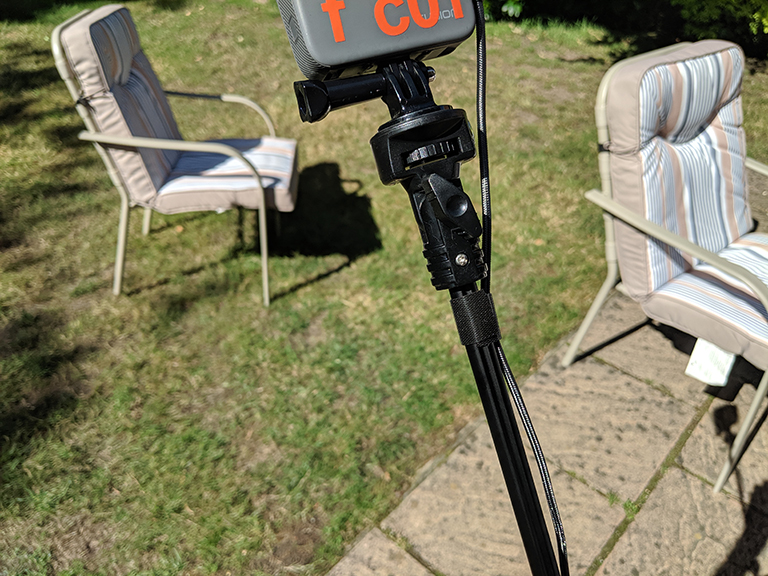
You’re probably wondering how it’s possible to run wires from a 360-degree camera a without capturing them in the imagery.
As described in part 4, GoPro Fusion Studio does not stitch a 100% true 360-degree photo due to small blind-spots between the two GoPro Fusion lenses.
These blind-spots are virtually unnoticeable in the stitched photos, and in fact work as an advantage to ensure the photo does capture monopod stand. Or in this case, wires protruding from the sides of the camera.
That said, you need to keep the wires as flush as possible to the camera to ensure they don’t enter the lenses line-of-sight.
To do this, I bought a role of fastening tape (Velcro) that I cut into 2cm pieces to secure the wires to the pole. I chose tape over zip-ties because they’re easy to fasten and remove whilst remaining reusable.
The Long Haul Trek Pack
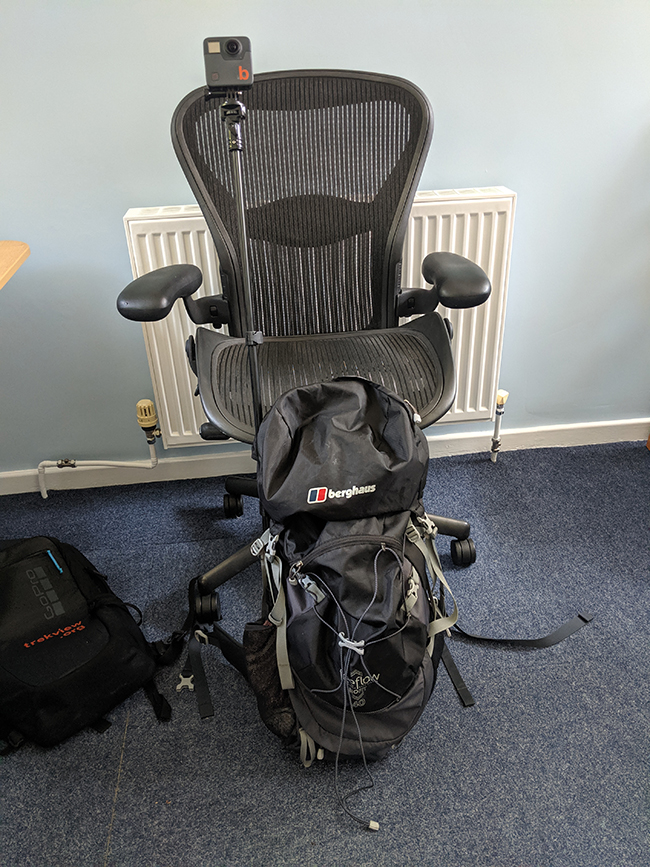
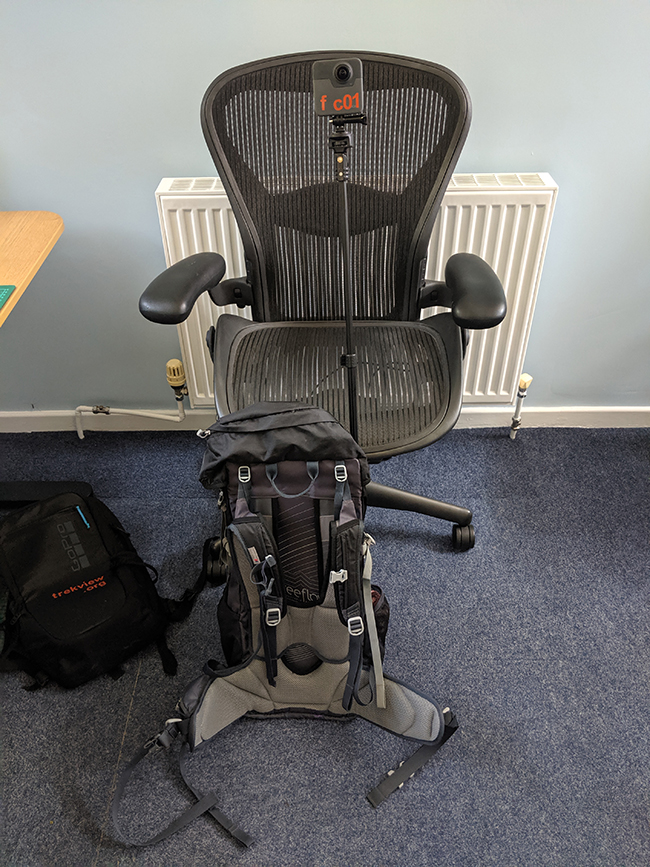
Whilst I love the DIY Trek Pack based on the GoPro Seeker, sometimes I need to carry more. The original Trek Pack is great for a weekend in the summer when packing light, but not so well for longer trips.
In such cases, I ditch the Trek Pack in favour of a larger rucksack. My 40L Berghaus Men’s Freeflow II (since discontinued) does the job perfectly. The monopod can again be mounted using the side pouches and straps, as I have done with the GoPro Seeker backpack.
Granted, these straps are not as good at holding the monopod stable – they’re not the dedicated elastic straps for a monopod found on the GoPro Seeker pack. A few pieces of fastening tape or zip-ties (cut off the protruding ends to keep them out of the photos) and padding in the pocket (usually a pair of socks) solves this problem on more adventurous hikes where the monopod is liable to move around.
I’m sure this solution will work with most hiking packs on the market with side pouches too.
We're building a Street View alternative for explorers
If you'd like to be the first to receive monthly updates about the project, subscribe to our newsletter...
