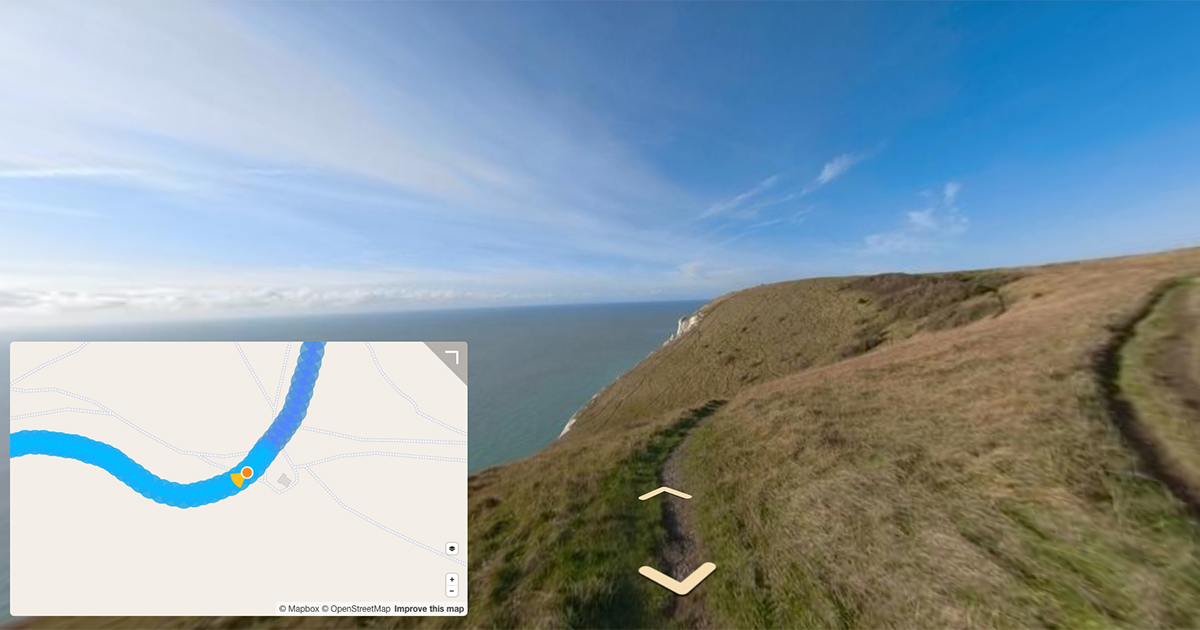
Create customised maps and stories about places anywhere in the world.
This week I’ve been playing with Google Earth, creating a variety of Projects.
Remember sitting around an over-head projector whilst friends showed you their holiday photos. I do… from watching old movies (sorry, Dad!).
Simply put, Google Earth Projects takes showing off your holiday snaps to the next level allowing you to mark spots you care about, and annotate with text, photos, or videos to complete your stories.
Think of Google Projects as a more interactive, map focused version of Microsoft Powerpoint.
Here’s a quick start guide that will give you everything you need to get up and running…
1. Get familiar with Google Earth
WARNING: You might lose a whole day to this part.
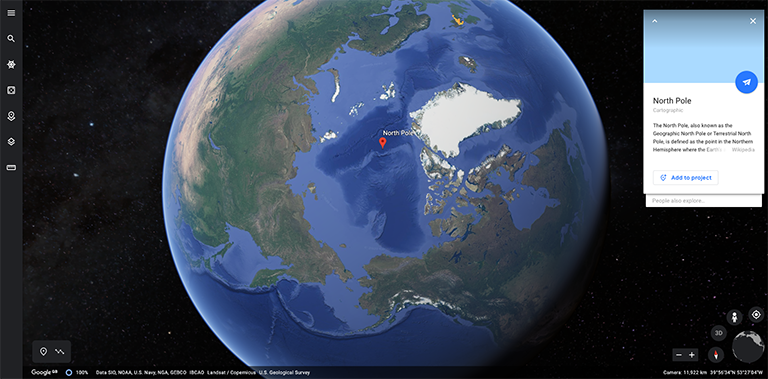
Sign into Google and head over to Google Earth.
Head to the North Pole.
Then spin the globe and take a trip to Antarctica.
Marvel as Google Earth visualisations render the globe in beautiful 3D.
Now for a trip home. Pull up the Google Street View imagery of your road.
Stuck for inspiration? Take a look at public Projects created by fellow adventurers in Google Earth Voyager.
I’ll leave you to it…
2. Create your first Project
OK let’s get down to business.
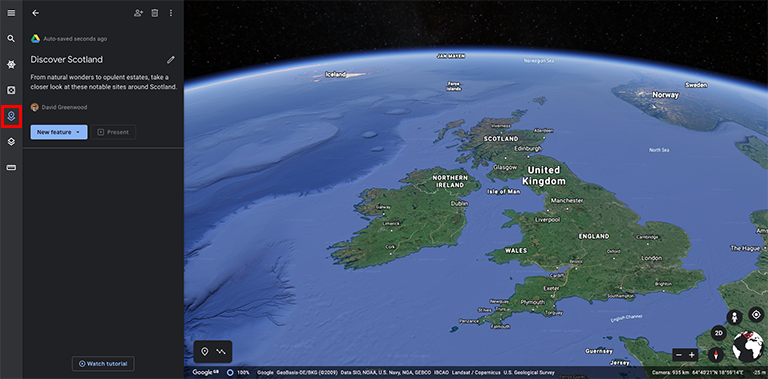
For todays post, I’ll create a tour of stunning Scotland.
On the left hand bar click the Project icon (map pin) and then click “create new tour”.
For this demo we’ll create a brand new Project. To do this, select “create Project in Google drive”.
Now you can add a name and description. This is likely to be the first thing viewers of your Project will see. Don’t worry too much about making it perfect – you can edit it any time.
3. Add your first feature
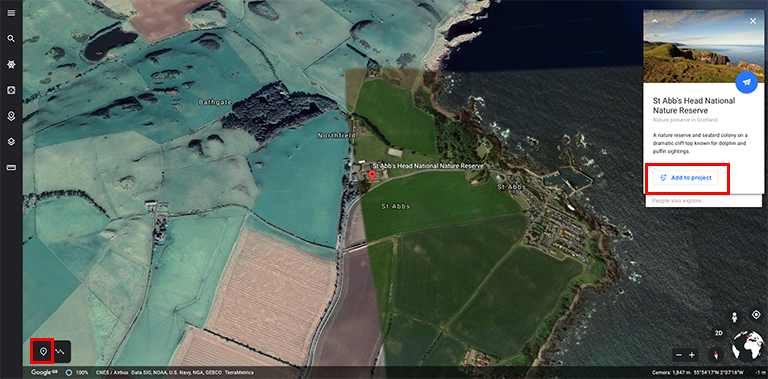
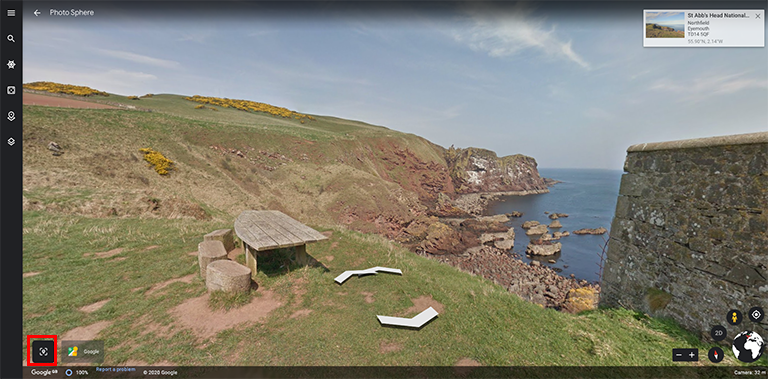
A feature can be a place (2D/3D/street view on the map), placemark (marker on the map), a line or shape (lines drawn on map), or full screen slide (a static slide with information and imagery).
I’ll explain more about all the available features in this post.
Let’s start by adding a place using the search function.
Once you’ve found the first location, try and line up the perfect view of the how you want it to look for the viewer. This could be a particular orientation of a satellite view or Street View image.
When you’re ready, click “add to Project” (2D / 3D map view) or “capture this view” (street-level view).
4. Annotate the feature
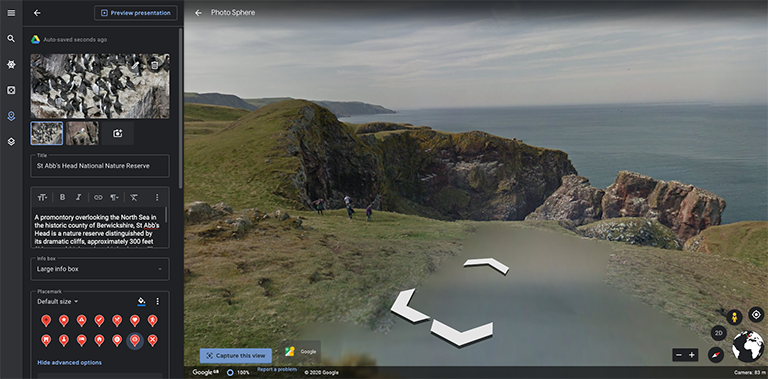
You can get really creative here.
Add text, photos, and videos to annotate the story you want to tell.
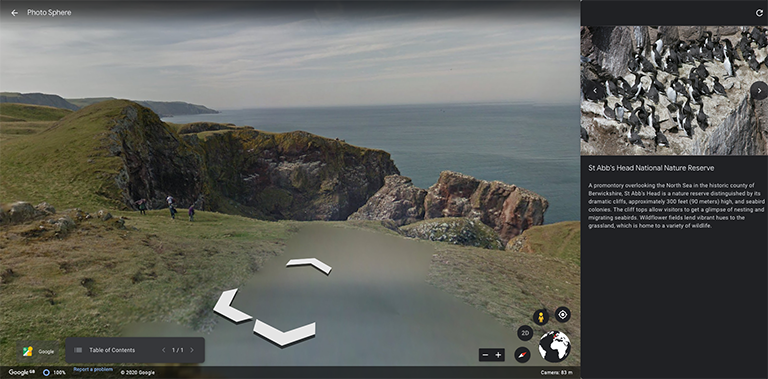
You can quickly see how the viewer will see the content you’ve added by pressing “Preview presentation”.
5. Add more features
Here’s where you can really start to play around with telling your story.
Add a place
We added a place in steps 3 and 4. Places are slides with mapping imagery and accompanying information.
You can add as many places, or any feature for that matter, to your Project.
Add a fullscreen slide
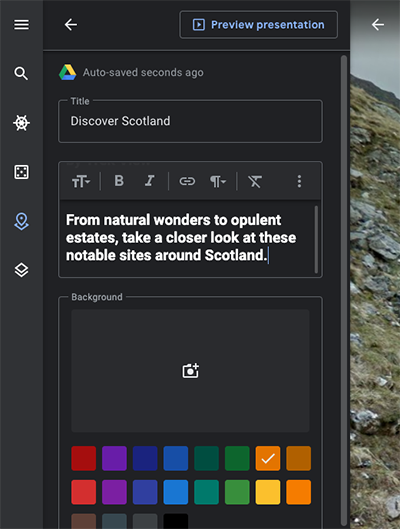
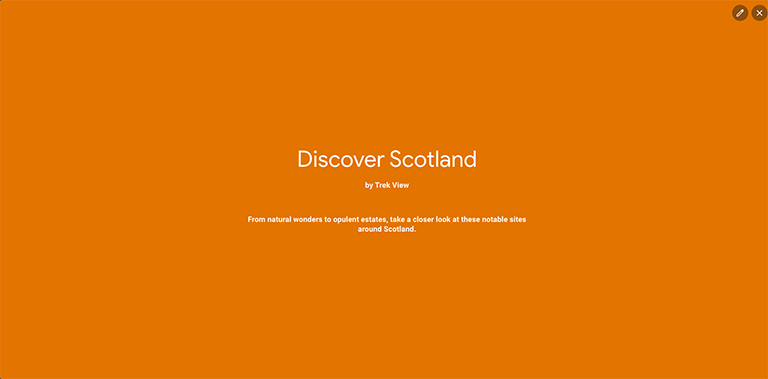
Fullscreen slides are very similar to Powerpoint slides, and let you break up the mapping parts of the presentation.
Add a background colour or image, include a title or maybe some more detailed text to the slide.
Again, use the preview function to check how it looks.
Add a line or placemark
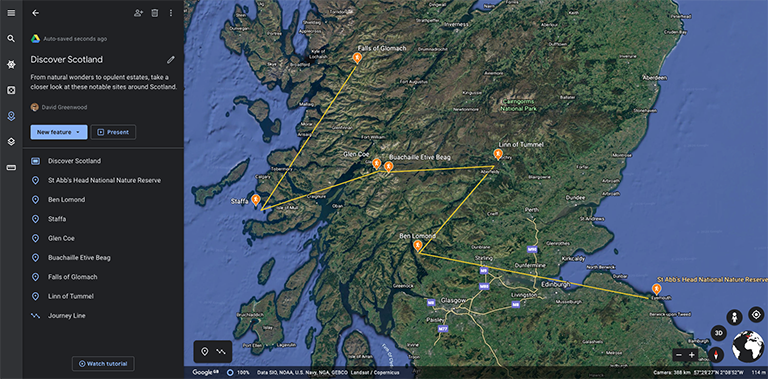
As viewers move through your presentation or zoom around the map they will be shown any lines or placemarks you have added to the map.
Lines are useful to highlight areas. Perhaps the order in which you visited places, or to highlight specific areas in satellite imagery, like the best fields to camp.
Placemarks, not to be confused with places, are markers on the map. The two are very similar, but unlike places you will not be able to modify the satellite view orientation or use Street View imagery as the default view when the viewer reaches that part of the presentation.
I’ve found placemarks useful for highlighting specific areas of a location, like the exact co-ordinates of where you should place your tent!
7. Order the features
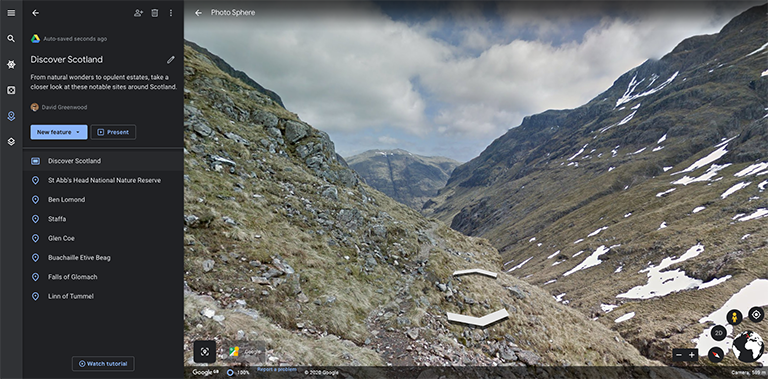
As you start adding more features to you Project, you can reorder them using the sidebar to define the order in which the viewer sees them.
8. See how it looks
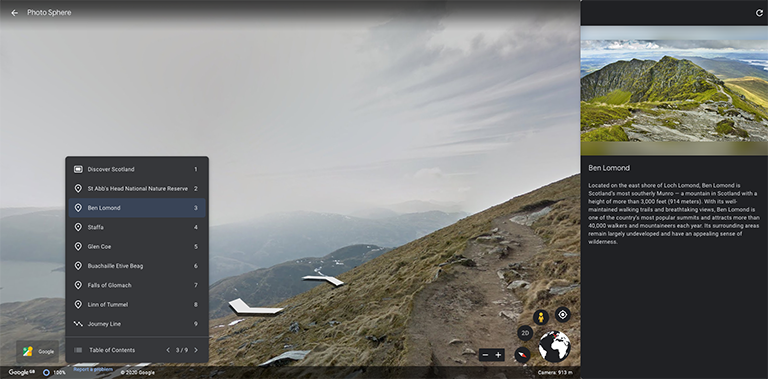
Once you’re happy with the content of your tour, hit the “Present” button to see how it flows.
The great thing about Google Projects is that the presenter, or viewer, can interact with the map. Zooming in and out, diving down to street-level and then exploring the surrounding area on the ground.
Hopefully everything looks good, but you can edit your Project at any time with slight changes or completely new content.
9. Share it with the world
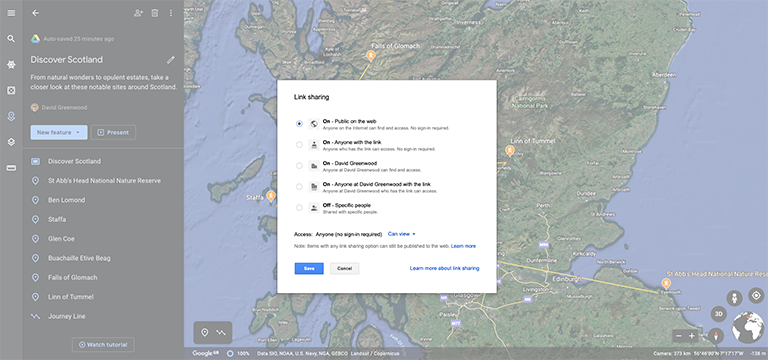
By default, the Project will only be visible to you, when logged into your Google account.
Using Google sharing settings you can choose to open it up to specific people (using their email address), or open it up to the whole world to explore… in which case you might want to remove the photos of you lying by the pool, sunburnt.
We're building a Street View alternative for explorers
If you'd like to be the first to receive monthly updates about the project, subscribe to our newsletter...
